How to Use a Coffee Scale for Better Pour-Over Coffee
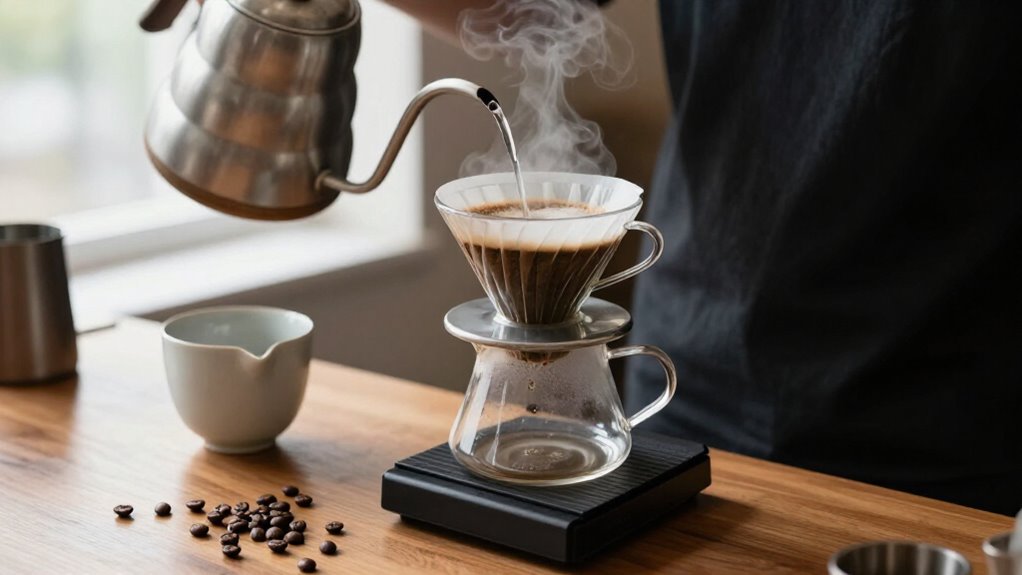
Use a gram scale to weigh 20–21 grams of coffee and 350 grams of water for a balanced 1:17 ratio. Rinse and seat your filter, place the dripper on the scale, and tare it.
Bloom with about 40–45 grams of water for 30–45 seconds.
Add the remaining water in three pulses, timing pours, and finish near four minutes. If drawdown slows, grind coarser; if it races, grind finer. Keep it clean and dry; more tips follow.
Balanced Flavor, Four Minutes
For a balanced, flavor-forward cup, start with a 1:17 coffee-to-water ratio—about 20–21 g of coffee for 350 g of water, or scale both amounts proportionally for a 20–27 g dose.
Heat at least 350 g water to 195–205°F, choosing the cooler end for darker roasts and the hotter end for lighter roasts. Start pouring when the water reaches that range. Bloom with about twice the coffee’s weight in water—40–60 g for a 20–30 g dose—and wait 30–45 seconds. Divide the remaining water into three or four roughly equal spiral pulses, reaching about 250 g by 1:40 and finishing at 350 g. Use your scale’s timer to keep the brew near 3–4 minutes. If it finishes around 2, grind finer; around 5, grind coarser.
Gather Scale, Kettle, Filter
Before you heat the water, gather a scale, gooseneck kettle, compatible filter and dripper, burr grinder, and heat-safe server. Choose a scale that reads in grams with at least 0.5-g resolution, has a stable platform, and can handle your brewer plus water. A built-in timer and tare button simplify recipe tracking.
Check these essentials before brewing:
- Kettle: Pick a temperature-stable gooseneck model for controlled pouring.
- Filter and dripper: Match their shapes and sizes; choose V60, Chemex, or Kalita-compatible pieces.
- Grinder: Use burrs for more even particles and repeatable flow.
- Power and calibration: Charge the scale, confirm grams, and test calibration before you begin.
Keep equipment within reach, and place the scale on a level surface before you start heating water.
Step 1: Rinse and Seat Filter
Rinse the paper filter thoroughly with hot water to remove its papery taste and fully wet it, then discard the rinse water. Give the rinse a quick sip to confirm the papery flavor has disappeared, then set the dripper securely on the server. Keep the dripper in place as you work, because moving it can shift the wet filter and create an uneven path for water.
Gently press the filter into the dripper so it sits snugly and lies flat against the walls. Pay attention to the shape: a conical dripper needs an even point at the base, while a flat-bottom dripper should maintain full contact around its perimeter. Check that no edge folds inward or lifts away from the brewer. Once the filter is seated, you’re ready to add your measured coffee and begin the bloom with the water amount your recipe requires.
Prepare the bloom water before pouring—about twice your coffee dose—so the grounds receive a consistent starting amount. Keep the filter seated, and pour gently along the center and bed rather than striking the paper or washing it loose during your bloom for even flow.
Step 2: Tare Scale Before Brewing
Add your measured grounds and confirm that the display shows only their weight. For a 20, 27 g dose, tare again only if you need to measure water separately. Keep the scale and brewer steady; moving them can invalidate the zero point and distort readings. Use a 0.1 g scale on a level, dry surface, and check that its reading stays stable.
Taring isolates each measurement, so you can repeat your recipe without accounting for equipment weight. Choose a scale with enough capacity for your brewer and a clear display you’ll easily read beside a kettle or server during every brew.
Step 3: Bloom Grounds for 30 Seconds
With the scale tared and the grounds level, start the timer as soon as water touches the coffee bed. Pour about twice the coffee’s weight in water: for a 30-gram dose, use 60g. Gently wet the entire bed, ensuring no dry grounds remain.
Pause for 30 seconds. This bloom lets trapped carbon dioxide escape while the bed swells. Without this rest, early water contact may not penetrate the grounds evenly.
Watch bubbling and active gas release; when they slow, the bloom has progressed, but use the timer to keep each brew consistent. Don’t measure from the end of pouring; start timing at first contact. Once 30 seconds pass, finish the bloom and follow your recipe’s next stage for repeatable extraction results and consistent timing.
Step 4: Pour in Three Pulses
After the 30-second bloom, divide the remaining water into three roughly equal pulses. Use your scale’s timer from the moment hot water touches the coffee again, and keep a spiral pattern to saturate the bed evenly.
For a 350-gram brew, reach 150 grams at about 0:50 to 1:00, 250 grams at 1:10, and 350 grams by about 1:40. Finish each pulse in 10 seconds, and let the liquid level stay around half to two-thirds full. Pause briefly between pulses so you can hit each weight without rushing.
If the total brew time runs long or short, adjust the grind: go coarser for a faster brew or finer for a slower one. Keep the three-pulse structure unchanged as you refine the recipe. Record each target and time.
Step 5: Monitor Drawdown Speed
Once you’ve reached the final target weight, monitor drawdown by timing how long the dripper takes to stop dripping, including any after-drip. Count from your final pour until the last drops fall. Use roughly 2:30 to 3:30 as a practical total-brew benchmark, though your recipe may vary.
If your scale shows flow rate, keep your pouring near 5–7 grams per second when appropriate for the recipe. Maintain a dripper fill level of about one-half to two-thirds; overfilling or underfilling can change drawdown speed.
A brew that finishes near two minutes usually needs a finer grind to slow the flow. If it takes around five minutes, grind coarser to accelerate it. Record the final time with your dose, water weight, and grind setting to repeat results.
Step 6: Unplug Scale, Discard Grounds
When the final drops fall, note the total brew time—typically about 2:30 to 3:30—then power off or unplug the scale before cleanup. This prevents accidental button presses and protects the scale from spills as you handle the brewer. Remove the dripper and discard the used grounds and filter promptly. Wet grounds can become stale and leave residue, and they’ll interfere with measurements if they remain nearby.
Wipe any water drips from the scale with a dry cloth. Keep its weighing surface dry so later gram readings stay accurate. Empty the dripper and carafe completely, then check that the scale is clean before your next brew. Only then place the brewer back on the scale, tare it, and weigh fresh coffee or water.
Taste for Sweetness
How can you coax more sweetness from your pour-over? Use your scale to target a balanced extraction, starting with a 1:16 ratio. For example, brew 20–27 grams of coffee with 350 grams of water, staying within 1:15–1:18 to suit strength. Bloom with twice the coffee’s weight, 60 grams for 30 grams of grounds, and wait about 30 seconds before continuing. This even wetting supports sweeter flavors.
Start the timer when water touches the grounds, and count drips after your final pour. Aim for brew time of roughly 2:30–3:30 and an extraction near 19–22%. If the brew finishes around two minutes, grind finer to slow it; if it takes about five, grind coarser. You’ll taste the cup, record weights and time, and change one variable next time.
Correct a Choked Filter
Is your filter barely dripping or stalled? Your grind’s likely too fine, or the bed’s packed too tightly. Check scale and timer: after a 30–45-second bloom, flow should resume, and brew time should approach 3–4 minutes, including drip-down.
| Sign | Action |
|---|---|
| Slow flow | Grind slightly coarser next time. |
| Uneven bed | Gently shake grounds level. |
| Compacted bed | Keep dripper half to two-thirds full. |
Use about twice the coffee weight for bloom for 30 grams, pour 60 grams, and pause before main pours.
During pours, use controlled pulses or spirals instead of one forceful stream; aggressive pouring can compact the bed. Keep your dose and water weights consistent so the scale isolates grind and technique. Change one variable, record result to confirm the improvement. Your brew should finish predictably.
Wipe Scale After Spills
Wipe up coffee or water immediately with a dry or slightly damp cloth to keep residue from affecting readings. Don’t let liquid run into the buttons or edges, where moisture and stains can disrupt weight or timer measurements. After cleaning, let the scale dry fully before you brew again. Otherwise, your next dose, perhaps 20–27 g of coffee, or 350 g water could read inaccurately.
Check display clarity and wait for the digits to stabilize. If readings remain inconsistent, clean around the platform and underside carefully without soaking the scale. Then tare it and verify accuracy with a known weight before dialing in your recipe.
Keep the scale level and dry during brewing, and wipe away fresh splashes promptly. Protect accurate ratios during brewing.
Conclusion
With a scale, you’ll turn pour-over brewing into a repeatable routine. Weigh your coffee and water, bloom for 30 seconds, and watch your pour reach the target time. If the filter chokes, adjust your grind; if the cup tastes flat, refine your ratio or extraction.
Taste, record, and make one change at a time. Then rinse your equipment, wipe spills from the scale, and enjoy a clearer, sweeter cup every morning with confidence and consistency.