Coffee-to-Water Ratio Chart for Every Popular Brew Method
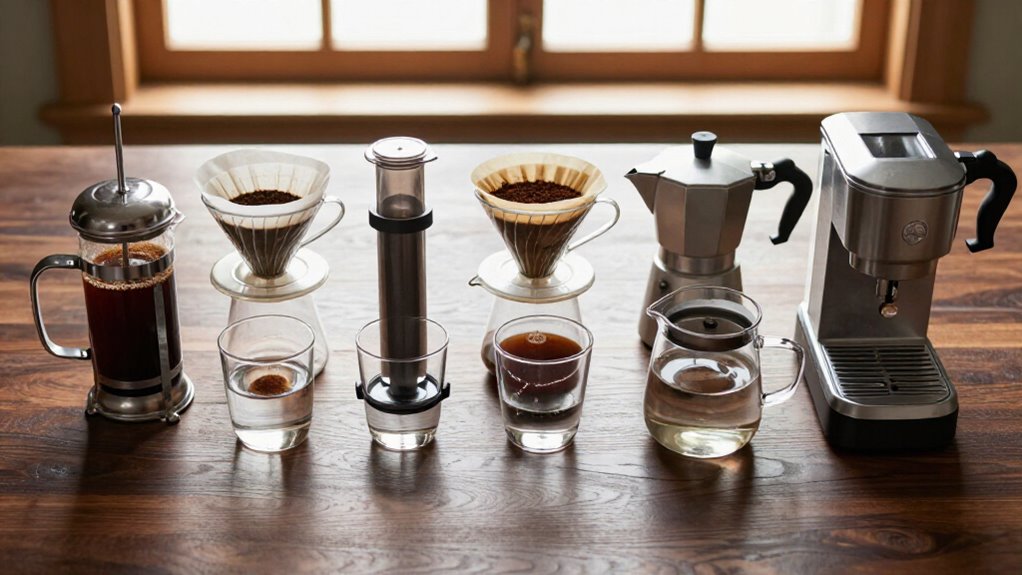
Use this coffee-to-water ratio chart as your starting point: drip and pour-over, 1:16; French press, 1:15; cold brew, coarse grounds steeped 12 to 24 hours; Moka pot, begin at 1:10; and espresso, measure dose to output, typically 1:2 (ristretto, 1:1 to 1:1.2).
For a 12-ounce mug, use about 340 g water and 20 to 23 g coffee.
Taste first, then adjust one variable, ratio, grind, or time. You’ll find practical recipes and troubleshooting tips below for better, more consistent cups at home.
Start With 1:16
Start with a 1:16 coffee-to-water ratio: use 1 gram of coffee for every 16 grams, or roughly 16 millilitres, of water. Measure each ingredient by weight on a scale, because volume measurements can vary and make results harder to repeat. With 1:16, you get a balanced reference point that works across many brewing setups.
For a 20-gram dose, add 320 grams of water. Taste the finished cup before changing anything; your coffee may need more or less intensity depending on the beans and your preferences.
If it tastes weak, move toward 1:15 or 1:14 by adding coffee or reducing water. If it tastes bitter or over-extracted, move toward 1:17 or 1:18 by using more water. Keep your grind and technique consistent.
Drip, Press, Espresso Ratios
Once you’ve established 1:16 as a baseline, adjust the ratio to suit your brewing method. For drip or pour-over, use 1:15, 1:18; 1:16 remains a dependable middle ground. With 400 g water, weigh 25 g coffee. Choose medium grind, adjusting for filter thickness and flow.
| Method | Starting ratio |
|---|---|
| Drip or pour-over | 1:16 |
| French press | 1:15 |
| Ristretto espresso | 1:1, 1:1.2 |
| Standard espresso | 1:2 |
French press? Get a fuller cup: start at 1:15, use coarse grounds, steep four minutes. For espresso, measure coffee in and liquid out by weight: a standard 18 g dose commonly targets 36 g, while a ristretto uses less liquid. Keep espresso separate from filter ratios; pressure brewing follows dose-to-output conventions, not coffee-to-water proportions.
TDS, Yield, and Extraction
Although they’re related, TDS, yield, and extraction measure different parts of a brew. TDS, or Total Dissolved Solids, tells you how much coffee material dissolved into the water, so moving from 1:17 to 1:15 usually raises strength and TDS. Yield means the final brewed liquid weight or volume, not merely the water you added.
With the same coffee dose, a higher yield generally dilutes the cup and lowers TDS.
Extraction estimates the percentage of soluble compounds you pulled from the grounds. A high water-to-coffee ratio can under-extract, while a low ratio can over-extract. Method matters: drip and pour-over commonly use 1:16 to 1:18, while full immersion often runs closer to 1:12 to 1:16. Espresso uses 1:2, producing high TDS; fine-tune extraction with changes in dose, yield, or time.
Grind Size by Method
Choose a medium-fine grind for drip coffee, a coarse grind for French press, and a medium grind for pour-over. Use a very fine setting for espresso, but choose very coarse grounds for cold brew’s long steep.
You’ll adjust slightly by taste: finer grinds extract faster, while coarser grinds extract more slowly.
Drip Grind Size
For drip coffee, use a medium grind so water can flow through the grounds evenly during the machine’s shower or pulse cycle. Aim for about a 1:17 coffee-to-water ratio, then adjust within 1:16 to 1:18 for strength. Keep particles consistent; a burr grinder helps prevent simultaneous under- and over-extraction as the brew runs for minutes.
If your cup tastes sour or weak, grind finer before changing the ratio. Smaller particles extract readily and can improve strength when your brew finishes too quickly. If the coffee tastes bitter or over-extracted, grind coarser to slow extraction.
French Press Grind
French press coffee needs a coarse grind, about the texture of raw sugar, so water can extract it evenly during the long immersion without creating excess sediment. This size works with the mesh filter, keeping the cup full-bodied rather than muddy. Aim for particles that drain cleanly, not powdery fines that clog the plunger and over-extract.
Use your ratio, often about 1:12 to 1:16, with 1:15 as a balanced starting point, but remember that grind size controls extraction speed. If your coffee tastes bitter or harsh, you’ll need to go coarser. If it tastes weak or sour, go slightly finer. Adjust, then keep your steep time and temperature consistent so you can judge the result. A coarse grind suits immersion’s longer contact time and keeps the finish clean.
Pour-Over Grind Size
Start with a moderate medium-fine grind, similar to table salt, for pour-over coffee, aiming for a 2:30–4:00 brew time for a typical 12 oz (340 g) cup. This setting gives water enough contact time to extract balanced flavor without pushing the cup toward harshness. V60 and Chemex brewers may prefer a slightly medium grind for clarity and clean flow, though your filter and pouring style matter for consistency.
If your brew’s too fast and tastes weak, move one small step finer. If it runs too slowly or tastes bitter, go coarser. Grind size controls extraction speed, while your coffee-to-water ratio mainly controls strength. Change only one variable at a time: adjust the grind first, then fine-tune your pouring and timing to reach the target end weight.
Espresso Grind Setting
Espresso needs a very fine grind, almost like powdered sugar, so pressurized water can extract balanced flavor quickly. Start with an 18-gram dose and target about 36-gram output, a 1:2 ratio. Aim for roughly 25–30 seconds, using a level tamp. If your shot runs faster, grind finer; if it chokes or tastes harsh, grind slightly coarser. Adjust in small steps and weigh both dose and yield for repeatable results.
Compared with other methods, drip uses medium to medium-fine grounds, while pour-over needs medium-fine to medium grounds. French press requires coarse grounds because immersion extracts slowly. Match each setting to contact and pressure; don’t swap them. Use espresso grind only when your machine forces water through a compact coffee bed, or you may get thin, sour, or bitter flavor.
Cold Brew Grind
Because cold brew steeps for 12–24 hours, use a coarse grind similar to French press coffee to limit over-extraction and bitterness. For concentrate at ratios from 1:5 to 1:8, this grind protects sweetness during immersion. If you’re making ready-to-drink coffee at about 1:12 to 1:15, choose coarse to medium-coarse particles so dilution leaves a balanced cup.
Consistency matters, too. Excess fines extract quickly and can make your batch taste harsh, while an ultra-coarse grind may under-extract and taste thin. Unlike hot brewing, cold brew relies less on grind size to speed extraction and more on it to prevent over-extraction. Keep your ratio and brew time steady when adjusting. If the result tastes weak or tea-like, grind slightly finer. If it tastes dry or astringent, go slightly coarser.
Scaling for 12-Ounce Mugs
For a 12-ounce mug, treat the drink as roughly 340 g of water and scale your coffee dose by brew ratio. At 1:17, your auto-drip recipe needs about 20 g of coffee (340 ÷ 17). For pour-over, use about 21 g at 1:16, while a French press takes roughly 23 g at 1:15.
Moka pot or siphon recipes use more coffee: an average 1:8 ratio calls for about 42.5 g, though you can round that amount to suit your equipment. These figures assume 340 g water, so weigh both ingredients for repeatable results.
Want a bolder mug? Lower the ratio to 1:14, which requires about 24 g. Prefer a lighter cup? Raise the ratio to 1:18 and use about 19 g. Adjust gradually to taste.
Altitude and Decaf Adjustments
At higher altitudes, water boils at a lower temperature, so raise your brew temperature slightly, or extend the brew time, to maintain extraction. Because cooler boiling conditions can leave coffee sour or thin, start by lowering your ratio slightly: move from 1:17 to about 1:16. This adds coffee strength without changing another variable.
For decaf, you’ll want a stronger hot-brew ratio around 1:16 to 1:15 rather than 1:17 to 1:18. Decaf can taste muted or flat, and the extra coffee helps restore body.
If you use immersion, keep your starting ratio near 1:15 to 1:16, with decaf toward the stronger end. Change only one factor at a time: ratio or brew time, not both. Then evaluate flavor and keep brew length consistent for repeatable results.
V60 300-Milliliter Recipe
A V60 recipe for a 300 mL cup starts with 18.75 g of coffee and 300 g of water at a 1:16 ratio. Use a tared scale: 300 mL of water weighs about 300 g, and weighing your dose keeps each brew repeatable. Heat water to 195–205°F (90–96°C), then pour it steadily through a V60 with a paper filter. Aim for a total brew time near three minutes.
If the drawdown finishes consistently too quickly, grind finer; if it runs long, grind coarser.
For a milder cup, use about 16.7 g of coffee with 300 g of water at 1:18. For a robust cup, increase the dose to about 23.1 g, creating a 1:13 ratio. Keep your pouring technique consistent while you compare results.
Adjust for Water Hardness
When your water is hard, its higher mineral content can mute sweetness and make coffee taste harsh, so try moving a pour-over recipe from 1:17 toward 1:16. This brew can restore sweetness and balance.
You’ll use your cup as the guide:
- If hard water tastes bitter, grind coarser before changing temperature.
- If soft water tastes sour or under-extracted, shift from 1:18 to 1:17.
- Keep water around 195–205°F for dependable extraction.
- Recheck your ratio after installing a filter, softener, or changing water sources.
- Retune each method separately: drip near 1:17, pour-over near 1:16, immersion around 1:15.
Measure by weight, and taste before making a change. Small adjustments work best: change one variable at a time, then record the ratio that produces sweetness, clarity, and body.
Moka Pot 1:10 Ratio
- Keep the basket level, not heaped.
- Avoid tamping; tight grounds can choke flow.
- Maintain consistent heat and brewing conditions.
- Taste bitterness as a cue to adjust.
- Dilute the coffee if needed.
If the cup tastes too strong or biting, try 1:11 or 1:12. If it tastes weak, move toward 1:9.
Treat 1:10 as your starting point, then change one variable at a time.
Conclusion
Use 1:16 as your starting point, then tailor the ratio to your brewer, coffee, and taste. Weigh both coffee and water for repeatable results, and change one variable at a time.
If your cup tastes sour, try a finer grind or higher ratio; if it tastes bitter, go coarser or use less water. You’ll quickly find your sweet spot. Keep notes, taste often, and let your palate—not a rigid chart—guide every brew with confidence.