
How to Make Cold Brew Coffee at Home: A Simple Step-by-Step Method
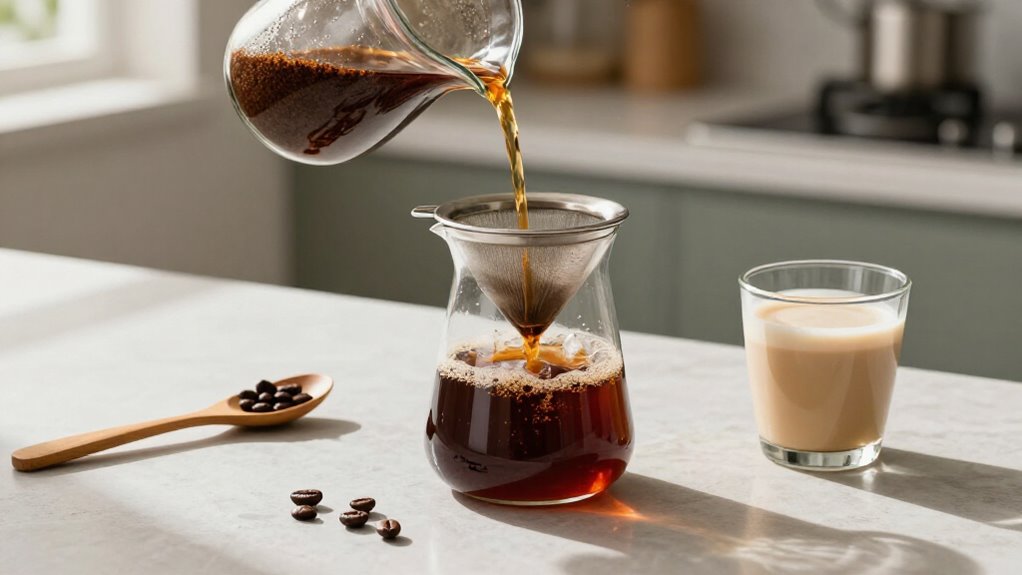
To make cold brew, sanitize a wide-mouth, lidded mason jar, strainer, and filter.
Coarsely grind 125 grams of coffee, add it to 1,000 grams cold water, and stir until evenly wet.
Cover and refrigerate for 14,18 hours.
Let the brew rest, then strain it slowly through cheesecloth or a paper filter without pressing the grounds.
Refrigerate the concentrate, dilute it gradually, start with equal parts water, and serve over ice.
You’ll find more guidance below.
Coffee-to-Water Ratio: 1:8
For a dependable cold brew concentrate, use a 1:8 coffee-to-water ratio: that’s 1 gram of coffee for every 8 grams of water. This proportion gives you a concentrated base designed for dilution after steeping, rather than a finished ready-to-drink brew.
For a one-liter batch, weigh 125 grams of coffee and 1,000 grams of water. Use a scale for accuracy; volume measurements vary with bean density and grind.
After filtration, dilute the concentrate with water, milk, or both, adjusting gradually until the flavor and strength suit you. If you prefer a more powerful base, tighten the ratio to approximately 1:4.5, then dilute more generously. Conversely, some brewing devices support roughly 1:11 for a drinkable strength without dilution; however, that approach differs from the 1:8 concentrate method in practice.
Use Lidded Mason Jar
A wide-mouth, lidded mason jar gives you an inexpensive, accessible vessel for steeping cold brew while keeping out fridge odors and contaminants. Choose a one-quart (1-liter) jar for a typical batch, or use a 1.5-2-liter jar when you need more capacity. Leave 1-2 inches of headspace so you can stir without splashing or creating pressure. Before brewing, wash and sanitize the jar, lid, and stirring utensil; rinse thoroughly and let them dry.
Check the lid’s gasket or seal for damage, and confirm every component is food-safe.
- Use a wide-mouth opening for easier filling, stirring, and cleaning.
- Select glass, which won’t readily absorb odors or alter flavor.
- Label the jar with your coffee-to-water ratio and brew date.
Seal it and refrigerate promptly.
Step 1: Set Out Strainer and Filter
After the overnight steep, set a fine-mesh strainer over a clean pitcher or jar and line it with a coffee filter, cheesecloth, or nut-milk bag. Strain slowly to keep grounds from clogging the filter and remove most sediment. If you’re using a French press-style setup, plunge the mesh filter down at the end, separating the grounds from the liquid.
For the clearest, freshest flavor, choose a paper filter; it captures fine particles and produces a cleaner concentrate. If you prefer a fuller, more textured cup, use a Toddy-style fiber filter or cheesecloth. Let the concentrate drain naturally rather than pressing the grounds, which can force sediment through. Once strained, transfer the concentrate to an airtight container and refrigerate; it typically keeps for a week.
Step 2: Sanitize Your Brewing Equipment
Before adding coffee and water, wash and sanitize the jar, lid, strainer, and filter so residual oils, odors, or microbes don’t affect the brew. Use hot, soapy water to remove coffee residue, then rinse thoroughly. Sanitize every component that will contact the grounds or finished cold brew, including seals, handles, and any Toddy-style parts.
Choose a nonreactive vessel, preferably glass, because it won’t absorb odors or alter flavor. After sanitizing, let each piece drain and air-dry completely; leftover rinse water can dilute your brew. If you’re using a fiber filter, rinse and sanitize it before assembly according to the manufacturer’s instructions.
Don’t skip this step because the coffee will sit for 12–24 hours, refrigerated. Clean equipment supports safer storage, fresher flavor, and reliable results.
Step 3: Coarsely Grind Coffee Beans
Grind freshly roasted beans to a medium-coarse texture, about 7/10 on a coarse scale, similar to French press coffee. This particle size supports balanced extraction during a 12–24-hour cold steep, helping you avoid bitterness and sediment. Use a burr grinder, which produces more uniform particles than a blade grinder. Consistency matters: fine particles extract quickly and can make your brew bitter, muddy, and unpleasant, while an excessively coarse grind may leave it weak and flavorless.
Choose freshly roasted beans and grind them before brewing for aroma and flavor. Don’t rely on preground coffee, which is often too fine for cold brew. If you buy ground beans, request a barista-style medium-coarse setting. Check the result: the grounds should resemble coarse sand, not powder or cracked pieces.
Step 4: Stir Grounds Into Water
With your coffee ground to a French press, style medium-coarse texture, add it to the jar first, then pour in cold water at a 1:8 ratio: 125 g of coffee per 1 liter of water. Clean equipment and filtered water help.
Stir with a long-handled spoon, scraping the bottom and sides, until every particle looks evenly wet; dry pockets will otherwise extract unevenly. You can also seal the jar and shake it gently, but don’t agitate aggressively, which can break up grounds and increase sediment. Check the slurry for floating clumps, then stir again until it appears uniform.
A medium-coarse grind, roughly 7/10 on a coarse scale, gives water access without encouraging excessive bitterness. Once saturation is complete, secure the lid and refrigerate the prepared mixture.
Step 5: Steep for 12–18 Hours
Once the grounds are fully saturated, steep the mixture in the refrigerator for 12–18 hours, with about 14–18 hours delivering a balanced, smooth concentrate.
Use a coarse grind. It lets water penetrate gradually, helping you avoid harsh, bitter flavors that a fine grind can produce. Keep the vessel covered and undisturbed in the refrigerator; the cold environment helps limit bacterial growth during the overnight wait.
At 12 hours, expect a lighter, cleaner profile; extending the steep toward 16 or 18 hours builds more body and intensity. Don’t stop too early: under 12 hours often produces a weak, watery brew. Likewise, don’t let it continue beyond roughly 24 hours, because the concentrate may become acidic or bitter. When your window ends, strain the concentrate promptly.
Step 6: Filter Through Cheesecloth
After 12–24 hours of steeping, about 14–18 hours for a balanced concentrate, strain the brew through a fine-mesh sieve lined with cheesecloth. Set the sieve over a bowl or jar, and pour slowly. This flow lets the liquid pass through while the cloth traps spent grounds and sediment. Don’t press the cloth; pressure can force particles through and make the concentrate cloudy.
When drainage stops, lift the cheesecloth and compost the spent grounds. Cheesecloth retains more oils than paper, so your concentrate will have a fuller body and more texture. If you prefer clarity, reserve paper filtration for a later step.
Transfer the strained concentrate to an airtight container, then refrigerate it. Clean the sieve, bowl, and jar before reuse to prevent residue from affecting the batch.
Taste for Smoothness
Your smoothness check starts with the grind: use a medium-coarse setting—about 7/10 on a coarse scale—to limit harsh extraction during the long steep. Pair it with a strong 1:8 ratio, such as 125 grams of coffee per liter of water, then dilute the concentrate 1:1 after brewing. Steep in the refrigerator for 14–18 hours; a shorter brew may taste thin, while a longer one can develop bitterness.
Taste a sample before serving and adjust the dilution rather than extending extraction. If the cup tastes intense, add water if it seems sharp or weak, check steep time and grind before changing it. Serve it chilled, and try milk or creamer: dairy rounds cold brew’s edges and makes smoothness apparent than drinking it black.
Muddy Brew: Let Sediment Settle
Fine particles can make cold brew look muddy and feel gritty, so let the brewed coffee rest in the refrigerator for several hours before decanting or filtering. Keep the container covered and refrigerated during this pause; cold temperatures slow extraction and help particles drop predictably. Don’t shake or stir the sludge before you pour.
| Stage | What you do | Why it helps |
|---|---|---|
| Rest | Chill 12–24 hours | Settles fines |
| Decant | Pour slowly from the top | Protects clarity |
| Filter | Use mesh or cheesecloth | Removes grounds |
| Rest again | Refrigerate after straining | Drops remaining sediment |
Pour into a clean, airtight glass container, leaving the final cloudy layer behind. If you use cheesecloth or fine mesh, expect additional settling afterward; filter only once the brew has rested.
Add these steps for better clarity.
Serve Over Fresh Ice
Once the concentrate has chilled fully, pour it over a glass filled with fresh, clean ice to preserve its flavor and aroma. Serve it immediately, because prolonged contact with melting ice gradually dilutes the brew and can dull its aromatic definition. If the flavor tastes too intense, dilute it after pouring.
Start with equal parts concentrate and water, then adjust the ratio to your preference. This approach lets you control strength without weakening the entire batch.
For a richer café-style drink, add cold milk or cream; cold brew’s lower acidity complements dairy particularly well. You can also prepare cold-brew ice cubes by freezing leftover coffee in an ice tray. Use them in future servings to keep your drink cold while limiting dilution during service.
Conclusion
With the right ratio, clean equipment, and a coarse grind, you can make smooth cold brew at home. Start with a 1:8 coffee-to-water ratio, steep it in a lidded Mason jar, and filter patiently through cheesecloth.
Let sediment settle before serving over fresh ice. Taste your concentrate, then dilute it if needed. Once you’ve refined the strength, you’ll have a consistently balanced, invigorating brew ready whenever you need it, without excess bitterness, grit, or harshness.