Coffee Accessory Types Explained: Essential Tools for Every Setup
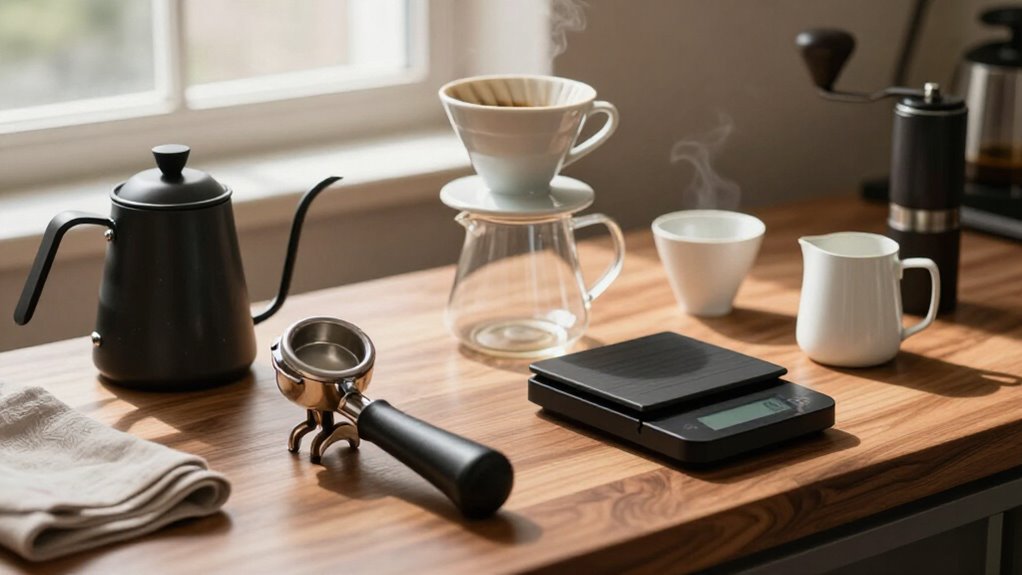
Choose accessories by brewing method: espresso needs a burr grinder, close-fitting tamper, 0.1–0.5-g scale, timer, and milk pitcher; pour-over needs a dripper, filters, kettle, and scale, while French press needs timing and cold brew needs filtration.
Weigh dose and yield, then track ratio and extraction time.
Use WDT before tamping, clean the three-way valve, prevent steam-wand burns, and match basket size.
You’ll find practical workflow and troubleshooting guidance next for consistent results in every setup.
Identify Your Brewing Method
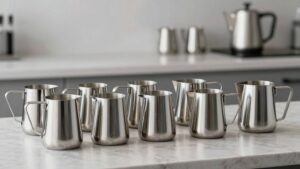
Start by identifying your primary brewing method, because it determines which accessories you actually need. If you’re brewing espresso, build around shot consistency: choose an espresso scale accurate to about 0.5g, ideally tenths, since programmed buttons can’t compensate for changing beans, grind, or dose. For milk drinks, add a pitcher sized to your batch—typically 12-ounce (355 ml) or 16-ounce (473 ml).
For pour-over, prioritize a dripper, filters, a kettle, and a scale; your pouring pattern and water delivery govern extraction. French press requires a brewer and timer, while cold-brew preparation benefits from a steeper and filtration. For moka pots or pod systems, match accessories to the device and its capacity. Start with method, then add tools that solve its control and cleanup needs.
Grinder and Tamper Terms
Treat the grinder as the foundation of extraction: it reduces roasted beans into particles whose size and uniformity determine how quickly water dissolves acids, sugars, and bitter compounds. Choose a burr grinder, flat or conical, for uniform particles; a blade grinder suits forgiving immersion methods, not espresso. Stepped settings repeat reliably; stepless adjustment fine-tunes espresso. Check retention, heat, static, burr size, and motor speed.
| Term | What you should know |
|---|---|
| Burr grinder | Shears beans between abrasive surfaces for consistent particles. |
| Tamper | Compresses grounds evenly in the portafilter; match its diameter closely. |
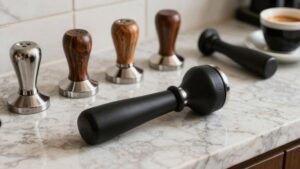
Purge retained coffee when changing settings. Brush removable burrs and the hopper regularly. Keep your tamper level, press vertically, and avoid excessive force; a close-fitting base distributes pressure evenly and supports a uniform puck. You’ll choose speed or manual control.
Dose, Yield, and Extraction
Measure your dose in the portafilter and your espresso yield in the cup, then calculate the brew ratio as yield ÷ dose. For example, a 21 g dose and 40 g yield produce approximately a 1:2 ratio, giving you a repeatable starting point for dialing in extraction.
Adjust grind size and, when needed, the ratio while evaluating flavor, since grind changes alter flow and extraction even when your grinder runs for the same time.
Understanding Coffee Dose
Your portafilter dose sets the starting point for an espresso recipe: dose is the grams of dry coffee in the basket, often about 21 g for a double, while yield is the grams of espresso collected—roughly 40 g for a common 1:2 ratio.
Treat dose as your recipe’s coffee mass, not a scoop volume or a timer setting. Use a 0.1-gram scale to weigh the basket before brewing; this removes guesswork and exposes changes caused by bean density or grinder retention between shots.
A 21-g dose suits many double baskets, but follow the basket’s rated capacity rather than forcing an arbitrary number. If you change dose, you’ll need to re-dial the grind because puck depth and resistance change. Keep distribution even and tamp level for consistent extraction.
Measuring Espresso Yield
Once you’ve set the dose, weigh both the dry coffee entering the basket and the espresso collected in the cup to make each shot comparable. Tare the portafilter before dosing, record the coffee weight, then tare the cup before brewing. This removes container weight and gives you clean, repeatable measurements.
During extraction, monitor yield on a scale rather than trusting preset machine buttons. Those programmed volumes can change when you alter grind size or switch beans, even if the grinder runs for the same time. Stop the shot at your chosen output, then record dose, yield, and total time together.
Compare these records while dialing in. A lower or higher output changes how much water contacts the coffee, which influences extraction, flavor, and body.
Calculating Brew Ratio
With dose and yield recorded, calculate the brew ratio by comparing the espresso’s output weight with the dry coffee dose. Divide yield by dose: 40 g out ÷ 21 g in = 1.90, conventionally written approximately 1:2. This ratio describes how much beverage you produce relative to coffee used, not a volume measurement.
Weigh both values with a scale; programmed buttons and grinder timers can’t guarantee consistent weights because grind size and bean density change output. Use a scale accurate to 0.5 g, preferably 0.1 g, and tare the cup before brewing. Record dose, yield, and ratio together for repeatable recipes.
If tripling the dose, target roughly 1:3, 21 g in and 63 g out, but treat it as a starting point, not measured results.
Dialing In Extraction
To dial in espresso, weigh both the dry dose and extracted yield rather than relying on programmed shot buttons or volume markings. Dose 21 g into the basket, then place the cup on a scale and stop near a 40 g yield, establishing an approximately 1:2 ratio.
Use a scale accurate to 0.5 g; 0.1 g resolution is preferable. Output weight keeps shots comparable because buttons can dispense different volumes as beans or settings change. If you alter a setting, recheck both dose and yield instead of trusting your recipe.
Change one variable at a time. Establish dose first, then adjust yield, and evaluate extraction time alongside flavor. Record results, including taste, so you can identify cause and effect and reproduce a balanced shot.
Grind Size Impact
Your dose-and-yield baseline makes grind size the next variable to adjust: it controls water flow through the puck, extraction rate, and final output. Keep your dose fixed, then weigh both input and beverage output with a scale accurate to 0.5 grams; tenth-gram resolution is better. Use a ratio target, such as 21 grams in to approximately 40 grams out, or 1:2, to judge how a setting changes extraction.
A finer grind creates more resistance, slows flow, and generally increases extraction, while a coarser grind speeds flow and typically extracts less. If output changes despite the same grind time, adjust grind size rather than assuming the grinder delivered an equivalent dose. Record dose, yield, and taste together, because output weight reveals what your grind adjustment changed.
Tracking Shot Time
For every espresso shot, track the dose in grams, the yield in grams, and the extraction time in seconds. Use a brew scale with a built-in timer to measure beans in and espresso out while timing the shot. A 21-gram dose yielding about 40 grams produces an approximately 1:2 ratio. Weighing gives you a repeatable time-to-yield target instead of trusting shot buttons.
Record your dose, yield, and time after dialing in, then use those values as your reference. Grind time and size, plus bean changes, can alter the dose and flow, so identical grinder duration won’t guarantee results. When you change a variable, let the scale guide the ratio: tripling the dose implies roughly a 1:3 ratio. Note the extraction time and update your recipe.
Recognizing Under-Extraction
Once you’ve logged dose, yield, and time, use those measurements to distinguish under-extraction from simple shot-to-shot variation. If you’re dosing 21 g and collecting only 30 g instead of roughly 40 g (a 1:2 ratio), you may be stopping the shot short. A sour, thin, or watery cup supports that diagnosis, but don’t rely on taste alone.
Use a scale accurate to 0.5-g increments; ideally choose one reading tenths of a gram. Weigh the dose and output every shot, because grind time doesn’t guarantee identical coffee mass. Keep the measured dose constant, then adjust one variable at a time: grind finer, dose, or yield.
This controlled process separates genuine under-extraction from changing weights, volumes, beans, or settings. A timer or button can’t correct inconsistency.
Identifying Over-Extraction
When a shot tastes harsh, dry, or excessively bitter rather than clear and balanced, check whether its dose-to-yield ratio has moved beyond your recipe’s target. A common reference is 21g in to about 40g out, a 1:2 ratio; consistently exceeding it can push extraction too far.
Use a scale even with programmable buttons because grind size and bean density can change output weight and volume.
If the yield stays the same but the cup tastes astringent or bitter, reduce output or coarsen the grind; grind time alone doesn’t describe extraction. Also inspect puck preparation: uneven distribution or tamping creates aggressive channels that mimic over-extraction.
Weigh dose and yield every shot, then adjust one variable at a time for reliable diagnosis across several consecutive shots.
WDT, Levelers, and Distributors
Use WDT needles to break up clumps and distribute grounds evenly, especially when your grinder produces inconsistent particles. Levelers prepare a uniform surface, while distributors can complement or duplicate WDT before tamping; so you’ll need to compare each workflow.
Choose the tool that matches your grinder’s output and compression method, including whether you use a calibrated spring-loaded tamper or leveler-only preparation.
WDT Needle Distribution
Because uneven grounds can create weak paths through an espresso puck, WDT uses thin needles to break up clumps and distribute coffee more evenly in the basket, reducing channeling risk, particularly with entry-level grinders that produce boulders. Use a fine, narrow needle tool and stir from the basket’s wall toward its center, reaching deep enough to loosen compacted pockets without scraping the metal. Work slowly through the full dose, then make a few gentle passes through the upper grounds.
WDT is especially valuable when your grinder creates clumps or retains grounds between doses. It won’t correct inconsistent particle size, but it can make distribution more uniform before compression. Pair it with a measured dose and repeatable tamping; if shots still channel, adjust your grind or dose.
Levelers And Surface Preparation
After dosing espresso grounds into the basket, use WDT needles to break up clumps and distribute the coffee evenly, especially when your grinder produces boulders or retention-related clumps. Work the needles through the full dose, reaching near the basket floor without scraping the metal.
This loosens compacted pockets and helps create a more uniform bed, reducing paths that can cause channeling.
A leveler can then smooth the puck’s top surface before compression. Set its height so the edges contact the basket consistently, rotate it gently, and avoid pressing down; the tool should prepare the surface, not replace tamping.
Finish with a properly fitted tamper and an level press. Inspect the rim for stray grounds, because a tilted or contaminated edge can compromise sealing and extraction consistency.
Distributors Versus WDT
When you’re choosing between a distributor and WDT, distinguish their primary functions rather than treating them as interchangeable tools. A distributor, or leveler, evens the bed and can leave a flatter surface before you tamp. WDT uses thin needles to break up clumps and reposition grounds in the basket.
This aerates and reduces density differences that can promote channeling, helping you prepare a more uniform puck.
Both methods target preparation, but they act at stages. You can use WDT to correct grinder clumping, then use a leveler for surface uniformity before compression.
However, the steps may overlap: an Ikape distributor costing $35.99 can feel redundant alongside WDT and a spring-loaded tamper. Normcore’s $39.99 distributor has manual height adjustment, giving you control during setup.
Choosing The Right Tool
Choosing among WDT, a leveler, and a distributor starts with identifying the weakness in your puck preparation. If your grinder produces clumps and boulders, choose WDT: its fine needles break apart agglomerates and distribute grounds through the basket, reducing channeling and uneven extraction. Avoid compaction.
Choose a leveler when your main issue is an uneven surface before tamping. It can flatten the bed, but you don’t need it if you already tamp consistently. A distributor makes distribution repeatable by spreading grounds across the basket; an adjustable model, such as the $39.99 Normcore, requires manual height adjustment, not gravity adaptation.
However, don’t buy every tool. Ikape’s roughly $35.99 distributor may feel redundant with WDT and a spring-loaded tamper, since both distribution and compression are already controlled.
Cleaning a Three-Way Valve
A three-way valve needs cleaning whenever coffee grounds or milk residue could restrict its internal pathways and disrupt water flow. After backflushing/steam-wand maintenance, clean the valve to prevent buildup from clogging passages and altering discharge. Remove accessible parts as your machine allows, then rinse them with hot water to loosen debris.
If your machine has a backflush circuit, follow its specified procedure with the detergent tablet. This drives cleaner through the three-way valve and group, removing residue. Inspect the valve outlet and internal passages for stuck grounds or dried milk film, which can cause inconsistent water release or poor espresso flow.
Dry components and reassemble fully before testing. Run a short water-only purge, confirming the valve switches correctly and reliably between delivery and discharge.
Steam Wand Burn Prevention
Prevent steam-wand burns by using a stable 12-ounce (355 ml) or 16-ounce (473 ml) stainless-steel pitcher that you can grip and maneuver without bringing your hand near the heated metal. Grip pitcher by its handle, keeping fingers clear of the wand and outlet. Position tip just below milk surface.
A clip-on or probe thermometer lets you stop at 55–65°C (130–150°F), avoiding scalding heat that increases handling risk and reduces sweetness. Don’t leave wand immersed too long or too close to surface; controlled depth creates smooth microfoam without splashing.
After steaming, turn off steam, wipe the wand with a damp cloth, and purge it while hot. This removes milk before it dries. Use a knock box for pucks, keeping messy surfaces safely away during cleanup.
Portafilter Basket Size Guide
Match your portafilter basket and tamper by measured diameter, not by the nominal size alone. Before ordering, check your machine: common families include 58mm (58.3, 58.5, or 58.55mm), 54mm, and 51mm. A Breville 54mm portafilter, for example, may suit a 53mm tamper for closer working clearance.
- Measure the basket’s internal diameter and compare the tamper’s stated dimensions.
- Choose a machined VST, IMS, or Pullman precision basket for more uniform geometry than many stamped OEM baskets.
- Recheck your recipe after switching baskets; a competition design may let you grind slightly finer.
An oversized tamper can bind, while excessive clearance leaves an uneven edge. That inconsistent compression encourages channeling and uneven extraction.
Match the tool to the basket, then validate dose, distribution, and shot time consistently.
Conclusion
Once you identify your brewing method, choose accessories that match its demands. Use a capable grinder, dose accurately, and track yield so you can control extraction rather than guess.
For espresso, distribute and level grounds consistently, then select the correct basket size. Clean the three-way valve routinely, and protect yourself from steam-wand burns by purging and wiping carefully.
With these habits, you’ll build a safer, more repeatable setup, and better coffee in every cup, too.