How to Use a Vacuum Coffee Maker for a Show-Stopping Brew
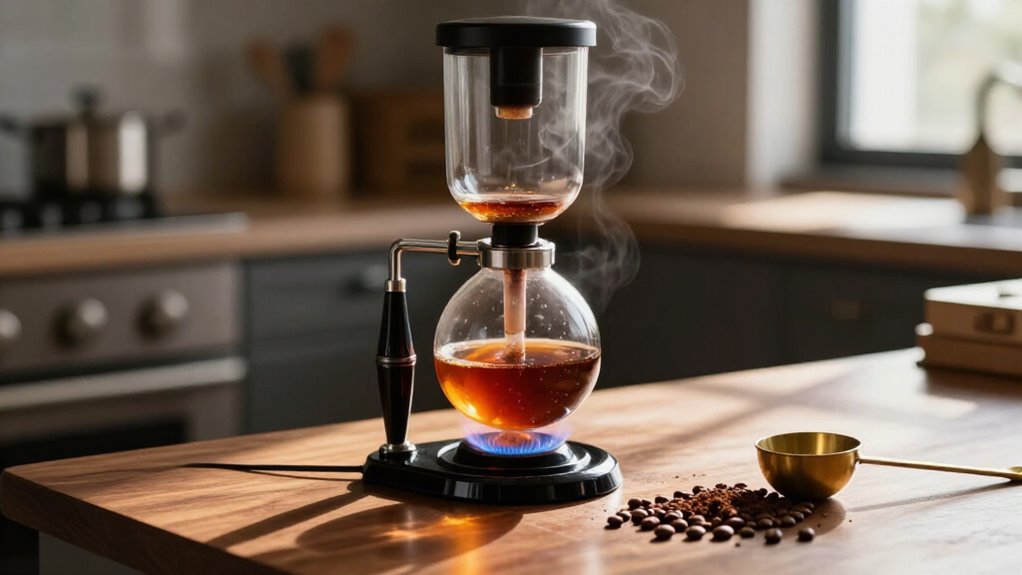
Use 25 g coffee and 350 g filtered water; grind slightly finer than drip, or finer if weak.
Fit a filter into the upper chamber, then join both dry chambers.
Preheat water and cups.
Heat gently; when coffee enters the upper chamber, start timing and swirl.
At 90 seconds, extinguish heat and let vacuum draw the brew down.
Remove the upper chamber carefully, serve immediately, and rinse both before oils dry.
More precise cues await farther below.
Target: Clear, Aromatic Brew
To produce a clear, aromatic brew, use about 7 g of coffee per 100 ml of filtered water; 25 g for roughly 350 ml in a three-cup brewer. Use a slightly finer-than-drip grind so the grounds infuse fully before the vacuum draw pulls liquid through efficiently. Maintain the 7:100 ratio to balance extraction without muting delicate floral and citrus notes.
Heat the lower chamber until the water boils, then remove heat promptly. As pressure falls, the coffee descends cleanly, concentrating sweetness while preserving a transparent finish. Watch for vigorous bubbling or turbulence, followed by a dome of grounds resting on the filter; these cues indicate completion. Serve immediately: siphon coffee reaches the cup extremely hot, and its aromatic clarity fades as it’s cooling.
Gather Filter, Beans, Water
Start by assembling a clean, compatible filter, freshly roasted whole beans, and filtered water. You’ll select supplies for clarity, aroma, and extraction consistency:
- Match the cloth, metal, or paper filter to your brewer; inspect the mesh, holder, chain, and clip for secure seating.
- Select beans roasted within two to four weeks. Light-to-medium roasts reveal floral, citrus, and caramel notes especially well.
- Weigh 20 grams of beans for 300 grams of water, then adjust between a 1:14 and 1:18 ratio for desired strength.
- Use fresh filtered water without chlorine or excessive hardness; preheated water accelerates the vapor-pressure cycle and reduces glass stress.
Grind with a burr grinder immediately before brewing.
Your beans should smell sweet, look uniform, and remain precisely measured for clarity and aroma.
Step 1: Warm the Serving Cups
While the brewer heats, warm as many serving cups as your siphon will fill, about five for a five-cup model, with hot water or a cup warmer. This parallel step keeps your service sequence smooth: you won’t wait for cups after the vacuum phase ends. Siphon coffee reaches a higher serving temperature than most brewing methods, so a cold cup can pull away heat immediately, muting aroma and cooling the first sips.
Empty each cup before pouring, then dry it thoroughly; residual water creates steam condensation and dilutes the coffee. Keep the cups together near your serving area, safely away from the flame, and handle them with care. After you separate the upper and lower globes, pour directly from the lower carafe into the warmed cups. Their retained heat preserves fragrance, body, and clarity.
Step 2: Attach Upper-Chamber Filter
With the cups warming nearby, fit the siphon filter into the upper chamber over the siphon-tube opening. Choose a cloth or metal filter sized for your brewer; a five-cup model needs its matching top filter. If you’re using cloth, secure its chain or clip according to the kit’s instructions.
Let the cloth hang into the tube, where it should form a snug seal without twisting.
Inspect the assembly: it must sit flat, centered, and stable. The vacuum pull will draw coffee through this barrier, so a crooked filter can admit grounds or slow flow. Before any heat reaches the brewer, dry the outside of both glass chambers completely. Moisture against hot glass can cause thermal shock and cracking, while intact seals preserve pressure changes.
Step 3: Join Both Siphon Chambers
Once both chambers are clean and completely dry, fill the lower globe with near-boiling water to the 5-mark, or your brewer’s specified level, and seat the upper chamber firmly into its gasket. Ensure the seal sits evenly around the joint; a secure connection lets pressure build without leaks and protects the glass from unstable movement. Check that the siphon tube reaches into the water and that the filter remains correctly positioned over its opening, with its chain or hook attached according to your model.
Keep the assembly upright on its stand, and handle hot glass with heat-resistant gloves or pads. As the system warms, watch for a clear, steady path through the tube rather than forcing the joint. The joined chambers should feel stable before proceeding.
Step 4: Brew for 90 Seconds
As soon as the coffee enters the upper chamber, start a count-up timer and let it infuse for about 90 seconds. Choose a grind slightly finer than standard drip, so the grounds release soluble compounds within this brief immersion.
Maintain low, controlled heat while the upper chamber fills; steady bubbling and visible turbulence indicate that hot water surrounds the coffee and extraction is underway. Watch the brew *change* from vigorous movement to calmer circulation as the system approaches its target time.
At 90 seconds, turn off or extinguish the burner completely. Cooling then reduces pressure in the lower chamber, creating the vacuum that draws brewed coffee through the filter and into the bottom carafe. Listen for the changing hiss and observe the stream clarify.
Step 5: Swirl Grounds Gently Twice
Keep the slurry moving with two gentle swirls: stir briefly when the grounds first enter the upper chamber, then fold the mixture again at about 0:40 to wet dry pockets and even out extraction.
Use a spoon or paddle to make a shallow whirlpool, not an aggressive stir that splashes the glass or drives grounds unevenly into the filter. At about two minutes, add a gentle back-and-forth swirl if the bed still shows dry patches; this second saturation improves contact without excessive agitation.
At roughly 1:30, when you turn off the heat, give the slurry one final broad swirl to level extraction before the vacuum draw begins. Keep your motion controlled and pause once coffee starts descending. You’ll taste a cleaner, balanced cup.
Step 6: Remove Upper Chamber Carefully
Turn off the heat completely when the vacuum draw finishes, then let the upper chamber settle before touching it—the glass and brewed coffee will be extremely hot. Put on dry hot pads or wrap the handles with towels; moisture transfers heat quickly and can reduce your grip.
When the glass feels stable, hold the lower globe on a heat-safe surface. Gently rock the upper chamber back and forth to break the vacuum seal; don’t twist sharply or force the joint. As the seal releases, lift the chamber straight up and away, keeping it level to prevent splashing. Set it immediately into the included lid or stand, where it can’t roll or tip. Set it in the included stand; serve afterward from the lower chamber.
Watch Coffee Filter Down
With the heat off, watch the brewed coffee descend through the filter as cooling vapor and liquid contract inside the lower chamber, creating a vacuum.
Observe the stream gather momentum through the siphon tube. As pressure falls below the upper chamber, the vacuum pulls coffee downward, even though you’ve removed the burner. Watch the liquid narrow into threads, then collect in the carafe while the spent grounds settle and look drier.
This transfer continues the brew without additional heat, so keep your eyes on the filter rather than disturbing the brewer. Time the drawdown from heat removal until flow stops; a cycle often approaches three minutes in workflows. You should see a clear coffee gather below, revealing the physics behind this dramatic finish.
Weak Brew: Grind Finer
If your siphon coffee tastes weak, grind finer: aim for slightly finer than drip, about table-salt coarseness, so more soluble flavor compounds enter the brew during immersion and drawdown. Keep your coffee-to-water ratio steady: use about 7 g per 100 ml, such as 25 g for 350 ml. Add the grounds, then give the chamber a swirl or whirlpool to saturate each particle.
If you use medium drip grind, move one setting finer and repeat the schedule: heat off around 1:30, with drawdown finishing near 3:00. This isolates grind as the variable. Expect a body, sweeter aroma, and caramel or cocoa notes; excessive fineness, however, can slow flow and taste bitter.
| Adjustment | Expected result |
|---|---|
| Finer grind | More extraction |
| Same ratio | Fair comparison |
| Balanced timing | Isolated change |
Wash Chambers After Brewing
Once the siphon brew has finished, let both glass chambers cool completely before separating the upper and lower globes. Immediately rinse each chamber with hot water, catching residual grounds and slurry in the filter before coffee oils dry onto the glass. This quick rinse preserves the brewer’s clean aroma and prevents stale, oily notes.
Wash the metal or cloth filter separately: rinse cloth thoroughly without twisting it, and brush metal mesh gently to release trapped particles. Run water through the siphon tube to clear hidden clogs.
Dry every gasket seal area and the outside of each globe completely; wet glass can crack under heat. Store the chambers and filter dry, covered, and dust-free, so you’ll achieve a reliable seal and clean draw next time.
Conclusion
With a vacuum coffee maker, you can turn precise technique into a show-stopping brew. You’ll gather fresh beans, clean water, and the right filter, then warm your cups for a lasting aroma. As you join, heat, and separate the chambers, watch the coffee’s clarity and flow.
If the cup tastes weak, grind finer next time. Finally, wash both chambers and the filter promptly, so your next brew starts clean and performs beautifully for reliable results.