How Often Should You Clean a Coffee Maker for Fresh-Tasting Coffee?
Clean your coffee maker every three to six months for fresh-tasting coffee, but shorten that interval if you use it heavily, have hard water, brew more slowly, or notice extra steam.
After each brew, rinse and wash the basket, carafe, and lid, then wipe the cooled hotplate.
Descale with a manufacturer-approved coffee-maker product, and run fresh-water cycles until no odor remains.
Check the cord and single-serve needle too; the steps below clarify each task clearly.
Fresh-Tasting Coffee Every Morning
For fresh-tasting coffee every morning, clean your drip coffee maker every 3 to 6 months, and clean it sooner if brewing slows or steam increases. Heavy use and hard water can require shorter intervals. Treat that schedule as a baseline, not a guarantee: mineral deposits restrict internal tubes, while coffee oils dull flavor.
After each brew, rinse the basket, then wash it thoroughly with warm, soapy water. Empty and clean the drip tray regularly, and wipe the hotplate after it cools. These steps remove residue before it transfers stale or bitter notes to your next pot. Descale promptly when brewing takes longer, water flow drops, or performance changes. After cleaning, verify flow and taste. Adjust reminders for usage, water hardness, and the manual guidance.
Gather Vinegar and Cloth
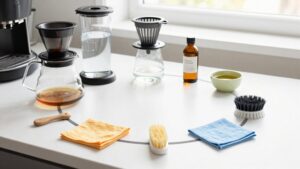
Gather white distilled vinegar, a clean microfiber cloth, a measuring cup, and, if needed, a soft brush for crevices. For monthly cleaning, collect supplies first; occasional users should repeat preparation every two to three months, or sooner if coffee tastes stale, flow slows, or visible mineral scale appears.
- Select standard 5% white distilled vinegar.
- Use a measuring cup to combine equal parts vinegar and water; use up to a 2:1 ratio for heavy scale.
- Keep it diluted; don’t use undiluted vinegar.
- Dampen the microfiber cloth for the reservoir rim, exterior, and removable parts.
- Add a soft brush for filter-basket edges, needle areas, and crevices.
You’ll need water ready for two to four rinse cycles, and protect electrical components from moisture while you work.
Clean the Hotplate
After every brew, let the hotplate cool completely, then wipe it with a damp cloth to remove coffee splashes and residue. Don’t clean a hot surface; cooling prevents burns and keeps moisture from flashing into stubborn stains. For dried coffee, use a damp sponge with a small amount of baking soda, then wipe away powder and loosened residue.
Avoid abrasive pads, excess water, and harsh chemicals that could damage the warming surface. A weekly deep wipe removes sticky, scorched oils that can linger and supports cleaner, fresher-tasting coffee. Check the plate before each use, especially if spills dried overnight.
| Check | Method | Frequency |
|---|---|---|
| Splashes | Damp cloth | After brewing |
| Stains | Baking soda | As needed |
| Residue | Gentle sponge | Weekly |
| Damage | Inspect surface | Monthly |
This routine keeps the warmer clean.
Scrub Brew Basket First
Remove loose grounds from the brew basket, then rinse it with warm water. Scrub every surface and crevice with mild soap to eliminate coffee oils and residue.
Rinse thoroughly and let the basket air-dry completely before reinstalling it.
Remove Loose Grounds
Start by rinsing the brew basket immediately after each brew, then scrub it with warm, soapy water to loosen grounds and remove oily residue before it dries. Use a soft brush to dislodge particles from the basket’s mesh, corners, and support ribs without deforming the filter. Empty the grounds into the trash rather than the sink, where they can accumulate and restrict drainage.
Wipe the sprayer head and its openings to remove particles lodged in small crevices; a soft cloth or small brush works well. For a pod-style machine, remove the detachable water reservoir and wash it with soap and water if grounds have migrated into it. Prompt cleaning prevents residue from accumulating, supports water delivery, and helps coffee retain a fresh flavor.
Rinse With Warm Water
Once you’ve discarded the grounds, rinse the brew basket with warm water, then scrub it with warm, soapy water to remove trapped particles and oily residue. This immediate rinse flushes loose sediment from perforations and reduces coffee-oil accumulation that can dull flavor.
Use your fingers or a soft brush to work across the basket’s underside and rim, where particles often lodge. Check each opening against the light; blocked holes can restrict flow and produce uneven extraction. Wipe the sprayer head after brewing, reaching its nooks and crevices carefully, so water distributes evenly during the next cycle. If you use a pod machine, remove the water reservoir and rinse it with warm water; wash it as directed in your manual, since some reservoirs are dishwasher-safe.
Scrub With Mild Soap
Scrub the brew basket with warm water and mild dish soap after every use, working around the rim, underside, and perforations to remove trapped grounds and oily residue. Rinse it thoroughly, then inspect the mesh or reusable filter for remaining particles before returning it to the machine. This simple step prevents coffee oils from accumulating and dulling flavor. Use a soft brush only when your manufacturer allows it; you’ll avoid abrasive pads that can scratch plastic or damage filter surfaces.
For pod-style models, wash the removable water reservoir with soap and water, following your owner’s manual to confirm dishwasher compatibility. Make basket washing part of your routine, because consistent cleaning helps preserve steady water flow, fresh taste, and reliable brewing performance across repeated brewing.
Reach Every Crevice
After washing the brew basket, inspect its rim, underside, perforations, and filter surface for trapped grounds and oily residue. Use a soft brush or nonabrasive sponge to work into each opening, corner, and seam. Rinse with warm water, then, if you still see film, don’t stop scrubbing. For persistent stains, soak the part longer or apply a paste of baking soda and water; scrub thoroughly afterward to dislodge residue without scratching plastic.
Once the sprayer head has cooled, wipe it with a clean cloth and clear its small outlets with a soft brush. Remove the drip tray regularly, wash residue with warm, soapy water, and clean its corners. If you use a pod brewer, remove and wash the reservoir; check the manual if dishwasher-safe.
Air-Dry Completely
Begin by rinsing and scrubbing the removable brew basket in warm, soapy water to remove oily residue that can make coffee taste stale. Use a soft brush around the mesh, corners, and hinges, where grounds collect. Wipe the accessible spray head and nearby crevices to clear trapped particles before drying.
After emptying the drip tray, place the basket, reservoir, carafe lid, and other removable parts on a clean rack with openings exposed. Let every part air-dry completely; don’t towel-dry, because fabric can leave lint and redistribute contamination. Moisture trapped in seams or beneath seals encourages stale odors, microbial growth, and residue buildup. Reassemble only when surfaces feel dry.
Check your owner’s manual before using a dishwasher, since some baskets may require hand washing.
Descale Hard-Water Machines
If you notice longer brew times, excess steaming, or white scale, your hard-water machine needs descaling. Choose the manufacturer-approved descaler and follow your model’s instructions.
Afterward, run clean-water cycles until all solution is flushed from the internal pathways.
Identify Hard-Water Buildup
Hard water often leaves mineral scale in the reservoir and internal tubes, restricting flow and reducing brewing performance. Inspect the tank, openings, and fittings for white or gray crust, chalky spots, or mineral film. Watch for slower brew cycles, excessive steaming, uneven flow, or coffee that tastes less fresh.
These changes can indicate scale inside areas you can’t see.
Some drip coffee makers include a descaling indicator light; use it as a maintenance signal, not a substitute for your manual. As a general rule, plan descaling every three to six months, then adjust the interval to your water hardness and usage. Check your model’s instructions for its schedule.
After descaling, clean the brew basket and carafe, because oily residue can compound mineral-related flavor problems.
Choose A Descaling Solution
Which descaler should you use? Choose a product labeled specifically for coffee makers. A coffee-maker descaler is formulated to dissolve mineral scale in internal water paths without exposing components to unsuitable chemicals. Check your manual first: it may require a branded formula, a specific concentration, or a dedicated descaling setting.
If you’ve lost the manual, search your machine’s make and model online for its approved procedure. This choice protects pumps, seals, and tubing.
For hard-water households, plan descaling every three to six months, then adjust the interval if scale returns sooner. Watch for excessive steaming or longer brew cycles; these signs indicate deposits may be restricting flow. If your machine has a descaling indicator, follow it, particularly in hard-water homes with rapid internal buildup.
Rinse Thoroughly After Descaling
Choosing the right descaler is only half the process; you must rinse the machine thoroughly afterward, especially in a hard-water home. Descaling removes mineral scale, but solution can remain in the reservoir, tubing, and brew path, causing metallic or sour flavors. Run fresh water through the machine until no descaling taste or odor remains. If your coffee maker has a cleaning indicator, use it as a cue to descale; you’ll still need to rinse thoroughly.
Wash removable parts, including the carafe, filter basket, and reservoir lid, with warm, soapy water. Rinse them well, leave the reservoir open to air-dry, and reassemble only when components are clean and dry. For hard water, follow the manufacturer’s three-to-six-month schedule, and shorten it if scale returns or brewing slows.
No Vinegar Smell Remains
After descaling, run several fresh-water brew cycles until you detect no vinegar smell or taste. Empty and refill the reservoir with clean water between cycles if the odor persists. Rinse the tank, carafe, filter basket, and other removable parts thoroughly, because vinegar trapped in seams or residue can contaminate the next pot. Keep flushing until the water smells neutral and brewed water tastes clean.
Check the hotplate and drip tray, then wash away coffee oils that can combine with residual descaling odor and create an off smell. If vinegar scent remains after several cycles, repeat the rinsing process rather than brewing coffee. Also monitor brew time and steam output; lingering slow flow or excessive steaming may indicate remaining mineral buildup. Follow your machine’s manual.
Check for Frayed Cords
Inspect your coffee maker’s power cord during each cleaning, especially where it bends near the plug and where it enters the coffee maker. Look for fraying, exposed wires, cuts, crushed insulation, or cracking along the entire length. Pay particular attention to bend points, because repeated flexing can weaken insulation and conductors.
If you find any damage, unplug the machine immediately, if you can do so safely, and don’t use it again. A damaged cord can cause electric shock, fire, or short circuit. Don’t tape over a frayed section; tape isn’t a safe repair. Replace the cord with a manufacturer-approved part, or contact the manufacturer or a qualified service professional for proper repair. Check the cord whenever you clean it—every three to six months.
Rinse the Carafe Lid
Rinse the carafe lid with warm water after every brew to remove coffee oils before they build up and affect flavor. This quick step limits residue that can transfer stale odors to your next pot. Wash the lid with warm, soapy water, focusing on hinges and seal areas where buildup hides.
Follow this routine:
- Remove the lid, if possible, and separate parts.
- Flush both sides with warm water after every brew.
- Scrub hinges, grooves, and seals with a soft brush.
- Soak stubborn stains overnight in one part baking soda and two parts hot water.
- Rinse thoroughly, then dry every surface before reassembly.
Clean and rinse the lid whenever you clean the carafe because it contacts brewed coffee. Don’t reinstall it damp; drying prevents stale odors.
Clean the Single-Serve Needle
The carafe lid isn’t the only small part that can affect flavor: clean the single-serve brewing needle after each use or whenever grounds begin to clog it. Residue can restrict hot-water flow, causing extraction or an incomplete cup.
Unplug your machine first. Wipe the needle area, then remove visible grounds and deposits from the opening without forcing debris farther inside. If your model has a removable needle cover or surrounding component, wash it with warm, soapy water and rinse it thoroughly before reassembly.
Follow your owner’s manual for descaling instructions, because mineral buildup can slow brewing. After cleaning, run a water-only brew cycle without a pod to flush loosened debris. Don’t make coffee until the rinse cycle finishes; cleaner, scale, or grounds can affect flavor.
Conclusion
For fresh-tasting coffee, clean your brewer after each use: discard grounds, rinse the basket and carafe, and wipe the hotplate. You’ll descale monthly if you use hard water, or every three months otherwise.
Clean a single-serve needle weekly and follow the manufacturer’s instructions. Run water through the machine after vinegar cleaning until no odor remains. Before use, inspect the cord for damage. This routine prevents buildup, protects flavor, and keeps your coffee maker operating safely.