Drip Coffee Ratio Guide
Start with a 1:17 coffee-to-water ratio (about 15 g for 250 ml, 29–30 g for 500 ml) and use 90–96°C water.
Aim for a 2:30–4 minute total brew time and adjust grind to control extraction: finer if it’s sour or thin; coarser if it’s bitter or harsh.
Keep grind consistent with a burr grinder.
Do flowchecks to avoid channeling, and tweak small steps while keeping dose steady.
Keep going to learn precise fixes and timing.
Quick Overview
- Aim for a 1:16–1:18 coffee-to-water ratio; 1:17 is a practical starting point for balanced drip coffee.
- For common volumes: 250 ml ≈ 15 g coffee, 500 ml ≈ 29–30 g, 1000 ml ≈ 55–59 g.
- Use water at 90–96°C (195–205°F) and target a 4–6 minute total brew time for many drip brews.
- Adjust grind finer if the cup tastes sour or under-extracted. Adjust coarser if bitter or over-extracted, changing in small steps.
- Prioritize consistent burr grinding, fresh beans, and flowchecks to prevent channeling and ensure even extraction.
Grams-to-Water Ratios Chart
Curious how many grams of coffee you need for a specific amount of water? You’ll use the 1:16–1:18 range as your guide, with 1:17 as the practical gold standard. For 250 ml, aim for ~15 g; for 500 ml, about 29–30 g. Start at 1:16 if you like stronger cups. Move to 1:18 for lighter brews.
Grind coarser? Lean lower in the range. Grind finer? Add water to avoid over-extraction. Don’t treat this as an irrelevant topic or a random pairing exercise: ratios directly affect extraction and flavor.
| Water (ml) | Coffee (g) |
|---|---|
| 250 | 13.9–15 |
| 500 | 27.8–30 |
| 1000 | 55–59 |
Brew Time & Flowchecks
How long should your drip brew take, and how do flowchecks help you hit the sweet spot? You want a total brew time that lets extraction reach taste balance: typically 4–6 minutes for many drip brewers. Use flowchecks to confirm even saturation and avoid channeling. They will also tell you if water temperature or dose needs adjusting.
- Time: Aim for consistent 4–6 minute cycles to approach the target ratio.
- Flowcheck: Watch for steady, even flow through the grounds; not rapid streams.
- Water temperature: Keep 90–96°C (195–205°F) to extract desirable flavors without bitterness.
- Adjust: Tweak pour rate, bed depth, or temperature if extraction skews sour or astringent.
Regular checks keep your brew predictable and balanced.
Grind Size for Pour-Over
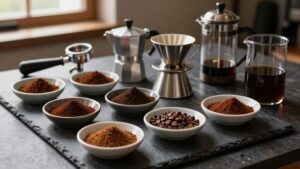
Your grind size shapes extraction and flavor, so you’ll want to understand basics like particle size and consistency. You’ll learn how to tweak grind for strength and timing. You’ll also learn how grind interacts with brew time, which grinders give the best consistency, and how to troubleshoot common problems like channeling or over-extraction.
Start by matching your grind to your pour rate and adjust in small steps until the cup tastes balanced.
Grind Size Basics
Why does grind size matter so much for pour-over? It controls extraction speed: finer grounds extract faster, coarser grounds slower. You’ll tweak grind size to hit that sweet 1:17 range without over- or under-extracting. Grind consistency matters more than tiny size differences; uneven particles brew unevenly.
Pay attention to grind temperature and bean storage. Warmer grinds speed extraction slightly. Grinding immediately after roast or in a hot kitchen can change brew dynamics. Store beans in a cool, dark spot and grind just before brewing to preserve volatile aromas and predictable extraction.
Use a burr grinder; start medium-fine for most pour-overs, then adjust in small steps. Keep notes: small changes in grind often beat big ratio shifts for dialing-in clarity and balance.
Adjusting For Taste
Wondering which grind tweaks will make your pour-over taste right? You’ll adjust grind size to nudge extraction and achieve the taste balance you want. If the brew tastes sour or thin, grind finer to expose more surface area and lift sweetness. If it’s bitter or harsh, coarsen slightly to slow extraction.
Change grind in small steps: one click or a quarter turn, then taste. Keep water scaling consistent while you tweak grind so strength stays predictable. Only alter water ratio after dialling in grind. Track each test: grind setting, grams of coffee, water scaling ratio, and tasting notes. That disciplined approach helps you converge quickly on a repeatable, preferred pour-over profile.
Grind And Brew Time
How long should your grounds sit in water? You want a grind that matches your pour over duration so extraction hits balance. If your grind is too fine, brew time shortens and over-extraction risks bitter notes. If it’s too coarse, grind time lengthens and coffee tastes weak.
Aim for a medium-fine grind for typical pour-over durations of 2:30–3:30 minutes with a 1:17 ratio as a starting point. Adjust in small steps: finer to slow flow and boost extraction; coarser to speed flow and lighten strength. Monitor taste and total pour over duration together. Altering grind size gives you precise control without changing dose.
Record settings so you can repeat the best cup.
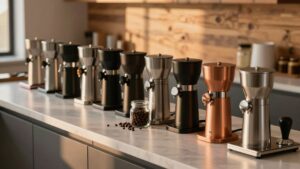
Grinder Types Compared
Now that you know how grind size and brew time interact, pick a grinder that gives you consistent, repeatable particles for your target pour-over range (about medium-fine for 2:30–3:30 minutes). If you want precision, choose a burr grinder; conical or flat burrs control particle distribution and extraction more reliably than blades.
Expect quieter operation from some models; consider grinder noise if you brew early mornings. Manual burrs give excellent control with minimal noise but require effort. Electric burrs speed up dosing and keep settings repeatable. Whatever you pick, follow regular burr maintenance to preserve consistency: clean grounds and oils, check alignment, and replace worn burrs on schedule.
A well-maintained grinder keeps your pour-over extraction predictable and balanced.
Troubleshooting Common Issues
Struggling with sour, bitter, or flat pour-overs often points to grind size issues. Start by checking your particles for consistency and adjusting in small steps. If your brew tastes under-extracted (sour, thin), make the grind finer or increase brew time slightly. If it tastes over-extracted (bitter, harsh), coarsen the grind or shorten contact time.
You’ll want to dial in grind size relative to your chosen ratio. Finer grinds need slightly more water to avoid choking; coarser grinds pair with lower water ratios. Use these tips: test one variable at a time, record grind setting and ratio, and taste.
Ignore irrelevant topics like bean origin when troubleshooting grind mechanics. Focus on grind, dose, water, and time.
Frequently Asked Questions
Can I Use Tap Water or Should I Use Filtered Water?
You can use tap water, but filtered water usually makes better coffee. Tap water works if it’s fresh and tastes neutral. However, minerals, chlorine, or hard water can mute flavors or clog your machine.
Filtered water removes off-flavors and balances minerals for clearer extraction; you’ll taste beans more vividly. If your tap is excellent, stick with it. Otherwise, switch to filtered water for consistently cleaner, brighter brews.
How Long Do Brewed Drip Coffee Leftovers Stay Good in the Fridge?
You can keep brewed drip coffee leftovers in the fridge for 3–4 days. After that, flavor degradation becomes noticeable. Store them in an airtight container to slow oxidation and off-flavors. Refrigeration after brewing temperature drops preserves aroma better than leaving it out.
Reheat gently to avoid further flavor loss, and taste before drinking. If it smells sour or stale, toss it. For best results, drink within 24–48 hours.
Does Altitude Affect Coffee-To-Water Ratio?
Yes, altitude impact can require a ratio adjustment. At higher altitudes, water boils at lower temperatures; so extraction slows. You’ll often compensate by using a slightly finer grind, a touch more coffee (lowering the water ratio toward 1:16), or longer contact time.
At low altitude, you can stick nearer 1:17–1:18. Taste-test and tweak: small ratio adjustments plus grind and brew time changes will keep balance.
Can I Scale Recipes for a Commercial Coffee Maker?
Yes, you can scale recipes for commercial machines by keeping the same coffee-to-water ratio: start at 1:17 and multiply to match batch volume. Use grams; adjust for grind and roast; and test cups from each batch.
Calibrate dose per hopper and program brew cycles. Then tweak slightly for extraction. Document settings and train staff so every batch stays consistent across shifts and machines.
How Does Milk or Creamer Change Perceived Strength?
Milk or creamer dilutes brew strength, so you’ll perceive coffee as milder. However, they also add milk flavor and alter texture perception. Fat and sugar coat your tongue, softening bitterness and reducing perceived acidity. Proteins change body and mouthfeel. That makes cups seem smoother and less intense even at the same ratio.
If you want boldness with cream, brew stronger or use a lower water-to-coffee ratio to compensate.
Conclusion
You’ve got the essentials to brew reliably great drip coffee. Use the grams-to-water ratios as your starting point; dial grind size and brew time to match flow, and let taste guide small tweaks.
Check your grinder type and adjust for consistency. Troubleshoot channeling, sourness, or bitterness with grind, dose, and water temperature changes. Keep notes on each change so you can repeat the hits and quickly fix the misses.