Espresso Machine Water Filter Compatibility Chart
You’ll quickly match cartridges, fittings, and orientations by checking three things: cartridge dimensions (e.g., 2.75″ x 20″ or Saeco bay 140x70x60mm), inlet/outlet connection type (3/8″ quick‑change, FNPT), and flow direction markings.
Track lifespan in liters or cups and replace at recommended intervals (typ. ~300 cups or 2 months, annually max). Mount cartridges upright unless specified. Confirm bypass valve position and test at operating pressure.
Continue for detailed compatibility tables and installation tips.
Quick Overview
- Confirm cartridge outer/inner dimensions (e.g., 2.75″ x 20″ OD x L, and inner core ID) for housing and head fit.
- Verify connector type and size (commonly 3/8″ FNPT or 3M-style quick-change fittings) before ordering.
- Match inlet/outlet orientation and flow arrows to machine plumbing to prevent bypass or reduced flow.
- Check recommended lifespan (liters, cups, or months) and set replacements at least annually regardless of remaining capacity.
- Mount filters upright unless allowed horizontal. Test at operating pressure to ensure bypass and valves function.
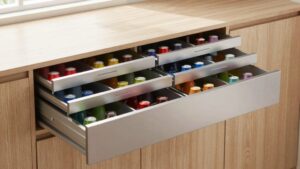
Filter Cartridge Dimensions Chart
Curious which filter cartridge will fit your espresso machine? You’ll check outer diameter, inner core ID, and length: those dimensions determine fitment, not an irrelevant topic or unrelated subject like media chemistry. Measure your current cartridge: common standards include 20″ x ~2.75″ OD for whole-house housings and 140 x 70 x 60 mm for Saeco/Philips bay filters. Note flush-valve heads or quick-change fittings when present.
| Dimension | Typical Value | Notes |
|---|---|---|
| OD x L | 2.75″ x 20″ | Fits standard 20″ housings |
| Bay Filter | 140x70x60 mm | Saeco/Philips Intenza+ |
| Quick-change | 3/8″ FNPT | 3M-style head-in-valve fittings |
Confirm core ID and connection type before ordering.
Filter Lifespan & Capacity
After confirming the correct cartridge dimensions and connection type, you should plan filter replacement based on both capacity (liters or number of cups) and elapsed time. You’ll track lifespan capacity and replacement intervals to protect boilers and optimize taste.
Use meters or counters where available and log calendar reminders; don’t rely on visual cues alone. Typical guidance: anti-calcium filters ~300 cups or 2 months; cartridge maximums vary by model and must be adhered to even if unused. Consider pre-soak and flow meters to ensure accurate capacity tracking.
Set calendar alerts keyed to manufacturer replacement intervals and recorded liters. Program inline AQUAmeter or similar with cartridge maximum capacity.
Replace annually at minimum regardless of remaining capacity to prevent degradation.
Installation Orientation Rule
When you install a filter, confirm inlet and outlet orientation and follow the flow direction markings to prevent bypass or reverse flow. Mount cartridges vertically unless the manufacturer explicitly allows horizontal installation, since gravity and system pressure affect filter performance and sealing.
Also, check bypass valve position and pressure requirements so the unit engages correctly under your machine’s water pressure.
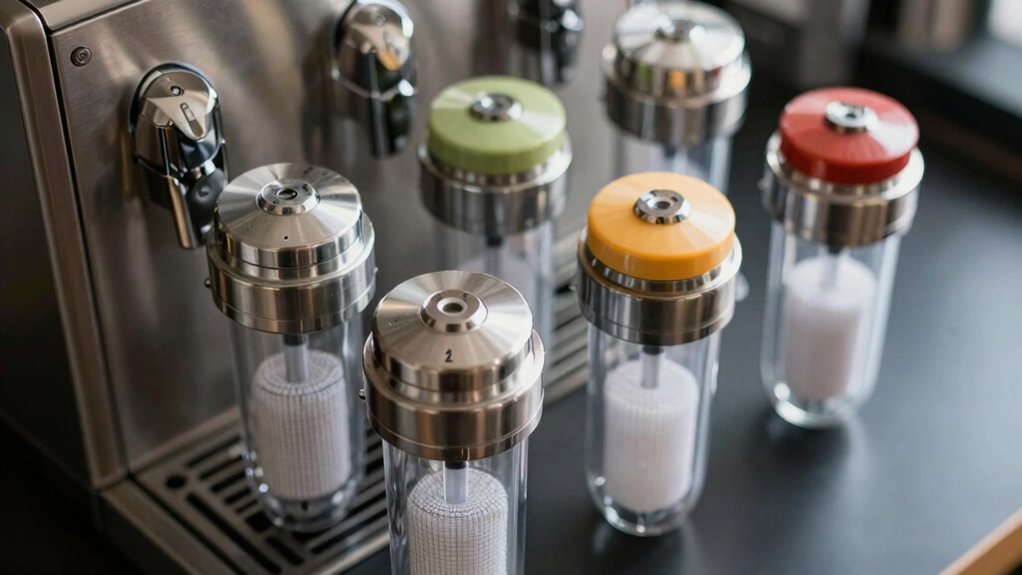
Inlet vs Outlet Orientation
How should you orient the filter head? You’ll match inlet orientation to the incoming supply and outlet orientation to the machine feed. Confirm arrow markings on the head: inlet orientation faces the house water hose, outlet orientation points to the machine connection.
Incorrect orientation can allow bypass, reduce flow, or void auto shut-off features on heads like BWT Besthead FLEX. When plumbing, keep fittings straight and avoid twisting hoses that stress seals. Use the correct 3/8 BSP or compression connections.
Verify the flush valve operation after installation to ensure flow direction is correct. If your head has replaceable connectors, swap them to maintain proper inlet/outlet alignment rather than re-routing plumbing.
Vertical Versus Horizontal Mounting
Why mount the filter vertically or horizontally? You’ll choose orientation based on space, service access, and manufacturer specs. Vertical mounting typically ensures full cartridge drainage, consistent flow profiles, and easier sediment shedding. Manufacturers often specify vertical mounting for inline cartridges to preserve rated capacity.
Horizontal mounting can save space under counters or beside boilers; however, it may trap air pockets and require more frequent priming. When you install, follow the filter head’s mounting plane, secure bracket alignment, and maintain recommended clearances for changing cartridges and actuating built-in flush valves.
Check hose routing to avoid kinks that alter pressure. In short, favor vertical mounting for performance and horizontal mounting only when space constraints demand it. Always confirm your machine’s installation guidelines.
Flow Direction Markings
Ever checked the arrows stamped on a filter cartridge and wondered if they really matter? You should follow those flow direction arrows: cartridges and inline heads are engineered for a specific installation orientation to ensure seals, media layers, and bypass valves work correctly. Installing opposite flow can reduce contact time, bypass ion-exchange resin, or trigger the head’s check valve, causing leaks or poor scale control.
When you fit a cartridge, align the arrow with incoming water and secure the head per manufacturer torque/specs. For retrofit adapters, confirm they preserve the original flow path. If you see reduced performance after installation, re-check orientation first; it’s the simplest diagnostic step before testing hardness or replacing parts.
Gravity And Pressure Effects
You already learned that arrow orientation matters for flow path and valve function. Gravity and system pressure add another layer to correct installation. You must mount cartridges and heads so gravity effects don’t create air pockets or starve downstream valves.
Install filter bodies upright when manufacturers require vertical flow to maintain internal valve seating and consistent media contact. Account for pressure effects from mains or pump boosts; excessive inlet pressure can deform seals or force bypasses open. Fit pressure reduction valves and test at operating pressure before finalizing routing.
When using inline heads, ensure hoses run without high loops that trap air. Confirm orientation against the spec sheet and re-check for leaks and consistent flow under normal pressure conditions.
Filter Bypass Positioning
How should you orient the bypass relative to flow and gravity to guarantee predictable operation? You should align the filter bypass so bypass ports are downstream of the primary element and on the low side of the housing; that keeps bypass flow consistent under varying pressures.
During installation orientation, mount the head so the bypass outlet points slightly downward, preventing air pockets and ensuring reliable venting. Verify flow direction arrows match supply flow and that the bypass seating surfaces are vertical or lower to gravity to avoid inadvertent partial bypassing.
Test at operating pressure to confirm full filtration, with bypass only activating at designed differential pressure. Document the chosen installation orientation for maintenance and repeatable replacement procedures.
Frequently Asked Questions
Do BWT Filters Require a Pressure Reducer for All Machines?
No, BWT filters don’t always require a pressure reducer for all machines. You’ll need pressure regulation when your incoming supply exceeds the machine’s specified inlet pressure, typically above 2–8 bar.
Install a reducer to protect valves and seals; it also ensures stable water mineralization through the cartridge. Check your machine’s manual and BWT installation guidance. If mains pressure is within spec, you can fit the filter without an added reducer.
Can I Use Brita Intenza+ in Non-Saeco Machines?
Yes, but beware: Brita Intenza+ incompatibility can occur with many brands, so non-Saeco machine usage isn’t guaranteed.
You should check your machine’s manual and connector type, verify physical fit, and confirm the filter’s flow and pressure specs match the brewer. If unclear, contact the manufacturer or use a compatible alternative.
Incorrect fit or mismatched specifications can impair filtration, trigger faults, or damage internal sensors and valves.
How Does Ion Exchange Affect Coffee Flavor?
Ion exchange softens water by replacing calcium with sodium or magnesium, and that alters coffee flavor directly. You’ll get cleaner extraction, fewer bitter scale-derived notes, and a brighter aromatic profile when hardness is reduced appropriately.
Too much mineral removal can flatten taste and reduce crema. Balanced ion exchange, adding magnesium, can enhance sweetness and mouthfeel. You should adjust settings based on water hardness to preserve optimal coffee flavor.
Are Refillable Cartridges Compatible With Besthead FLEX?
Yes, you can use refillable cartridges with Besthead FLEX in many setups. However, cartridge compatibility depends on physical fit and seal type. You’ll need refillable cartridges designed for Besthead FLEX dimensions and the same thread/seal standard; otherwise, leaks or bypass can occur.
Test for proper seating and run a flush cycle. Keep records of recharge materials and replace media per BWT recommendations to protect your machine and maintain performance.
What Happens if I Set the Wrong Blend Level?
If you set the wrong blend, you risk scale buildup or over-softened water. You’ll notice flavor impact: sour or flat shots and reduced crema. Wrong blend can violate machine compatibility limits for cartridge types; this can cause faulty performance or damage.
You’ll need to test and reset per water hardness charts. Additionally, replace cartridges if exposed to improper conditions, and monitor maintenance intervals to restore proper operation and protect your machine.
Conclusion
You’ve now got the key facts to pick and install the right espresso machine water filter. Match cartridge dimensions and lifespan to your usage, and follow the installation orientation rule: inlet to inlet, outlet to outlet.
Note vertical vs horizontal mounting limits, flow direction markings, and how gravity or system pressure can create bypass issues. Position the bypass correctly to preserve filtration and ensure consistent flow for reliable espresso extraction.