Grinder Calibration Checklist
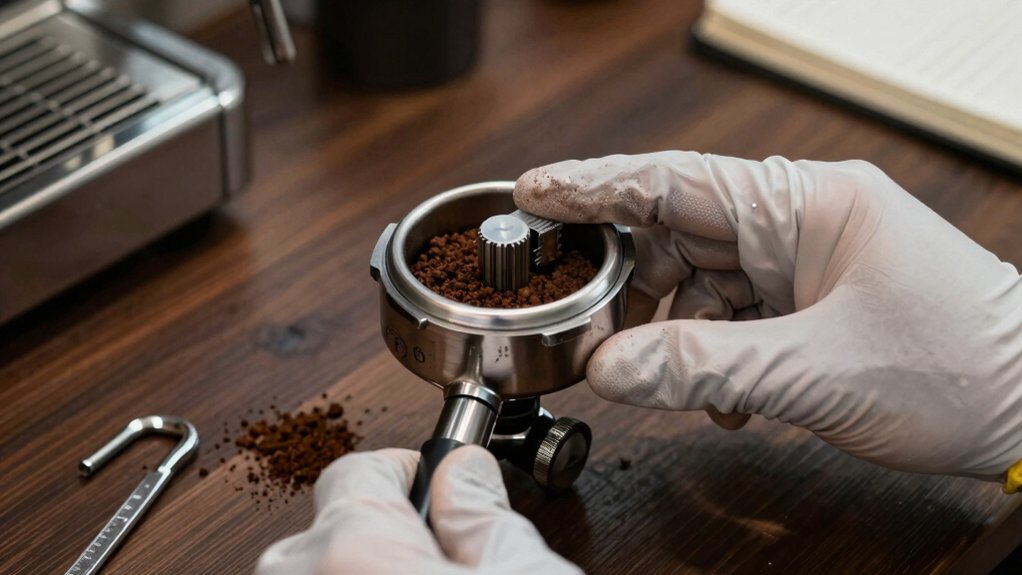
You’ll follow a compact, methodical checklist to ensure consistent extraction: confirm burr diameter suits your workload and upgrade requirements.
Inspect alignment, mounting, and geometry after any change.
Set and weigh a daily target dose to 0.1 g tolerance across three trials and log environmental data.
Verify motor max RPM against wheel rating and establish a documented minimum safe speed under load.
Measure RPM with a calibrated tachometer and lock controls to prevent accidental changes.
Keep going to see the full calibration steps.
Quick Overview
- Verify burr size, condition, and appropriate category (40–64mm, 64–80mm, 83–102mm, >102mm) for your application.
- Confirm burr alignment, mounting geometry, and increased weight/clearance when upgrading burrs.
- Set and verify a daily target dose by weighing three single-dose trials to 0.1 g and averaging.
- Record motor and wheel max RPMs; confirm with a calibrated tachometer, and prevent overspeed with governors or locks.
- Establish and document minimum safe RPM under load. Monitor for under-speed symptoms and lockout until resolved.
Burr Diameter Comparison Chart
Why does burr diameter matter? You need to match diameter to use: larger burrs give clearer separation and consistency, but they bring burr diameter limitations and grinder size tradeoffs you must accept. Use the chart below to compare practical ranges and performance.
| Category | Typical outcome |
|---|---|
| 40–64mm | Compact, entry-level; quicker muddiness at espresso dial-in |
| 64–80mm | Better clarity; 64mm finicky, 80mm more stable |
| 83–102mm | Commercial clarity; superior separation, higher cost |
| >102mm | Specialized gains; alignment sensitivity increases |
You’ll inspect alignment, mounting, and geometry when upgrading. Expect increased weight, cost, and the need for stricter alignment with larger burrs. The benefits justify tradeoffs for demanding applications.
Daily Dose Settings
How much should you dose each time to get consistent extractions? You’ll set a daily target dose, then verify it against grinder output to preserve grind consistency and dosage accuracy. Follow a measured routine, record deviations, and adjust settings minimally.
1. Weigh a single dose to 0.1 g tolerance, run three trials, and average results to establish baseline.
2. Check particle uniformity after dosing; inconsistent particles indicate a setting or feed issue affecting grind consistency.
If average dose drifts, recalibrate feed rate or stop-start timing rather than changing grind size; this preserves dosage accuracy.
3. Log daily temperature, humidity, and dose variance. Trends will reveal when mechanical maintenance or recalibration is needed.
Motor RPM Limits
You’ll confirm the motor’s maximum RPM spec and the minimum safe speed before any calibration step. Use precise RPM measurement methods and define acceptable speed tolerance limits so you can detect RPM drift during operation.
Record measurements and set alarms or maintenance actions if RPM moves outside those established bounds.
Max RPM Specification
When calibrating your grinder, establish the motor’s maximum safe RPM and confirm it never exceeds the abrasive wheel’s rated RPM; doing so prevents catastrophic wheel failure and ensures consistent grind quality. You’ll record the motor’s max rpm from the nameplate. Then, cross-check the wheel sticker and documentation for rpm limits.
If the motor rating approaches the wheel’s limit, fit a lower-speed wheel or install a speed governor. Verify settings with a calibrated tachometer under no-load and operational conditions, documenting readings. Lock or tag the control to prevent accidental overspeed changes. Include the verified max rpm in your calibration log.
Recheck after maintenance or wheel replacement to maintain safety and repeatable grind performance.
Minimum Safe Speed
Why isn’t a minimum safe motor RPM tracked with the same rigor as the maximum? You must treat minimum safe speed as a measured limit that preserves cutter engagement, prevents stalling, and maintains grinder safety. Establish a documented minimum RPM for each wheel and material based on manufacturer guidance and empirical testing.
During calibration precision checks, verify the motor sustains that RPM under load without torque drop or vibration spikes. If the motor falls below the minimum, stop and inspect for worn bearings, electrical faults, or binding in the mechanism. Record conditions, corrective steps, and re-test.
Maintain a lockout procedure for speeds beneath the minimum, and train operators to recognize symptoms of under-speed. Consistent monitoring ensures both product quality and ongoing grinder safety.
RPM Measurement Methods
How do you accurately determine a grinder’s operating RPM and ensure it stays within motor and wheel limits? Use a digital tachometer to measure spindle speed under load and compare readings to nameplate RPM and wheel maximums. Record baseline values. Then repeat measurements after warm-up and during representative grinding to detect calibration drift.
Cross-check with an optical tach or strobe for non-contact verification if access is limited. Log results and set action thresholds when readings approach motor or wheel ratings. Inspect for tool wear and balance issues when RPM varies unexpectedly. If RPM exceeds safe limits or fluctuates beyond thresholds, stop and correct bearing, coupling, or control faults before resuming.
Maintain periodic RPM checks as part of preventive maintenance.
Speed Tolerance Limits
Curious what RPM margin keeps your grinder safe and effective? You must set clear speed tolerance limits tied to the wheel and motor ratings. Define an acceptable operational band: typically ±5% of target RPM unless the manufacturer specifies otherwise; record that as your speed tolerance.
Ensure the motor’s maximum RPM never exceeds the abrasive wheel’s rated max; label both values on your checklist. During calibration, run the grinder at low, nominal, and high points within the band to confirm mechanical stability and torque response. If you observe rpm drift beyond the band, stop and inspect bearings, belts, and electrical supply before proceeding.
Document limits, test points, and corrective actions so future calibrations follow the same strict criteria.
RPM Drift Monitoring
Anyone monitoring RPM drift must track and limit motor speed variations to protect the abrasive wheel and preserve grind quality. You’ll establish a baseline RPM at the desired grind setting, record it, and define an acceptable speed tolerance band around that baseline.
Use a calibrated tachometer or encoder and log readings during startup, steady state, and load changes. If RPM drift exceeds the tolerance, stop operations, inspect drive belts, motor brushes, and control electronics, and verify wheel balance and mounting.
Implement automated alerts for sustained deviations and schedule preventive maintenance based on drift frequency. Document each incident, corrective action, and outcome so you can refine speed tolerance thresholds and reduce recurrence while maintaining safety and consistent particle size.
Frequently Asked Questions
How Often Should Grinder Wheels Be Replaced?
You should replace grinder wheels every three years or sooner if you observe grinder wear affecting performance. Check wheels at each calibration interval and during routine maintenance for cracks, excessive wear, or RPM rating mismatches.
If particle consistency degrades or tests show uneven grinding, change the wheel immediately. Keep manufacturer stickers intact, document replacement dates, and align replacements with scheduled calibration intervals to maintain safety and consistent grind quality.
Can Sticky Herbs Be Frozen Before Grinding?
Yes, you can freeze sticky herbs briefly to firm them, which reduces clogging and helps the grinder operate cleanly. Use rapid freezing methods like a few minutes in the freezer or sealing herbs in a zip bag on ice. Avoid full deep-freeze that can damage trichomes. Thaw only slightly before grinding to preserve potency and consistency.
Discussion ideas: flavor preservation, tool sterilization.
Are Grinder Parts Dishwasher-Safe?
No: you shouldn’t assume grinder parts are dishwasher-safe. Inspect grinder components for manufacturer guidance and removable labels. Many metal or coated parts can corrode or lose finish in a dishwasher.
You’ll clean most pieces by hand with warm water, mild soap, and thorough drying to prevent rust or contamination. For electrically operated or labeled parts, never immerse them. Verify dishwasher safety only if explicitly stated by the manufacturer.
How Do I Verify Electrical Grounding?
To verify electrical grounding, you’ll first disconnect power and use a multimeter or receptacle tester to measure continuity between the grinder’s ground pin and a known earth ground. That’s how to test grounding.
Confirm resistance is near zero. Look for loose or corroded connections, missing grounding conductors, or sparks: these are signs of poor grounding. If you find issues, stop use and have a qualified electrician repair the grounding immediately.
What Records Should Be Kept for Calibration Iterations?
You should record each calibration iteration with timestamps, operator ID, settings changed, and measured outcomes to ensure calibration traceability. Log target and achieved grind sizes, deviations, and acceptance status. Track tolerance for each parameter.
Include photos or particle-analysis data, cleaning and wheel-inspection notes, RPM and pressure used, and any corrective actions. Keep retained samples and versioned procedure revisions for audits and continual improvement.
Conclusion
You’ve covered burr diameter, dose settings, motor RPM limits, and measurement methods. Now tie it together. Use the burr diameter chart to set starting doses; then verify daily doses against your target.
Keep RPM between the max and minimum safe speeds. Monitor drift with consistent measurement methods; enforce tolerance limits. If RPM trends toward limits, service or recalibrate immediately.
Stay methodical: document readings, changes, and actions so your grinder stays predictable and safe.