Whole Milk Vs Oat Milk for Frothing
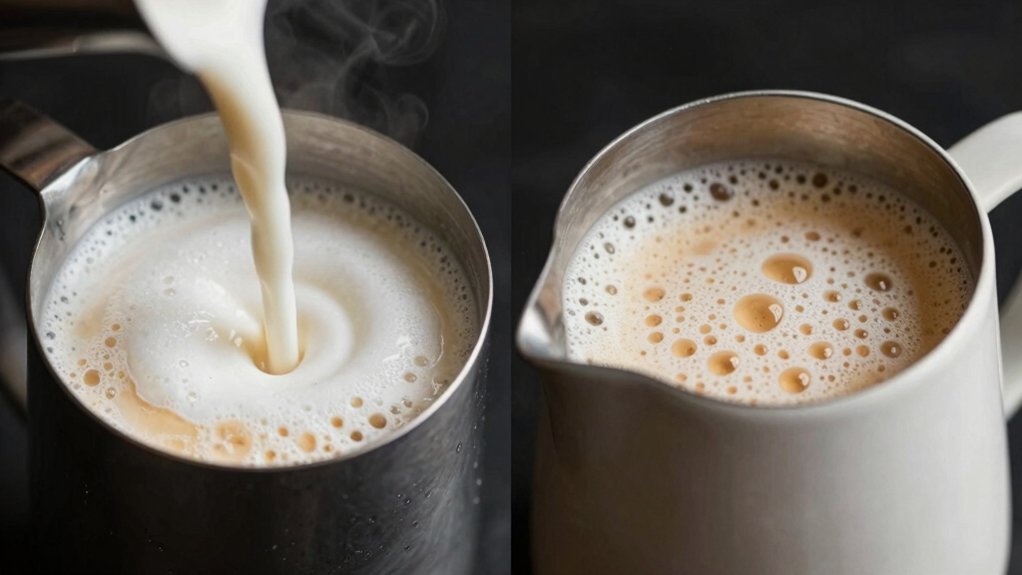
You’ll get creamier, more stable microfoam with whole milk because its fat and protein balance traps tiny bubbles and holds texture. Steam to 60–65°C and stop before scorching.
Oat milk, especially standard varieties, makes larger, quicker-collapsing bubbles. Barista-formulas foam better but can still break down sooner; use gentler aeration and lower final temperature. Purge and wipe the wand between steams.
Keep going to learn practical steaming steps and troubleshooting.
Quick Overview
- Whole milk produces abundant, silky microfoam with small, stable bubbles; this is ideal for Latte Art.
- Standard oat milk often foams into larger, weaker bubbles and yields less consistent microfoam.
- Barista-formulated oat milk gives more predictable, silky foam; however, it can collapse sooner than dairy.
- Aim for 55–65°C. Stop aeration around 38°C to optimize sweetness and foam stability for both milks.
- Purge and wipe the steam wand between steams. Record temperature and steaming time for consistent results.
Froth Yield & Texture Comparison
Wondering which gives better foam? You’ll find whole milk delivers abundant, silky microfoam with small stable bubbles, easy for beginners. Standard oat milk produces variable, larger-bubbled froth and often weak yield. Barista editions mimic dairy more closely but collapse sooner.
Consider foam chemistry: dairy proteins and 3% fat trap air and stabilize structure, while oat’s lower protein needs fortification.
| Milk Type | Froth Yield | Texture |
|---|---|---|
| Whole Milk | Abundant, predictable | Silky, small bubbles |
| Standard Oat | Minimal–moderate, variable | Larger bubbles, disrupted |
| Barista Oat | Abundant, predictable | Silky-ish, shorter lasting |
Use this comparison when evaluating dairy alternatives and choosing technique for consistent results.
Protein-To-Fat Ratio Chart
How do protein and fat work together to determine frothing performance? You’ll use a simple protein-to-fat ratio chart to predict foam density and behavior. Track protein ratio (protein divided by fat) for each milk: Whole milk sits near the ideal balance, giving dense, stable microfoam. Oat milks often show lower protein ratio, yielding larger bubbles and weaker foam. Read the chart to choose milk and adjust technique.
Compare protein ratio values for whole milk, barista oat, and regular oat. Note foam density expectations tied to each ratio. Use the chart to decide if you need fortified oat milk or stick with dairy. Record temperature and steaming time alongside ratios for consistency.
This keeps choices objective and repeatable.
Barista Tips for Steaming
Keep your milk between 55–65°C and stop before it scorches to preserve sweetness and stability. Angle the pitcher so the steam wand creates a steady vortex. Introduce air briefly at the surface for microfoam; then bury the tip to texturize.
Wipe and purge the wand between steams to prevent cross-contamination and maintain consistent texture.
Milk Temperature Control
When steaming, aim for 55–65°C (130–150°F); you’ll get the best sweetness, texture, and foam stability in that range. Keep a thermometer or tactile habit: stop at the lower end for oat milk to avoid scorching and near 60°C for whole milk to balance sweetness and body.
Practice temperature control so proteins denature correctly and fats emulsify, producing stable microfoam. Heat too much and you’ll accelerate foam collapse and scorch flavors; heat too little and foam will be loose and underdeveloped. Monitor pitcher warmth and use sustained, gentle steaming rather than forcing rapid temperature rise.
For oat milk, be especially cautious: its lower protein makes it prone to collapse if overheated. Cool promptly if you overshoot to preserve texture.
Steaming Technique Basics
Why does steaming feel tricky at first? You need steady hands and clear steps: purge the wand, angle the pitcher, submerge the tip just below the surface, and introduce air briefly before dropping to texturing position.
Watch the pitcher’s temperature; stop at 60–65°C for whole milk and slightly lower for oat milk to avoid breakdown. Listen for a consistent, faint hissing then a low whirl; that sound guides aeration and stretching.
Ignore branding myths that claim exotic techniques trump fundamentals: technique matters more than label hype. Note sensory differences as you steam: whole milk will feel silkier and warmer to touch, while oat milk can seem lighter and cooler.
Practice short, repeatable routines to build muscle memory and consistent results.
Microfoam Texture Tips
You’ve practiced the basic steaming routine; now sharpen how you create microfoam for silky texture and latte art. Start with cold, fresh milk in a chilled pitcher and purge the wand. Submerge just below the surface to introduce controlled air for the first 2–4 seconds. Then lower the pitcher slightly to create a vortex.
Maintain steady motion to break larger bubbles into uniform ones; watch the surface tighten into glossy, paint-like milk. Stop aeration before the milk reaches 38°C. Then continue heating to 55–65°C, avoiding scorch.
Tap and swirl to integrate air and liquid, ensuring consistent microfoam texture. For oat milk, be gentler with aeration and faster with integration to maximize froth stability. Practice precise timing for repeatable results.
Pitcher Angle & Position
How should you hold and tilt the pitcher to get consistent microfoam? You angle the pitcher so the spout sits slightly above the steam tip, creating a controlled vortex. Maintain a 20–45° pitcher angle depending on pitcher size; too steep slows circulation, and too flat splashes.
Set the milk position so the steam tip hugs just below the surface for aeration; then lower slightly to submerge for texturing. Use your wrist to adjust angle, not the elbow, keeping movements small and steady. Anchor the pitcher against your body for stability.
Watch milk position and the whirlpool: consistent roll means even heating and fine bubbles. Adjust angle and depth quickly when switching from whole milk to oat variants to preserve microfoam quality.
Cleaning Between Steams
Once you’ve set the pitcher angle and achieved a steady whirlpool, clean the steam wand immediately before and after each steam to prevent milk residue from burning and altering flavor. Wipe the tip with a damp, lint-free cloth; purge briefly to expel trapped milk; then immerse and purge again if needed.
Between shots, follow a quick cleaning routine: wipe, purge, and cap if your machine supports it. At shift end, perform a deeper soak and backflush per manufacturer guidelines. Check equipment compatibility: some wands and caps tolerate soaking; others need specific detergents or disassembly.
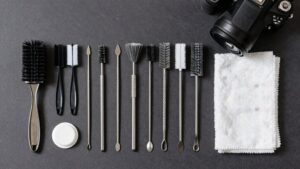
Keep a small brush and approved cleaner on hand. Consistent cleaning routines preserve taste, prevent cross-contamination between whole and oat milk, and extend steam wand life.
Frequently Asked Questions
Does Oat Milk Change Coffee Flavor When Frothed?
Yes, oat milk flavor shifts when frothed. You’ll notice sweeter, grainy notes that become more pronounced as heat amplifies natural sugars. Meanwhile, frothed texture softens acidity and rounds coffee edges.
Barista editions mask graininess and add creaminess; however, foam can taste slightly oatty compared with neutral dairy. Adjust brew strength, temperature, or choose a neutral barista oat to balance flavor and preserve espresso character.
Can Lactose-Free Dairy Froth Like Whole Milk?
Yes, lactose-free dairy can froth like whole milk. You’ll get similar lactose free frothing and dairy foam performance if the product retains normal milk proteins and approximately 3% fat.
Heat and technique matter: steam to about 55–65°C, introduce air briefly, then polish for microfoam. Avoid ultra-high heat processing or heavy homogenization that alters proteins. If protein or fat is reduced, expect weaker, less stable foam.
How Does Altitude Affect Frothing Performance?
Altitude affects frothing consistency by lowering air pressure and boiling point. As a result, you’ll get larger bubbles and faster foam collapse at higher elevations. You’ll need to steam slightly cooler, watch texture closely, and shorten aeration to avoid overexpansion.
Altitude effects hit oat milk harder because lower protein yields less stable foam. Whole milk fares better but still requires tighter temperature control. Adjust technique and timing for reliable microfoam.
Are There Health Differences in Frothed Drinks?
Yes, there are health differences in frothed drinks. You’ll get more protein, calcium, and saturated fat from frothed whole milk, which supports froth stability and provides lasting mouthfeel. However, this raises calorie and heart‑health considerations.
Frothed oat milk gives fewer proteins and often more carbs. Barista blends add oils to improve froth stability but increase calories. Choose based on nutrition goals, allergies, and how much froth stability you need.
Can Home Blenders Improve Oat Milk Froth?
Yes, you can improve oat milk froth at home with a blender. Use cold barista-style or high-protein oat milk. Blend at high speed for 20–30 seconds to incorporate air. Then, heat gently to preserve frothing texture.
For thicker, longer-lasting foam, add a small pinch of soy or pea protein powder or 1 tsp of neutral oil. Practice timing and temperature; you’ll get more consistent blender improvements with repeat trials.
Conclusion
You’ll get more voluminous, silkier microfoam with whole milk thanks to its higher protein-to-fat balance. Oat milk produces creamier, slightly denser foam and needs gentler technique.
Control temperature (55–65°C / 130–150°F), angle the pitcher to create a steady whirlpool, and position the steam wand just below the surface for consistent microfoam. Purge and wipe the wand between steams.
Adjust technique for each milk: faster stretching for oat, subtler aeration for whole milk.