
How Often Should You Replace Coffee Grinder Burrs?
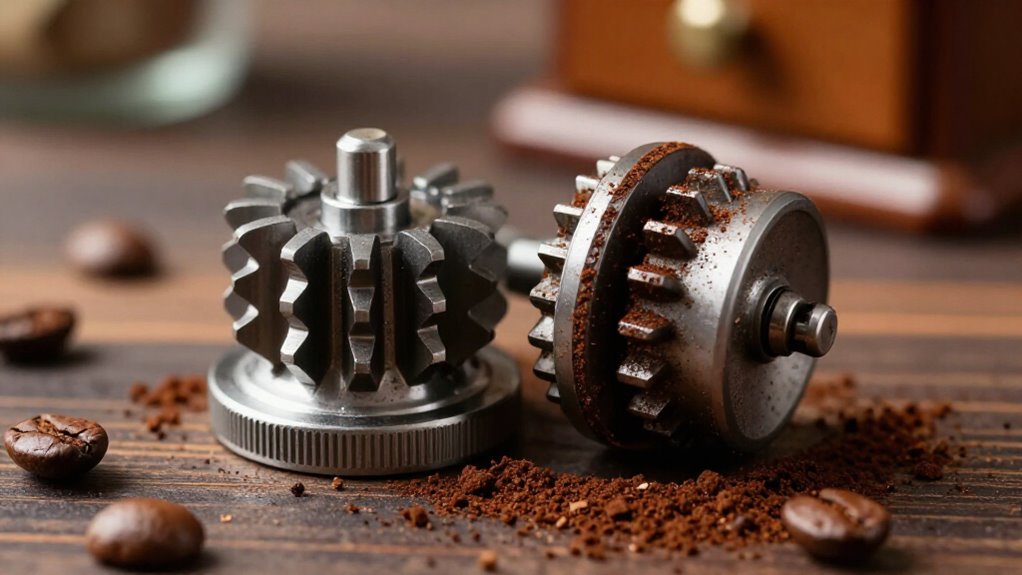
Replace your grinder burrs by cumulative coffee throughput and declining performance, not calendar age alone. Consumer steel burrs may approach 450 kg, while ceramic burrs commonly reach about 340 kg, but deterioration can appear near half those figures.
Replace matched burrs together, especially after chipping, harder grinding, excess fines, clumping, slower shots, or unstable extraction.
Clean and vacuum the chute before calibrating, then track settings and seasonal changes.
Continue for replacement checks and service tips.
Burr Replacement by Kilograms
Burr replacement depends more on cumulative coffee throughput than on calendar age, because every kilogram gradually rounds the burrs’ cutting edges. Track your grinder’s running total in kilograms rather than relying on years of service. As a baseline, consumer steel burrs often warrant consideration near 450 kg, while ceramic burrs commonly reach about 340 kg.
You may notice deterioration around half the manufacturer’s stated throughput, so don’t wait automatically for the maximum. Coated steel, such as titanium-nitride burrs, generally resists abrasion longer than uncoated steel, but it still accumulates wear. Estimate your kilograms per day, multiply by operating days, and compare the running total with the model-specific rating. Replace the matched burr set when throughput and declining grind consistency coincide for your grinder.
Replacement Burrs and Brush
Once you’ve tracked throughput and confirmed declining grind performance, select a matched replacement burr set rather than relying on calendar age alone. Confirm the grinder’s model and part number before ordering; OEM burrs provide factory fit, while aftermarket steel may improve durability or cut quality.
Check these specifications:
- Outer diameter, bore, thickness, and mounting or bolt pattern.
- Tooth count, profile, and flat-versus-conical design.
- Material and coating, since steel generally offers durability, while ceramic retains less heat but is more brittle.
Include a food-safe grinder brush in your service kit. Use it to remove loose grounds from surfaces after disassembly and cleaning.
A brush won’t restore sharp edges or correct wear. If uncertainty remains, contact the manufacturer or service partner to verify compatibility and installation requirements.
Replace Both Burrs Together
Because burrs wear as a matched pair, you should replace both at the same time rather than combine a new burr with a worn one. Mixing them creates uneven cutting and a wider grind-size distribution, reducing extraction repeatability.
Replace the full set when several symptoms converge: harder grinding, increased fines or clumping, slower shots, or unstable extraction. A damaged burr from a foreign object also warrants replacing both, not just the chipped component.
| Evidence | Recommended action |
|---|---|
| Matched wear | Replace both burrs |
| Multiple symptoms | Replace the complete set |
| Chipped tooth | Replace both immediately |
| ~1,500 kg throughput | Plan paired replacement |
After installation, season the matched set, then judge performance only after it settles; track cumulative kilograms because some setups show dulling near 1,500 kg of throughput.
Vacuum Chute Before Calibration
Before calibration, remove loose grounds, inspect the chute interior, and clear any static buildup that could affect retention or dosing. Make sure the chute is fully dry, then run two grind-and-discard cycles to flush residual fines.
You’ll establish a more reliable baseline for calibration and subsequent burr-performance comparisons.
Remove Loose Grounds
With the new burrs installed, vacuum the chute and grinding chamber to remove loose grounds and previous-burr fines before calibration. These retained particles can contaminate your first dialing, temporarily skewing the grind-size distribution and making early espresso extractions appear inconsistent despite sharp, unworn burrs. Burr wear increases dust-fine production, and those particles are particularly difficult to flush out without cleaning.
After vacuuming, run the grinder briefly, or purge a small amount of coffee, so remaining particles don’t sit on the burr surfaces or carry into your calibration shots. Only when the output is clear should you begin seasoning and pulling calibration shots. A clean path gives you a reliable baseline, allowing grind-size comparisons, flow timing, and extraction adjustments to accurately reflect the new burrs.
Inspect Chute Interior
Once the grinding chamber is clear, inspect the chute interior and vacuum passage for caked fines or other buildup. Focus on areas where coffee dust can accumulate and restrict the passage. During burr replacement, remove this residue so old buildup doesn’t mimic burr wear through extra fines, clumping, or altered dosing.
If your grinder uses a vacuum chute, confirm that the passage and collector are clean and unobstructed. A partial blockage can change how much ground coffee reaches the doser, shifting shot results even with fresh burrs.
After cleaning, run a test grind and discard it. This clears loosened particles before calibration, preventing them from skewing initial pulls. Recheck the chute after several days if distribution seems unusual; disturbed residue may alter particle mix.
Clear Static Buildup
Vacuum the chute and transfer path before calibrating the burrs, because static buildup can trap fines, increase retention, and disrupt ground-coffee flow. Use this clean-out consistently; you’ll need it whenever you recalibrate after installing replacement burrs. Removal prevents residue mimicking burr wear and changing grind behavior.
First, inspect the chute for clumps or a film of fines, then vacuum the chute and transfer path thoroughly. Static-related retention can destabilize dose delivery and extraction even when fresh burrs remain sharp.
Afterward, recalibrate and compare flow, shot timing, and dosing consistency. If buildup returns repeatedly between clean-outs, log the pattern and adjust retention-control practices before blaming the burrs. This process helps you separate burr wear from airflow or residue effects, preventing premature replacement of usable burrs.
Ensure Complete Dryness
Before calibrating after installing new burrs, make sure the grounds chute and vacuum path are completely dry; trapped moisture can clump fines and distort initial grind-size adjustments. Run the vacuum or its purge sequence until you see no dampness or sticky residue in the chute. If the area feels humid, wait and let it air-dry rather than relying on appearance alone.
Use a dry-to-the-touch check at the chute outlet and collection area. Towel-dry cleaned components, then allow air-drying time; residual moisture can rehydrate fines during seasoning and testing. Confirm that airflow remains stable and that no wet particles remain in the path. Moisture can temporarily alter particle movement, flow, and distribution, causing you to misread the grinder’s response and make incorrect grind-setting decisions.
Prepare For Calibration
With the chute fully dry, clear it of loose fines and retained grounds from the worn burrs before calibrating the replacement set. Vacuum the chute and surrounding outlet thoroughly, then reseat any removable parts securely.
Residual particles can alter the first grind’s distribution, lengthen or shorten shot times, and make the new burr geometry seem incorrectly calibrated.
After installation, season the burrs with coffee before dialing in. Then calibrate using a consistent dose, target brew method, and stable extraction time.
If you track wear through fines or extraction consistency, cleaning first prevents carryover from imitating dull-burr symptoms. Don’t chase settings created by trapped grounds; confirm performance only after the chute remains clear. Repeat the vacuuming procedure whenever retained coffee could influence subsequent calibration checks.
Seasonal Humidity Changes
Seasonal humidity changes can amplify burr wear by increasing clumping, fines variability, and extraction inconsistency. You may need to adjust grind settings as moisture changes, but persistent coarser or finer corrections can indicate aging burrs rather than seasonal variation alone.
Monitor damp conditions for corrosion, especially on uncoated steel burrs, and inspect them when humidity-related performance changes persist.
Humidity And Burr Wear
Humidity swings don’t usually change burr wear overnight, but they can make its effects appear sooner by increasing the stress and heat generated during fine grinding. During humid periods, you may notice more fines, a broader particle-size distribution, and reduced extraction consistency even when coffee hasn’t changed. Higher-density light and medium roasts already abrade cutting edges aggressively, so repeated fine grinding can accelerate rounding.
Coated burrs, including TiN and DLC types, resist wear better than uncoated steel, but humidity-related variability doesn’t eliminate cumulative degradation. Track kilograms ground by season, and compare extraction consistency and your grinder’s maximum achievable extraction. Increased shot-to-shot variance or a declining extraction ceiling can indicate geometry loss before the burrs reach their rated lifespan. Cleaning won’t restore sharpness; track trends.
Seasonal Grind Adjustments
Burr wear develops gradually, so seasonal humidity changes usually alter how tightly you need to dial in the grind rather than causing sudden degradation. In humid seasons, beans may clump and behave finer, so you’ll need a coarser setting. This can mask wear by limiting extraction ceiling and causing earlier astringency.
Compare grind time, ground temperature, shot variance, and extraction with the same dose and recipe. Longer grinding, hotter grounds, and worsening consistency indicate that dulling or chipping may be adding fines beyond humidity effects.
Track throughput. If your steel burrs approach 450 kilograms, repeated month-to-month moves finer, not ordinary seasonal corrections, support replacement. After installing burrs, season and recalibrate consistently, then judge wear through extraction stability and particle distribution rather than one humid season.
Moisture And Burr Corrosion
When moisture lingers on exposed or lightly coated steel, it can accelerate corrosion and dull the burrs faster than normal abrasion. During humid seasons, residual moisture and coffee oils can promote rust-like surface damage, reducing cutting sharpness noticeably before your expected throughput rating.
Beans may also grind differently, producing more clumping and fines that can conceal or compound burr wear. You may notice wider particle distribution, unstable extraction, or a slower, hotter grind.
Inspect and clean the burrs whenever humidity changes substantially, removing oils and moisture residue with care. If coarser settings, excessive fines, or dulling persist after cleaning and calibration, replace the matched burr set.
Treat manufacturer kilogram ratings as estimates: corrosion can shorten practical service life, even when abrasion alone wouldn’t require replacement.
Shot Times Hold Steady
Stable espresso shot times don’t prove that your burrs are still performing well. Even when timing remains consistent, wear can increase fines and broaden the particle-size distribution. That reduces extraction clarity and ceiling before shot duration changes.
As cutting surfaces dull, you may creep toward finer settings to preserve the same flow rate. With heavily worn burrs, nearly twice as many fines can form at the same gap and speed, promoting less stable extraction and channeling while the timer looks normal.
Using the same blend can conceal this shift, whereas changing coffees makes comparisons unreliable.
Pair shot times with clumping, rising grinder heat or noise, increased fines, and shot-to-shot variance. Clean and recalibrate first; if these signs persist, replace burrs to restore uniformity.
Chipped Cutting Edges Detected
Consistent shot timing won’t rule out sudden burr damage. Inspect the cutting edges whenever stones, metal fragments, or foreign objects may have entered the grinder. A chip disrupts the tooth profile, producing a uneven particle distribution and excess fines than gradual dulling. You may notice channeling, clogging, unstable flow, or changes in pressure and shot behavior even when timing appears normal.
Treat visible chipping as an immediate service condition, not a mileage milestone. Don’t wait for a lifespan such as 450 kg for consumer steel burrs or 1,000–1,500 kg in commercial guidance. TiN- or DLC-coated burrs resist wear, but impacts can damage their edges; coating loss can accelerate performance decline. Replace both burrs as a matched pair, then recalibrate and season the new set.
Ignoring Burr Carrier Alignment
Ignoring burr carrier alignment can create uneven burr gaps that mimic wear, even before a steel burr set reaches its rated throughput. A misaligned carrier increases grinding resistance, making the grinder hotter, louder, and slower while accelerating edge rounding or chipping. Before replacing a set rated for roughly 450 kg, verify carrier seating and alignment.
Check:
- Inspect the carrier, mounting surfaces, and fasteners for debris, damage, or tilt.
- Confirm burrs form a parallel gap throughout rotation; replacing only one component won’t correct misalignment.
- Recalibrate after installation, then assess fines, channeling, unstable flow, and astringency before diagnosing wear.
Misalignment can mimic nearly doubled fines from worn burrs, degrade extraction, waste coffee, and force premature replacement. Correct alignment protects grind uniformity and helps you judge burr life.
Record Weekly Grind Settings
Once you’ve verified burr-carrier alignment, record your grinder setting each week to distinguish genuine burr wear from mechanical or recipe changes. Record the setting that reaches your target shot time or extraction, along with dose, target yield, water ratio, and coffee brand and roast.
Note any gradual creep finer over successive weeks; this drift can indicate dulling edges.
Estimate weekly throughput from your typical dose: divide grams by 1,000 to get kilograms, then multiply by weekly drink volume. Compare cumulative totals with steel-burr guidance, often about 450 kilograms, for replacement planning.
Also log longer grinding times, hotter grounds, dust, or clumping. Recheck trends after a new coffee, humidity change, or cleaning. Consider replacement only when finer drift persists under comparable conditions and identical recipes.
Conclusion
Replace your coffee grinder burrs by workload, not by calendar alone: track kilograms, shot-time stability, and grind-setting drift. When you replace them, install both burrs, clean the chute with a vacuum, and calibrate before dialing in. Use a brush for remaining residue, account for seasonal humidity, and inspect for chipped cutting edges.
Don’t ignore burr-carrier alignment, because it can mimic wear. Record weekly settings so you can identify performance changes early and maintain consistent extraction.