How to Clean a Burr Grinder
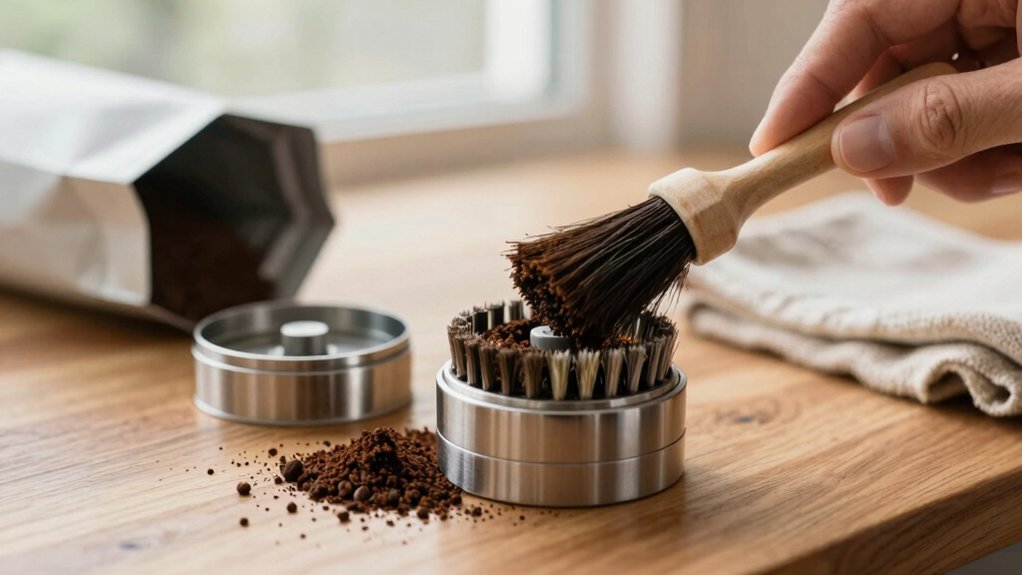
Unplug the grinder, remove the hopper and empty beans. Then brush and vacuum the chute and burrs to remove retained grounds. Flat burrs need cleaning more often than conical ones. Commercial units need immediate attention.
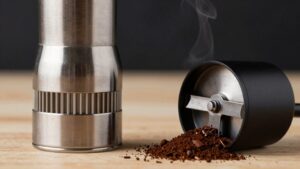
For jams, try soft tools first. Then, a tiny amount of food-safe glide oil on the shaft may be needed. Reassemble by aligning splines and run cheap beans or cleaning pellets to purge residue.
Keep a schedule based on grind size and use to maintain consistency. More detail follows.
Quick Overview
- Unplug the grinder, remove the hopper, and empty beans before any cleaning or disassembly.
- Brush and vacuum the burrs, grind chamber, and chute after each heavy use to remove retained grounds.
- For espresso or fine settings, clean daily; run cleaning pellets or cheap beans. Deep-clean every 2–3 days.
- For coarser settings, brush weekly and deep-clean monthly. Increase frequency for dark roasts or commercial use.
- To free stuck burrs, power off. Remove carriers and gently dislodge grounds with soft tools. Reassemble by aligning splines.
Grind Retention Comparison Chart
How much coffee your grinder holds between uses depends largely on its burr type and internal design. You’ll use the chart below to judge grind retention and set a practical cleaning schedule to prevent stale carryover.
Flat burrs hold more grounds in horizontal chambers, so clean more often. Conical burrs retain less but still need weekly brushing. Commercial units demand immediate, frequent attention.
Run brief purges and vacuum chutes after use. Remove burrs for inspection per your cleaning schedule or every 3–6 months. Focus on chute, chamber, and burr crevices where oils and dust collect. A disciplined routine preserves flavor and reduces extraction variability.
| Type | Retention | Recommended Action |
|---|---|---|
| Flat burr | High | Frequent cleaning |
| Conical | Moderate | Weekly brush |
| Commercial | Very high | Immediate cleaning |
Grind Size-To-Cleaning Schedule
Why does grind size change how often you should clean the grinder? Grind size affects particle surface area and oil release: finer grinds expose more surface, accelerate oil lubrication buildup, and increase burr wear. Match your cleaning schedule to grind use.
- Espresso (very fine): clean daily, vacuum/brush; professional pellet use every 3 days to manage oil lubrication and limit burr wear.
- AeroPress/Fine drip: brush after each session; deep clean every 2–4 weeks depending on roast oiliness.
- Drip/Pour-over (medium): weekly brush; monthly professional clean if using dark roasts.
- Coarse/French press: biweekly cleaning; monthly deep clean. Coarse particles shed less oil but still cause residue.
Adjust for dark roasts and heavy use.
Stuck Burr Removal Tips
Before you touch anything, power off and unplug the grinder to eliminate shock risk. Remove the hopper and grind chamber so you can inspect the burrs. Then try soft tools (brush, vacuum, bent paper clip) to free trapped grounds.
If the burr still won’t move, apply a tiny amount of food-safe glide oil to the shaft. Work the burr gently until it loosens. Then reassemble and test.
Power Off And Unplug
When you’re about to tackle a stuck burr, cut power and unplug the grinder first to eliminate any risk of electric shock or accidental starts. This simple step is the foundation of safe disassembly and gives you full control while working on jammed components.
Start by confirming unplug safety: check the cord, pull the plug, and leave the switch off. Work only when the unit is dead. Keep a small tray for screws and note positioning to speed reassembly. Avoid introducing moisture near electrical parts.
If you plan oil lubrication after cleaning, wait until the grinder is fully reassembled and dry. Apply minimal manufacturer-recommended lubricant only to specified bearings; never to burr surfaces.
Remove Hopper And Grind Chamber
Start by ensuring the grinder is unplugged and the hopper is empty. Then loosen the Phillips #2 screw just enough to free the hopper so you can lift it straight off. This gives you clear access to the maintenance lid and the upper burr carrier without twisting or forcing parts that may be jammed.
Once you remove the hopper, push the two maintenance lid tabs toward the back and lift the lid to expose the burr carrier. Photograph each step of disassembly steps so you can reassemble correctly. If the upper burr carrier is secured with screws, remove them and store safely.
With the lid and carrier out, you’ll have unimpeded access to the grind chamber for dry cleaning or further inspection.
Use Soft Tools First
With the hopper and burr carrier removed, inspect the exposed burrs and chamber for lodged beans or grounds. Use soft tools first to avoid damage. Start with a soft brush and a can of compressed air or a small hand vacuum to clear loose debris. Work methodically from the center outward; avoid metal picks or excessive force that can nick burr surfaces.
For stubborn particles, use wooden toothpicks or plastic picks. Gentle prying preserves alignment. Keep parts supported so you don’t stress bearings or shafts. Follow quick guides for your model to note screw locations and reassembly order.
When the visible debris is gone, test the burrs by hand rotation. If they still bind, proceed to deeper loosening steps.
Loosen With Glide Oil
If a burr has seized or feels overly stiff after dry cleaning, apply a small amount of food-grade glide oil to the shaft and contact points to free movement without contaminating beans. You’ll want a dropper or cotton swab to place just enough oil to seep into the bearing and mating surfaces. Then gently rotate the burr by hand until it moves smoothly, wiping away any excess oil and running a short purge of beans or pellets afterward to remove residue.
Use glide oil sparingly to loosen glide and avoid pooling. Work incrementally: one drop, test rotation, add if needed. Keep oil off grinding faces and hopper. After loosening, clean any visible film with a lint-free cloth. Store oil capped and label for grinder use only.
Reassemble And Test
Want to make sure the grinder runs right and any stubborn burr stays free? Reassemble carefully: follow your photos, seat the upper burr carrier, replace screws snugly (not overtightened), and secure the hopper.
Use grinder reassembly tips: align splines, confirm clearance, and restore the maintenance lid tabs. Plug in only after all parts are seated.
For reassembly troubleshooting, run short test pulses with no beans to listen for scraping or resistance. If noise or binding appears, unplug; reopen and recheck alignment and debris.
After clearing, run a small amount of cleaning pellets or cheap beans to purge residual grit, then vacuum the chute. Final check: consistent grind size and smooth operation before regular use.
Frequently Asked Questions
Can Coffee Oils Damage Stainless Steel Burrs Over Time?
Yes, coffee oils can harm stainless steel burrs over time. You’ll get oily buildup that promotes corrosion, attracts stale grounds, and dulls cutting edges. This reduces grind consistency. Regular dry brushing and periodic use of food-safe cleaning pellets remove oils and preserve burr life.
You shouldn’t let oils sit for long, especially with dark roasts. Frequent maintenance prevents accelerated wear and keeps stainless steel burrs performing accurately.
How Do I Safely Clean an Electric Grinder Motor Housing?
Unplug the grinder and remove beans; safety precautions first. You’ll wipe the motor housing with a dry or slightly damp lint-free cloth. Don’t let moisture reach vents or electrical parts.
Use compressed air or a vacuum to clear vents and crevices, holding the unit steady. Avoid solvents and submersion. Reassemble only when fully dry.
Regular motor housing care prolongs life and prevents damage from debris and trapped oils.
Can I Use Baking Soda to Deodorize the Hopper?
You can use baking soda to deodorize the hopper, but don’t leave it inside where it can contact beans. Sprinkle some in a small open container or cloth sachet. Place it in the emptied hopper for a few hours, then remove and vacuum thoroughly.
Wipe with a dry brush afterward. Avoid direct powder contact with grinder parts; baking soda is fine for odor control, not for cleaning.
Are Replacement Burrs Universal Across Grinder Models?
No, replacement burrs aren’t universally compatible. You’ll need burrs matched to your grinder’s model, size, mounting pattern, and material specs.
Check manufacturer part numbers or specs before buying; many third-party options exist, but verify fit and tolerances. Using incorrect burrs can ruin grind consistency and damage the machine.
If unsure, contact the maker or a specialist seller who confirms compatibility and performance for your specific grinder.
Will Cleaning Void My Grinder’s Warranty?
No, cleaning itself typically won’t void your warranty if you follow manufacturer instructions and don’t alter parts. Will warranty be void? It can be if you illegally modify, damage components, use nonrecommended cleaners, or fail to meet owner responsibilities like safe disassembly and proper maintenance.
Keep records, unplug before working, avoid moisture, use approved products, and reassemble correctly. That protects coverage and shows you met your owner responsibilities.
Conclusion
You’ve now got a fast, reliable routine: unplug the grinder, remove the hopper and chamber, use soft tools to clear grounds, and apply a little glide oil only when burrs are stubborn.
Check retention against your grind size and clean more often for finer settings. Reassemble carefully, test with a small batch, and adjust if you notice uneven grind or noise. Do this regularly and your grinder will stay consistent and long-lasting.