Moka Pot Gasket Sizes Guide
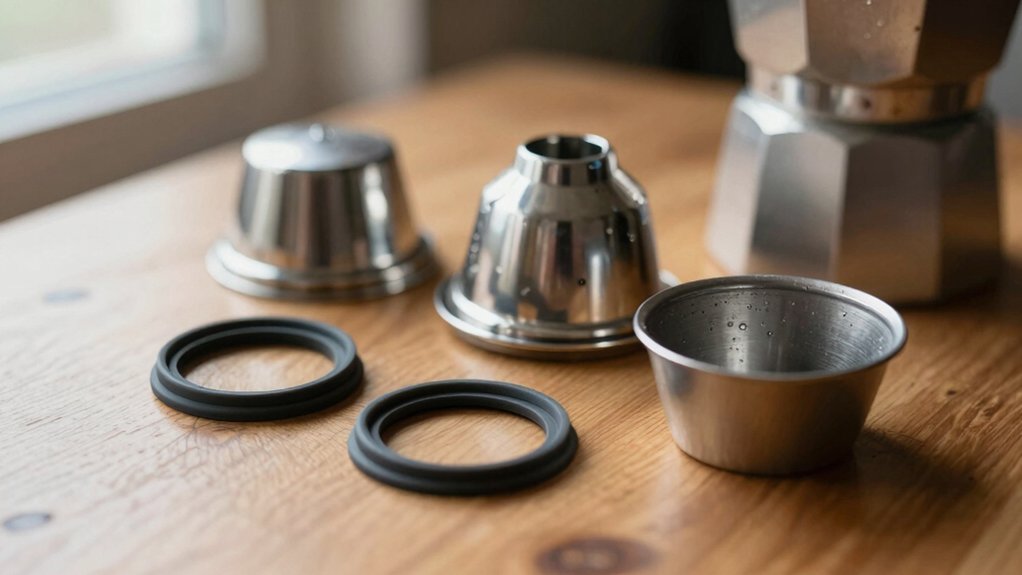
You’ll match gasket inner and outer diameters to your pot’s funnel and lid. Note common mid-range sizes like 50/65 mm (3/4 cup) and 55/71–73 mm (6 cup).
Larger 9–18 cup gaskets reach 63–74 mm. Measure the pressure‑valve recess and gasket thickness because every 0.5–1.0 mm alters valve clearance and release timing.
Prefer silicone for shape retention or softer rubber for uneven seats. Always test valve gap and safety after replacement. Continue for practical measuring and adjustment steps.
Quick Overview
- Measure inner and outer gasket diameters to match your pot model and ensure the seal sits correctly against the valve recess.
- Common mid-range sizes include 3/4 cup (inner ~50 mm / outer ~65 mm) and 6 cup (inner ~55 mm / outer ~71–73 mm).
- Verify valve compatibility and material: silicone holds shape longer; softer rubber can mask uneven valve seats.
- Check and record valve clearance (optimal ~0.5–1.5 mm). Gasket thickness changes valve actuation and safety timing.
- Use feeler gauges around a clean valve seat to measure runout. Replace gasket and filter plate together if wear is detected.
Diameter and Thickness Chart
How big is the gasket you need? You check measurements against models, focusing on inner and outer diameters to match fit and gasket material. Use the chart below to compare common mid-range sizes quickly.
| Cup Size | Inner / Outer (mm) |
|---|---|
| 3 / 4 Cup | 50 / 65 |
| 6 Cup | 55 / 71–73 |
You’ll note Musa/Venus/Kitty interchangeability for matching cup capacities. The Bialetti Express 2-cup differs (41 mm) from Musa’s 42 mm. For large sizes, confirm specs: 9–18 cup gaskets climb to 63–74 mm inner. When ordering, account for packaging variations: single seals versus multi-packs that include filter plates. Choose rubber or silicone based on temperature resilience and longevity.
Valve-Compatible Gasket Sizes
Why does valve compatibility matter when you replace a moka pot gasket? You need a seal that mates precisely with the pressure valve opening so safety and extraction stay consistent. Check gasket material (rubber vs silicone) for heat resilience and compression; softer rubber can fit uneven valve seats. Silicone holds shape longer. Also confirm brand compatibility: some lines (Bialetti, Musa/Venus/Kitty, Grosche) share sizes; others vary outer/inner diameters.
Measure inner and outer diameters against the valve recess to ensure a snug fit. Prefer OEM or verified cross-compatible gaskets when valve geometry is nonstandard. Replace gasket and filter plate together if the valve seating shows wear to restore correct pressure sealing.
Measure, match, replace.
Pressure-release Valve Clearance
You should check the pressure-release valve clearance whenever you replace the gasket, because a misaligned gap changes brew pressure and can create safety risks.
Measure the valve gap with the assembled unit and note how gasket thickness shifts that clearance; even 0.5–1.0 mm can alter release timing. If clearance is off, you can thin or swap gaskets and retest under low-heat conditions to confirm safe, consistent operation.
Valve Clearance Importance
Wondering what happens if the pressure-release valve doesn’t have proper clearance? If valve clearance is too tight, pressure can build above safe limits; this risks valve failure or uneven extraction. If it’s too loose, steam escapes prematurely, lowering brew temperature and yield.
You should check clearance relative to gasket material. Firmer silicone needs slightly more gap than soft rubber to seat correctly. Data-driven guidance: optimal clearance usually falls within 0.5–1.5 mm for common Moka pots, but tolerances vary by model and gasket compressibility.
Prioritize consistent, repeatable clearance to maintain target pressure and flow rate. Inconsistent gaps correlate with channeling and bitter or weak coffee. Keep records when replacing gaskets so you can reproduce the clearance that gave the best results.
Measuring Valve Gap
How do you accurately measure the valve gap so your pressure-release valve behaves predictably? Start by cleaning the valve seat. Then use a set of feeler gauges to record valve clearance at ambient temperature. Insert gauges of known thickness until you feel light drag; note the smallest gauge that fits.
Repeat measurement around the seat to detect runout and average the values. Compare the measured clearance to manufacturer tolerances or baseline values from similar models. Track gasket thickness separately. Thicker gaskets can alter seating height and indirectly change effective valve clearance; record both measurements.
Log results, date, and any gasket changes. Use that data to decide if valve filing, replacement, or gasket adjustment is needed.
Gasket Thickness Effects
One clear effect of gasket thickness is that it raises the brew chamber height and reduces the effective clearance of the pressure-release valve. Thicker seals can make the valve sit closer to the seat and change its opening pressure. You should measure how much extra height a replacement adds; every 0.5–1.0 mm of added thickness can measurably alter valve actuation. Choose gasket material (rubber vs. silicone) knowing silicone often compresses differently and may require slightly different clearances.
If manufacturers use color coding for thickness or material, record it and match replacements accordingly. When you test a new gasket, watch pressure-release timing and visual steam flow. Changes indicate altered valve clearance and may require a different gasket size or material.
Adjustment Techniques
Want to guarantee your pressure-release valve opens at the intended point? You’ll measure clearance between the valve stem and surrounding gasket, then adjust gasket thickness or seating to achieve specified millimeter range. Aim for consistent clearance across cycles; record baseline pressure and clearance values.
Use incremental thickness changes of 0.5–1.0 mm so you can correlate adjustments to pressure response and avoid abrupt shifts. Note incompatibility risks: wrong outer/inner diameters or overly compressible materials can jam the valve or prevent relief. Before committing, perform compatibility testing with the replacement gasket and filter plate to confirm dimensional fit and functional clearance.
Log results and repeat until valve actuation aligns with manufacturer pressure targets.
Safety And Testing
Why check pressure-release valve clearance before brewing? You need predictable pressure and safe venting: a blocked valve raises risks. Measure clearance with the new gasket fitted and the filter plate seated. Leave 1–2 mm of free movement so steam can escape if pressure spikes.
Inspect the valve port for debris each time you replace gasket material since small rubber or silicone fragments can lodge and obstruct flow. Test by filling the boiler to the specified water level, assembling dry, and briefly heating off-boiler to confirm steam exits the valve without resistance.
Store spare gaskets flat, away from heat and sunlight. Good gasket storage preserves flexibility and reduces cracking that could affect valve interaction. Replace if you see deformation.
Frequently Asked Questions
Can I Use Silicone Instead of Rubber Gaskets Safely?
Yes, you can safely use silicone instead of rubber gaskets in many moka pots. Silicone safety is high: it’s heat-resistant, food-grade, and won’t degrade as quickly with heat or oils.
You’ll often get improved gasket longevity versus traditional rubber, reducing replacements. Check your pot’s fit and manufacturer recommendations. Buy food-grade silicone sized to your model to ensure proper sealing and long-term performance.
How Often Should I Replace My Gasket With Regular Use?
You should replace your gasket every 6–12 months with regular use. For gasket maintenance, inspect monthly for cracks, flattening, or leaks. Test pressure or seal during brewing.
If you use daily or notice wear, aim closer to 6 months. Occasional users can stretch to 12 months. Keep spares, buy correct size replacements, and consider silicone if heat-resistant.
Track replacement frequency to avoid flavor contamination and safety issues.
Can I Lubricate the Gasket to Improve Sealing?
Yes, you can lightly lubricate the gasket to improve sealing, but prioritize lubrication safety and gasket compatibility. Use food-grade, heat-stable oil (very sparing); avoid petroleum-based products; and test at low brew first.
Silicone gaskets tolerate silicone oils. Rubber ones prefer vegetable-based options or none. Replace worn gaskets rather than over-lubricating. Track results and stop if you see leaks, odors, or degraded material.
Are Aftermarket Gaskets Compatible With Vintage Moka Pots?
Yes, aftermarket compatibility is often good. However, you’ll need to verify vintage moka compatibility by measuring. Match inner and outer diameters to the original gasket; many brands sell replacement sizes that fit vintage Bialetti and similar models.
Check thickness and material (rubber vs silicone) and read seller fit notes. If measurements align and seal sits flush, the aftermarket part will restore pressure and prevent leaks without issues.
How Do I Size a Gasket if Cup Count Is Unknown?
Measure the gasket directly: Remove the old seal and use calipers to record inner and outer diameters. That tells you how to identify correct diameter. If you can’t remove it, measure the brew funnel opening and base seat.
For thickness, compress the gasket lightly and measure with calipers or feeler gauge to learn how to measure gasket thickness. Compare numbers to brand tables or order a snug silicone replacement.
Conclusion
You’ve now got the key dimensions and checks to keep your moka pot safe and reliable. Use the diameter/thickness chart to match replacements, confirm valve-compatible sizes, and maintain a 1–2 mm pressure-release valve clearance. Measure the valve gap with feeler gauges or calipers. Swap gasket thickness in 0.5 mm steps to tune seal pressure.
After any change, run a cold-water test and inspect for leaks. Prioritize correct fit and regular testing to avoid overpressure.