Coffee Grind Size Chart: Find the Right Setting for Every Brew
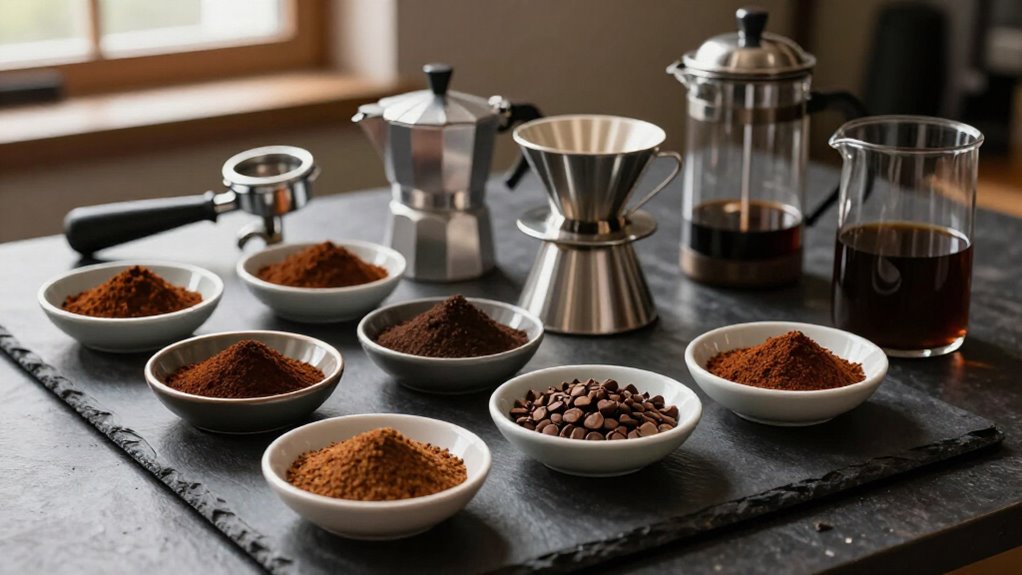
Match your grind to the brew method, then let taste guide fine adjustments. Use extra-fine, flour-like grounds (50–200 microns) for Turkish coffee; fine, table-salt-like grounds (200–400) for espresso; medium-fine (360–660) for moka pots; and 400–700 for pour-over.
Choose coarser grounds—about 1,500,1,600 microns—for French press and 1,300,1,350 for cold brew. Sour coffee needs finer grounds, while bitter coffee needs coarser ones. Keep exploring for calibration, humidity, and sieve tips to improve every cup with confidence.
Brew Method Grind Settings
Start with your brew method, then use its grind range as a baseline: Turkish coffee needs an extra-fine 40–220 microns, espresso about 180–380 microns, and Moka pot roughly 360–660 microns.
For filter brewing, begin around medium, then adjust gradually for your recipe and grinder. If coffee tastes sour or thin, go one or two micro-steps finer to increase extraction. If it tastes bitter, dry, or heavy, go coarser instead.
Track your dose, water temperature, brew time, and setting so you can repeat results. A burr grinder helps produce more even particles, which improves consistency and makes adjustments easier to evaluate. For immersion or flow recipes, let brew time guide your choice; don’t chase a perfect number when the cup tells you otherwise.
Micron Ranges by Brewer
Because grinder dials vary by model, you’ll get more consistent results by comparing particle size in microns. These bands give you a measurable target when your grinder’s numbered dial doesn’t transfer between models. Treat them as starting points, then adjust for your brewer, recipe, and taste.
| Brewer | Approx. range | Texture |
|---|---|---|
| Turkish | 50–200 μm | Flour-like |
| Espresso | 200–400 μm | Table salt |
For pour-over and drip, aim around 400–700 μm, with V60 examples near 425–500 μm. Chemex commonly sits toward the coarser end because its thick filter slows flow. Longer-contact methods move higher: specialty pour-over and some immersion brewers often use 700–900 μm, while French press averages about 1,500–1,600 μm and cold brew about 1,300–1,350 μm. Use a micron chart to compare results, not dial numbers alone.
Fines and Boulders Explained
Your grinder will produce some spread, even with burrs, so you’ll want to judge texture rather than chasing one exact micron value. Place a sample on white paper under bright light: powder-like fines and sea-salt-like chunks reveal an uneven batch. If the cup tastes harsh, move slightly coarser; if it tastes weak or sour, move slightly finer.
Make one change at a time, then taste again. A uniform grind helps balance cup.
Sieve Mesh Equivalents
You can use sieve mesh to estimate coffee particle size, with higher mesh numbers indicating finer grounds. A U.S. Standard 20 mesh equals roughly 850 microns, though common standards and grinder output vary.
Compare mesh equivalents with your brew method to choose the right target size, rather than treating one number as exact.
Mesh Size Basics
When a grind chart lists sieve mesh instead of microns, mesh size gives you a practical way to compare particle sizes: a U.S. Standard 20 mesh sieve has openings that let particles around 850 microns pass. In other words, mesh describes a sieve’s screening size, not a grinder’s dial setting.
For cupping, SCA guidance targets about 70%–75% passing through a U.S. Standard 20 mesh sieve. That benchmark corresponds to a cupping grind range of roughly 470–850 microns.
On the sieve scale, finer coffee contains smaller particles that pass more readily, while coarser coffee contains larger particles that stay behind. Use mesh equivalents to connect a recommended method, such as paper-filter drip or cupping, with a measurable target. This helps you compare charts and targets.
Micron-To-Mesh Conversion
Micron-to-mesh conversion helps you relate a grinder’s particle-size target to a physical sieve reference. Use an established equivalence as your anchor, not a simple linear formula. For example, about 850 microns corresponds to a U.S. Standard 20 mesh sieve, meaning particles near that size can pass through its opening.
For cupping, you’ll commonly target roughly 470–850 microns, with about 70%–75% passing 20 mesh under SCA-referenced guidance.
Smaller micron values indicate finer particles, which pass more easily through sieves with higher mesh numbers and smaller openings. To check your grinder, compare its stated micron target with the nearest sieve equivalent. If the target sits near 850 microns, 20 mesh offers a sanity check. Remember, mesh conversion complements taste and brew-time evaluation; it doesn’t replace either.
Common Sieve Standards
Common sieve standards give coffee grind charts a consistent way to describe particle size, with the U.S. Standard 20 mesh sieve measuring about 850 microns. This reference helps you interpret published charts and compare laboratory results without relying on a grinder’s numbered dial.
For SCA-style cupping, guidance describes a grind slightly coarser than paper-filter drip, with roughly 70%–75% of particles passing through a 20-mesh sieve. If a chart lists a range such as about 470–850 microns, use the 850-micron point as a practical check on its intended fineness.
Don’t convert blindly, though: U.S. mesh, U.K./ASTM, and other sieve systems may define mesh differently. Before comparing recommendations, confirm the stated standard and whether “passing” means particles passing through. That distinction prevents inaccurate cross-standard conversions later.
Grind Size Equivalents
V60 400–700 µm and French press 690–1300 µm. With 20 mesh ≈ 850 µm, you’ll sanity-check their coarseness: V60 sits finer, while French press extends coarser.
Remember that mesh-to-micron conversions describe fractions, so treat sieve equivalents as approximate reference points rather than exact grinder settings alone.
Choosing The Right Mesh
When you compare grind charts, use U.S. 20 mesh—about 850 µm—as a practical reference point for drip and cupping grinds.
Don’t treat it as an exact particle size: mesh describes a distribution. Cupping commonly spans 470–850 µm, with about 70%–75% passing U.S. 20 mesh; paper-filter drip may be slightly finer. If another chart lists a mesh number, compare it with the 20-mesh conversion to estimate its place in that range.
Then match the starting point to your brewer and taste. Weak, sour coffee may need a finer setting; bitterness or slow flow may call for a coarser one. Grinder models create different distributions, so use mesh as a guide. Record setting, dose, and brew time, and adjust one step at a time for repeatability.
Reading Your Grinder’s Dial
Your grinder’s dial is a starting point, not a universal measurement: setting 8 on one model may produce a completely different grind on another. Use the chart to choose a rough range, then adjust in small steps by taste because burr gaps and particle distributions vary.
For espresso, you’ll use shot time as your readout: under about 20 seconds, go finer by one or two clicks; over 35 seconds, go coarser by one click. For V60-style pour-over, use drawdown time: under two minutes, go finer, while past four minutes, go coarser. Make only micro-steps and record each change.
To check major error quickly, photograph your grounds against a white sheet in natural light. Compare the texture with references such as table salt or sea salt.
Keep Fingers From Burrs
Keep your fingers away from a burr grinder’s grinding chamber, especially while it’s powered on. Burrs crush beans between two interlocking discs, and their teeth can catch skin and cause severe injuries. Don’t reach inside to check a setting, add beans, or remove a blockage.
If grounds stick, turn the grinder off, unplug it, and wait until moving parts stop. Then use the manufacturer’s brush or approved tool to clear debris; never your hand. Before changing beans or maintaining, follow the sequence: power off, unplug it, wait, and clean around the chamber.
If your model has an accessible adjustment ring, use it only as directed at all times and keep your hands well clear of the burr area. Caution always protects you while you dial in the grind.
Humidity Changes Your Grind Setting
As humidity rises, coffee beans can absorb moisture and grind finer at the same grinder setting, increasing resistance during brewing. In humid conditions, espresso or Turkish coffee may slow noticeably because these pressure-based methods respond to small particle changes. If grounds look closer to table salt than your usual medium sand, move one or more clicks coarser to restore your target flow and brew time.
Compare the texture with table salt or sea salt in good natural light, since humidity can change appearance without moving the dial. Then taste the result and adjust incrementally: sour or weak coffee usually needs a finer setting, while bitter or harsh coffee calls for one step coarser.
Keep your dose, water temperature, and brew time consistent while testing.
Grinder Zero-Point Calibration
Humidity can shift how your grinder behaves, so a reliable reference point helps you separate environmental changes from actual setting changes. To calibrate, slowly close the burrs until they just touch; don’t force them; then mark that position as zero. Count clicks upward from there.
Your grinder’s printed numbers may not match another model, or even its own true fineness. Treat each micro-step as a measurable change from zero, and record the setting for repeatable adjustments.
- Picture espresso grounds like fine sand, offering noticeable resistance.
- Picture Turkish grounds as soft, extra-fine powder.
- Listen for a gentle burr touch, not a forced stop.
- Keep a small log beside the grinder: zero, clicks, and texture.
After calibration, judge texture before changing brew time or interpreting symptoms.
Brew Ratio Quick Reference
Start with your preferred brew ratio—about 1:15 for a standard cup—then use grind size to fine-tune extraction. A ratio sets coffee-to-water balance; your grind then controls how quickly flavor enters the cup. Keep the ratio steady while you adjust one variable at a time, and record dose, water, and brew time.
- Turkish: Pair your ratio with extra-fine, 40–220 microns, for roughly 1–2 minutes.
- Espresso: Use fine, 180–380 microns, aiming for about 9 bar and 25–35 seconds.
- Pour-over: Begin medium-fine, 400–700 microns, and target 2:30–3:30 for 20 grams.
- French press: Choose coarse, 690–1,300 microns, for an approximately four-minute steep.
If your coffee tastes sour or weak, grind finer; if it tastes bitter or harsh, grind coarser. Change gradually, because each grinder’s numbered settings vary widely.
Conclusion
With the right grind size, you’ll control extraction instead of guessing. Start with the chart’s setting for your brewer, then adjust one step at a time: go finer if the cup tastes sour and thin, or coarser if it tastes bitter and dry.
Use your grinder’s zero point, watch humidity, and protect your fingers around the burrs. Keep notes as you dial in, and you’ll build a reliable routine for consistently balanced coffee at home.