How to Use a Built-In Grinder Coffee Maker for Better Morning Brews
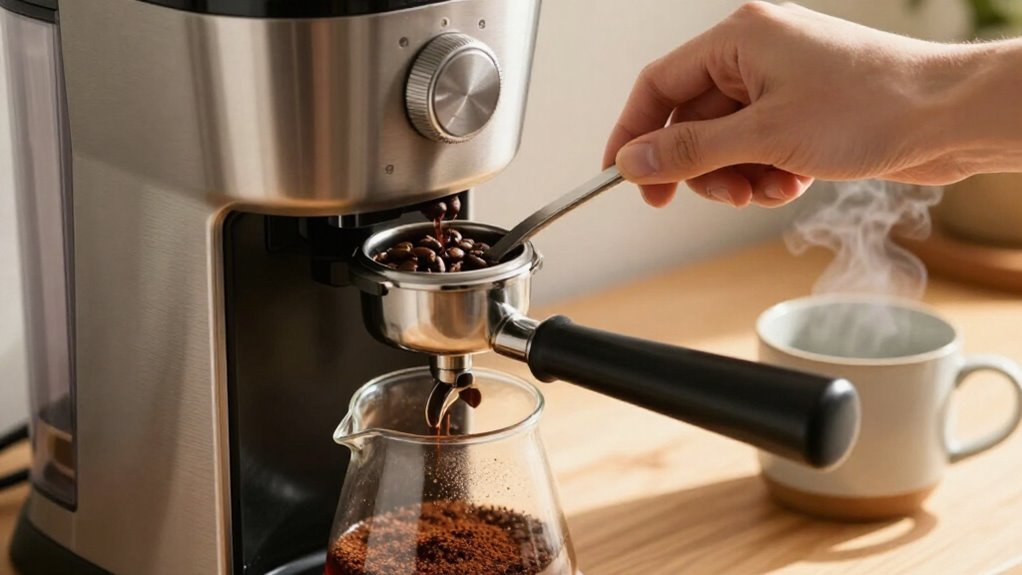
For better morning coffee, set the grinder to a medium grind and use about a 1:15:17 ratio by weight.
Lock the hopper firmly, fill the reservoir with fresh filtered water, and seat the basket and carafe.
Run a water-only cycle to flush carbon dust before adding beans.
Choose medium strength and the matching cup size.
If coffee tastes weak, grind slightly finer; if it’s bitter, go coarser.
Use guidance below to refine settings and replace filters.
Set Grind Size and Dose
Start with a medium grind for automatic drip coffee, then adjust the machine’s burr-grinder setting based on taste. Set the dose and strength using the brew-strength control and cup-size button, so you’ll match ground coffee to water volume. For a starting point, use about 1:15–1:17 by weight, and use a scale when possible.
If the strongest setting still produces weak coffee, grind one or two steps finer to increase extraction. If the brew tastes bitter or harsh, move one or two steps coarser. You shouldn’t change multiple variables at once: adjust the grind first, then fine-tune the dose if necessary.
Record each setting with its cup size and result. For stronger coffee, shift the ratio toward 1:14–1:15, but keep the water volume consistent.
Verify Hopper Is Locked
Before adding beans, align the hopper’s tabs or keyed slots with the grinder collar and seat it fully. A secure fit engages the safety interlock, prevents spills, and feeds beans evenly. Keep the machine off or unplugged while installing it.
- Rotate the hopper clockwise until you hear a click or feel a firm stop. If your model uses a latch, clip, screw, or spring retainer, engage it per the manual.
- Seat the lid and check that it closes securely, then gently tug the hopper upward. It shouldn’t lift, wobble, or rotate.
- Inspect the rim and grinder inlet for debris, packaging, or moisture. Clear buildup with a dry brush, and confirm the ready indicator appears.
Never operate with a loose hopper; it can damage components.
Step 1: Fill the Water Reservoir
With the hopper locked in place, fill the reservoir with fresh, cold water to the marking that matches your serving size, from a single cup to the full carafe capacity. Use filtered water when possible; it can improve flavor and reduce mineral scale inside the water system.
Match the volume to your intended yield, whether you’re brewing a small cup, travel mug, or full pot, so the machine maintains the appropriate water-to-coffee ratio.
Inspect the reservoir for debris, then seat it firmly in its receptacle. Verify the level remains below the maximum line; overfilling can cause inconsistent brewing or leaks.
If you’re using a programmable timer, fill the reservoir before selecting AUTO or PROGRAM. Confirm the water supply matches the serving size.
Step 2: Run the Water-Only Cycle
After filling the reservoir, run a water-only cycle with no beans, filter, or coffee grounds to flush manufacturing dust and residue from the water path. Place the carafe and brew basket correctly, then start the cycle. Watch the outlet as water flows. If dispensing sputters or appears uneven, stop the machine and re-seat the carafe and brew basket before restarting. This test confirms smooth delivery before you add coffee.
Run this cycle first after shipping or extended storage. It provides a baseline for programmable brewing, helping timed cycles begin with predictable output. Repeat it after deep cleaning or using bypass mode so leftover coffee oils won’t dilute or alter your next pot. Let the carafe cool, empty it, and proceed when the machine is ready.
Step 3: Choose Your Brew Strength
Once the water-only cycle runs clear, choose a medium brew-strength setting as your baseline. Select the machine’s strength option that matches this level; models may provide several choices, such as eight. Pair that setting with the correct brew-volume button—small cup, travel mug, or full carafe—so the machine doses enough coffee for the selected output. Taste the result, then change only one variable at a time.
If the cup tastes weak at a higher strength setting, adjust the grind one or two steps finer instead of increasing strength repeatedly. Finer particles extract more readily, while excessively fine coffee can become bitter or restrict flow.
For an intense profile, move gradually toward a stronger setting and consider a paper filter if your machine supports fine grinds. Record the setting that balances intensity and clarity for your beans.
Step 4: Start the Grind-And-Brew Cycle
Fill the reservoir to your desired cup marking, load whole beans into the hopper, and position the carafe securely on the warming plate. Select the previously chosen grind size and brew strength, then set the cup amount to match the reservoir level. Confirm the filter basket and lid are closed before proceeding.
Press ON/OFF to start the grind-and-brew cycle. The grinder runs immediately, and hot coffee drips into the carafe while the warming plate keeps it hot.
For scheduled brewing, set the clock first: press and hold PROGRAM until the time flashes, adjust HOUR and MINUTE, then enable AUTO. When brewing finishes, don’t leave spent grounds inside; remove them and brush the grinder as needed. Monthly cleaning helps prevent oily residue buildup inside it.
Step 5: Taste Before Changing Settings
Taste the coffee before changing any settings, then adjust only one variable at a time so you can identify its effect. Evaluate the same cup size and bean dose each time, because you can’t isolate flavor differences if volume or cup-count settings change. Begin with medium grind; on an eight-step dial, 4 or 5 provides a reference point. If the brew tastes weak, even with a stronger brew-strength setting, move one or two steps finer.
Finer particles expose more surface area and usually increase extraction. If the coffee tastes bitter, harsh, or astringent, move one step coarser and brew again. Change either grind size or brew strength, never both together. Keep the other controls constant, and compare each result with the previous cup. Retest.
Step 6: Rinse Basket and Carafe
After you’ve evaluated the brew and adjusted one setting at a time, clean the brew basket and carafe after each cycle. Remove the basket, discard the spent grounds, and rinse it thoroughly to dissolve coffee oils. If you use a paper filter, keep the filter holder clean and rinse the carafe after every brew to limit residue.
Rinse a thermal or stainless-steel carafe with warm water immediately, especially after extended warming, to prevent stains and stale deposits. Don’t use abrasive tools that could damage its finish. Brush stray grounds from the brew area while you rinse, so they won’t drop into the next basket. Wipe and dry both parts before reassembling them. This routine reduces lingering odors and helps preserve consistent flavor between brew cycles.
Confirm Coffee Reaches 195°F
Use the grinder-and-brew cycle as designed so ground coffee enters extraction and the water remains near its target longer. If the cup tastes sour or weak, adjust grind size or strength rather than assuming temperature alone caused under-extraction.
A finer grind increases extraction, while a coarser grind reduces it. Confirm performance especially after descaling or changes in conditions, because heating supports flavor.
Unclog the Grinder Chute
| Check | Action | Purpose |
|---|---|---|
| Residue | Brush monthly | Prevents blockage |
| Flow | Test-grind briefly | Confirms clearance |
After brushing, remove loosened grounds and reinstall parts. Run a test grind before brewing a carafe.
If flow remains restricted, stop the machine and consult the manufacturer rather than forcing the burrs or blades. Store beans dry, and keep the grinder path clean to protect dosing and extraction.
Replace the Water Filter
Once the grinder chute runs freely, replace the water filter on the schedule specified for your model—typically every two to three months, or sooner if the indicator changes or your water is hard. Use only the filter size and type recommended for your exact machine, so water flows correctly before heating and brewing.
Remove the reservoir, discard the old cartridge, and install the new one according to the manufacturer’s orientation. Fill the reservoir with fresh filtered water, then run a water-only brew cycle to flush carbon dust. This prevents an off taste in your first cup.
Filtered water matters because coffee is about 98% water; it improves taste and limits mineral scale that can affect brewing consistency. If brewing slows or flavor changes, replace.
Conclusion
With the right settings and routine, you’ll get more consistent results from your built-in grinder coffee maker. Set the grind, dose, strength, and water volume deliberately, then lock the hopper before brewing.
Run a water-only cycle when needed, and confirm the coffee reaches 195°F. Afterward, rinse the basket and carafe, clear the grinder chute if flow slows, and replace the water filter on schedule. These steps keep flavor balanced and equipment reliable for years.