How to Organize Coffee Accessories
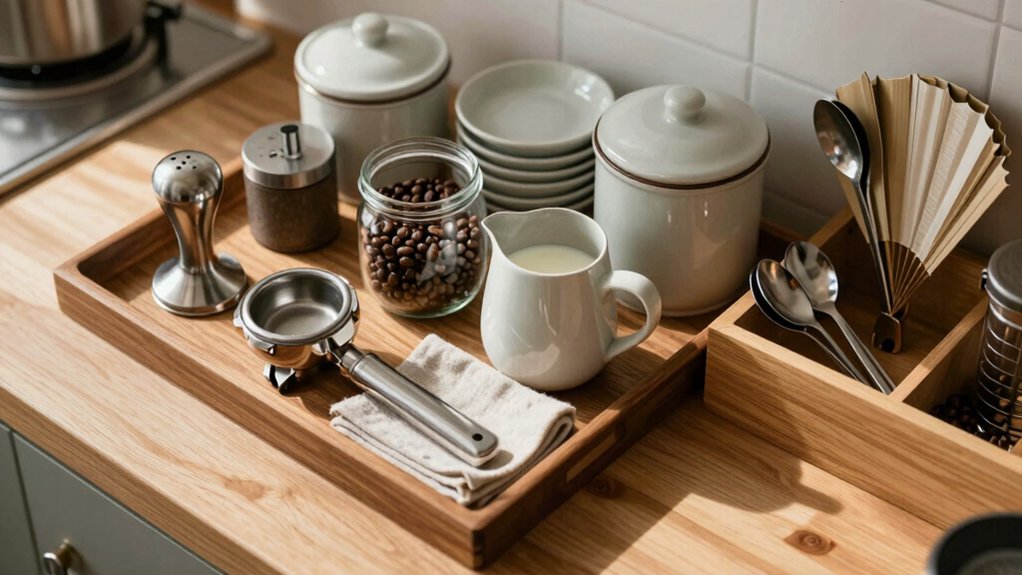
Measure drawers and counter openings. Then group gear by use and size so every item has a home. Fit drawer inserts or trimmable wood dividers to your exact width and depth. Consider tiered trays to double capacity.
Stack portioned filters by diameter and label grams per cup. Allow 2–3″ behind grinders for cords and airflow. Provide 4–6″ front clearance for access. Use padded baskets for delicate parts and tidy cords with low-profile clips. Keep going to get layout templates and measurements.
Quick Overview
- Measure drawer and cabinet openings. Then choose trimmable or drop-in inserts to ensure perfect fit and capacity.
- Assign dedicated locations by accessory type (filters, pods, grinders, tools) for fast retrieval and reduced clutter.
- Stack portioned filters in labeled shallow baskets. Note diameter, cone size, and scoop-to-water ratios.
- Reserve ventilated space for grinders with 2–3″ rear clearance, 1–2″ side clearance, and 4–6″ front access.
- Use adhesive tabs or slim permanent markers to label sizes, grams-per-cup, and pod counts for repeatable, waste-minimizing organization.
Drawer Dimensions Chart
Wondering which drawer insert will fit your coffee setup? You’ll measure width, depth, and height. Then match specs to capacity and material. Trimmable wood inserts give flexible widths; drop-in styles need no hardware.
Note drawer slide placement if you’ll swap full-replacement boxes. Consider tiered designs to double capacity in the same opening. That’s useful for two word discussion ideas when planning zones. Don’t get sidetracked by an unrelated subtopic like filters here; keep focus on fit and finish.
| Type | Width Range | Capacity |
|---|---|---|
| Standard K-Cup | 13″–22″ (trimmable) | 30–40 pods |
| Large K-Cup | 27″–42″ (trimmable) | 40 pods |
| Commercial Slim | 12.2″ | Varies |
Portioned Filter Measurements
A few simple measurements will keep your filters portioned precisely so you get consistent brews and less waste: measure the diameter and depth of your filter basket, note the cone size (e.g., #2 or #4 for pour-over), and mark the scoop-to-water ratio you prefer. You’ll create labeled stacks of portioned filters that fit each brewer perfectly, reducing tear and spill.
Use a slim permanent marker or adhesive tabs to note size and preferred grams per cup. Store each stack in shallow baskets or dedicated holders so they’re visible and tactile. That keeps your countertop aesthetic clean and functional.
- Match filter stacks to specific brewers for quick selection.
- Record ratios for fast, repeatable measurement consistency.
- Arrange by size for an orderly, minimalist display.
Bean Grinder Clearance
Check grinder dimensions before you buy or shelve one so it fits your storage zone and leaves room for ventilation and cord routing.
Plan protective homes: padded baskets or dedicated cabinet spots to keep burrs safe, make cleaning and part replacement easy, and prevent grounds from spilling onto other accessories. Keep a cord wrap or hidden hook nearby. Note where replacement parts are sold so maintenance stays quick and your setup stays tidy and functional.
Grinder Size Considerations
How much clearance does your grinder actually need to sit and operate comfortably? Measure depth, width and height around the machine, accounting for hopper tilt and lid removal. Grinder size considerations mean you’ll leave 2–3 inches behind for cord and airflow and 1–2 inches each side for tamping or jar placement.
Consider front clearance for portafilter access or catch container removal; 4–6 inches prevents awkward angling. If you tuck the grinder under cabinets, confirm overhead space for loading beans and heat dissipation. Choose a base or tray that complements your countertop aesthetic while stabilizing vibration.
Keep the area visually tidy with a small mat and a dedicated spot for dosing cups so the grinder looks intentional and operates without obstruction.
Storage And Protection
Want your grinder to stay reliable and look good doing it? Store it where it’s protected from spills, sunlight, and kitchen heat. Choose a dedicated shelf or drawer zone with soft liners to prevent scratches and steady vibration.
If you rotate beans, use sealed canisters nearby and maintain humidity control to protect internal parts and beans alike. For seasonal changes, consider dual temperature storage: a cool, stable spot away from ovens and windows maintains consistent performance.
Use a compact cover or stylish box to keep dust off while preserving an aesthetic countertop. Keep cords coiled and accessories in divided trays so clearance around the grinder stays clear for airflow and quick access during brewing.
Cleaning And Maintenance
A clean grinder performs better and looks sharper, so make it part of your routine to clear grounds, oils, and dust after each use and deep-clean monthly. Wipe the hopper, knock out the puck tray, and brush burrs into a small bin. You’ll prevent stale oils from tainting flavor and keep the unit visually pleasing.
Create a simple cleaning schedule: daily quick clears, weekly brush-and-vacuum, monthly full disassembly and wipe with a damp cloth. Set maintenance reminders on your phone or calendar to stay consistent. Store grinder parts on a dedicated tray or in a shallow basket so they dry and stay organized. Treat cleaning as aesthetic upkeep: neat tools, gleaming surfaces, and predictable care extend life and elevate your counter’s look.
Power Cord Management
Why leave cords draped across your counter when a few simple moves will tidy them and protect your grinder? You’ll free space and reduce wear by routing power cords along the back edge; secure them with low-profile clips so the grinder sits flush against the backsplash.
Use a short cable sleeve or Velcro wrap to bundle excess, keeping clearance under the hopper for easy bean loading. If you slide appliances on a tray, run cords beneath the tray lip and out the back to hide cables and prevent snagging.
Label each cord end for quick swaps, and choose clips that match your finish to keep the look cohesive. Good cord management protects equipment and keeps your coffee zone calm.
Replacement Parts Availability
Once cords are neatly tucked away, check how much clearance your grinder needs for replacement parts and maintenance access. You’ll want a dedicated gap or removable panel so burrs, hoppers, and dosing chambers can be swapped without shifting the whole station.
Measure vertical and rear clearance, note hinge or cord routing, and label parts with purchase sources and part numbers. Keep a slim drawer or box nearby for spare burrs, gaskets, and screws. Include availability details: lead times, vendor contacts, and compatibility notes.
If a model’s parts are scarce, prioritize accessible storage that lets you repair rather than replace. This practical, aesthetic approach preserves clean lines while making upkeep predictable and efficient.
Frequently Asked Questions
How Do I Keep Coffee Beans Fresh Without a Fridge?
Keep whole beans fresh by storing whole beans in an airtight, opaque canister kept cool, dark, and dry. Use small airtight coffee canisters, glass jars with rubber seals, or InterDesign Onza-style bottles to keep beans airtight and block light.
Buy modest amounts, grind just before brewing, and avoid clear containers or the fridge. Rotate stock by date, keep away from heat sources, and label canisters for an organized, aesthetic setup.
What’s the Best Way to Store Flavored Syrups?
Store flavored syrups on a cool, dry shelf in shelf stable storage containers away from sunlight. Label each bottle clearly with flavored syrup labeling: include flavor and opened date. Group syrups by use or color on a floating shelf or tiered tray for an attractive display.
Use a small tray or lip to catch drips and keep caps tight. Rotate stock by date so you use older bottles first.
How Can I Organize K-Cups by Flavor Quickly?
Use clear, labeled stacking bins or InterDesign stacking bins to sort K-Cups by flavor for quick categorization. Line bins in a drawer or on a tiered tray so you can see labels at a glance. Group similar flavors together, color-code labels, and keep most-used flavors up front.
A shallow basket with dividers works for limited space. You’ll get an aesthetic, practical system that makes grabbing your favorite fast.
Where Should I Place a Coffee Station in a Small Kitchen?
Place your coffee station in a low-traffic corner near outlets and water access for an efficient coffee station layout in a small kitchen placement. Use a narrow cart or floating shelves to add vertical storage. Keep frequently used items at eye level, and tuck bulky appliances below.
Match materials and colors to your kitchen for an aesthetic, cohesive look. Leave a small drip mat to protect surfaces while keeping everything compact and reachable.
What’s a Stylish Way to Display Mugs on Open Shelves?
Use mixed heights and finishes to display mug display attractively on open shelf styling: Group mugs by color or pattern. Place your favorites at eye level. Stagger stacks and single hangers, and mix in a small plant or canister for contrast.
Line a row of matching mugs on hooks under the shelf for function and rhythm. Keep spacing consistent, rotate seasonally, and balance negative space so the arrangement feels curated, tidy, and accessible.
Conclusion
You’ve planned drawer sizes, measured filters, and left proper grinder clearance so every tool fits and looks intentional. Keep beans and filters in sealed, labeled containers, wipe surfaces and burrs regularly, and route cords neatly with clips or channels.
Stash spare burrs, gaskets, and small parts nearby for quick swaps. With routine cleaning, smart storage, and accessible replacements, your coffee station will stay efficient, beautiful, and ready for a perfect brew every time.