Descaling Schedule Template for Coffee Machines
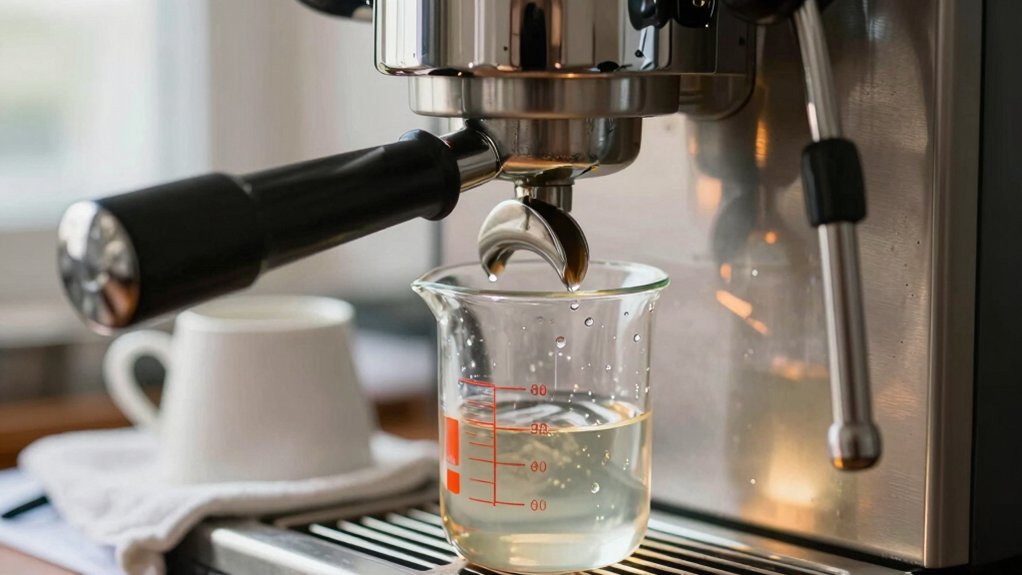
You should set a simple, model-specific descaling schedule tied to water hardness and daily throughput: De’Longhi every 1–3 months; Philips 2–5×/year (monthly if >18 dH). Fully automatic machines should be monitored by alert plus a monthly check. Semi/manual machines require descaling every 1–3 months for daily use.
Inspect group heads, steam wands, and inlets for white crust and flow loss. Use manufacturer-approved acid strengths and calibrated dilutions. Log concentration and rinse verification, and schedule follow-ups to confirm removal. More procedural details follow.
Quick Overview
- Set descale frequency by model and hardness: De’Longhi 1–3 months, Philips 2–5×/year. Fully automatic by alert/monthly; semi/manual 1–3 months.
- Include throughput and water hardness to adjust intervals. Increase to monthly when hardness >18 dH or heavy daily use.
- Log each descale: date, machine, solution concentration, contact time, operator, and rinse verification.
- Inspect and document scale hotspots (group head, steam wand, inlet screens). Isolate parts, soak, and scrub removable components.
- Follow manufacturer concentrations, PPE, lockout steps, storage, and spill procedures. Schedule follow-up based on hardness and usage.
Descale Frequency by Model
Wondering how often you should descale your specific machine? You’ll align your schedule to model maintenance specs and user ergonomics. Follow manufacturer alerts first, then adjust for water hardness and usage.
De’Longhi: 1–3 months depending on hardness; use descaling mode. Philips: 2–5×/year; increase to monthly if >18 dH. Fully automatic: rely on self-alert plus monthly check for heavy use. Semi-automatic/manual: set calendar reminders—1–2 months for daily use, 3–4 months for occasional. Log cycles and assign responsibility to improve ergonomics and reduce handling errors.
| Model Category | Suggested Interval |
|---|---|
| De’Longhi | 1–3 months |
| Philips | 2–5×/year |
| Fully Auto | Alert-based/monthly |
| Semi/Manual | 1–3 months |
Mineral Buildup Removal Checklist
How do you quickly identify and remove mineral buildup without disrupting service? Inspect group heads, steam wand tips, and water inlet screens for white crust or reduced flow. You’ll act fast, keep brew taste neutral, and restore an ultra clean system.
- Visually inspect and document scale hotspots; note flow reductions.
- Isolate component, run short descaling pass, then immediate rinse cycle.
- Remove removable parts; soak only per manufacturer’s timing; scrub with nonabrasive brush.
- Flush steam wand and group head until output is clear and taste neutral; verify flow rates.
- Log cleanup, replace filters if compromised, and schedule follow-up based on hardness and throughput.
Follow PPE and machine-specific lockout steps. Avoid overexposure to solution and don’t exceed recommended contact times.
Descale Solution Concentration Limits
You’ll specify recommended acid strength and the maximum safe concentration for each machine type before mixing. Use precise dilution calculations and note material compatibility (brass, stainless, rubber) to avoid corrosion or seal damage.
Also, document proper storage, shelf life, and stability of mixed and concentrated solutions for safe handling.
Recommended Acid Strength
Because descaling uses acidic solutions that can damage seals, gaskets, and metal if too strong, stick to manufacturer-recommended concentrations and commercial descaler labels for safe effectiveness. You’ll verify acid compatibility for all wetted materials before mixing. Consult machine manuals and descaler SDS sheets.
Measure concentrate with calibrated tools; dilute to specified percent (typically 1–5% citric or 0.5–2% sulfamic equivalents unless manufacturer states otherwise), and document batch concentration on the work log. Follow specified contact times and avoid prolonged exposure. After use, flush systems thoroughly per procedure.
Store unused concentrate per storage conditions on the label: cool, ventilated, corrosion-resistant cabinets with secondary containment. Train staff on PPE, spill response, and label-reading to maintain consistent, safe descaling practice.
Maximum Safe Concentration
A safe maximum concentration for descaling solutions balances effective scale removal with protection of seals, gaskets, and metal components. Stick to manufacturer limits and never exceed labeled percent by weight for the active acid (commonly 1–5% for citric acid or 0.5–2% sulfamic acid equivalents). Record the prepared concentration on the maintenance log.
You’ll measure and mix by weight or supplied dilution chart. Verify with a calibrated refractometer or titration strips, and note batch concentration and date. Set procedural maximum concentration and acceptable deviation in your SOP. Train staff to refuse higher strengths.
For safety, define PPE, neutralization steps, and spill response. Audit logs monthly to confirm adherence to maximum concentration and safe limits.
Machine Material Compatibility
How should you match descaler strength to machine materials to avoid damage while removing scale effectively? Assess materials first: brass, stainless steel, aluminum, plastics, rubber seals, and coatings. Consult manufacturer specs for material compatibility and maximum acidity.
Use milder concentrations on aluminum, plated parts, and soft plastics to prevent etching or swelling. Stainless and brass tolerate stronger solutions; however, still follow limits. Isolate vulnerable components or remove them before treatment. Monitor contact time strictly and flush thoroughly to prevent residual corrosion.
Implement descaling safety: wear gloves, ventilate, neutralize spills, and document concentration used per machine. Log material compatibility findings in maintenance records and include approved concentration ranges to guide technicians during scheduled descaling cycles.
Dilution Calculation Methods
When you calculate descaler dilutions, start by confirming the manufacturer’s maximum concentration for each material type and the descaling agent’s recommended mixing ratio. Then convert those recommendations into measurable volumes for your water reservoir or service tank.
Next, use dilution math to determine stock volume versus final volume: C1V1 = C2V2. Select target concentration below the maximum for the most sensitive component. Record two word discussion ideas like “safety margin” and “material limits” in your log. Measure with graduated cylinders or calibrated sight gauges; avoid estimations.
Prepare labeled batches, noting ambient temperature which can affect activity. Verify final concentration with test strips or titration kits before introducing solution to the machine. Dispose or neutralize excess according to local regulations and manufacturer guidance.
Storage And Stability
Concentration limits determine how long descaling solutions remain effective and safe to store. You should label mixed batches with target ppm, mix ratio, and date. Never exceed the manufacturer’s maximum recommended concentration for the machine materials. You’ll document concentration limits for each product; note pH, active acid percentage, and compatible materials.
For storage stability, keep mixed solutions in sealed, labeled containers away from heat and direct light. Use within the manufacturer’s stated shelf life: typically 7–30 days for diluted mixes. Don’t re-dilute used solution.
For bottled solutions, record lot number and unopened shelf life. Once opened, transfer remaining product to original bottle or compatible chemical-grade container; label with open date and observe disposal protocols if clarity, odor, or color changes.
Frequently Asked Questions
How Do I Test My Water Hardness at Home?
You test water hardness at home using a home hardness test strip or DIY titration kit. Wet the strip or follow kit steps. Add reagent drops until color change, and compare to the chart for PPM. Record results to improve descaling accuracy and schedule.
Repeat tests at different taps. For DIY testing, use boiled sample cooling to avoid interference. Log readings and retest monthly or after plumbing changes for reliable results.
Can Descaling Void My Machine Warranty?
Yes, descaling can affect your warranty. You should check manufacturer instructions and follow approved descaling methods to avoid descaling warranty issues and warranty implications.
Use recommended solutions and qualified service for internal scale removal. Keep records of cycles; document dates, agents, and responsible staff in logs. If the manufacturer requires service-only descaling, do not attempt invasive repairs yourself. Unauthorized procedures may void coverage.
Are Eco-Friendly Descalers as Effective?
Yes, eco-friendly descalers can match conventional descaler effectiveness when you follow manufacturer instructions. You’ll verify active ingredients (citric or lactic acid), concentration, contact time, and temperature.
You’ll run a full descaling cycle, soak removable parts, flush thoroughly, and repeat if scale remains. You’ll document results and monitor machine performance; if buildup persists, switch to a stronger formulation or professional service. Test strips confirm success.
How Long Should a Full Descaling Appointment Take?
A full descaling appointment typically takes 45–90 minutes. You’ll plan descaling duration around machine size and complexity. Start with 10–15 minutes setup and pre-rinse. Then, run 20–40 minutes of solution cycles and soak intervals.
Spend 10–20 minutes on removable-part soaking and brushing. Finally, allow 10–15 minutes for thorough rinses, testing, and reassembly. Use appointment pacing to schedule buffer time for diagnostics and unexpected repairs.
Can I Drink Coffee Immediately After Descaling?
Yes, you can drink coffee after descaling, but don’t do it immediately if residues remain. Rinse thoroughly: run at least two full tanks of fresh water through the machine, flush group heads and steam wand, and purge lines until no chemical taste is detectable.
Test a small shot; if it tastes clean, resume normal brewing. Log the cycle completion and rinse steps in your maintenance record for accountability.
Conclusion
You’ve got a practical plan: follow model-specific frequencies, use the checklist to confirm mineral removal, and stick to recommended acid strengths and maximum concentrations for safety.
Check material compatibility before treating any component. Calculate dilutions precisely, and note solution storage limits. Descale on schedule; record each service, and adjust intervals based on water hardness and performance.
Do this consistently to protect machine longevity and keep brew quality reliable.