Coffee Maker Carafe Size Compatibility Chart: Find Your Match
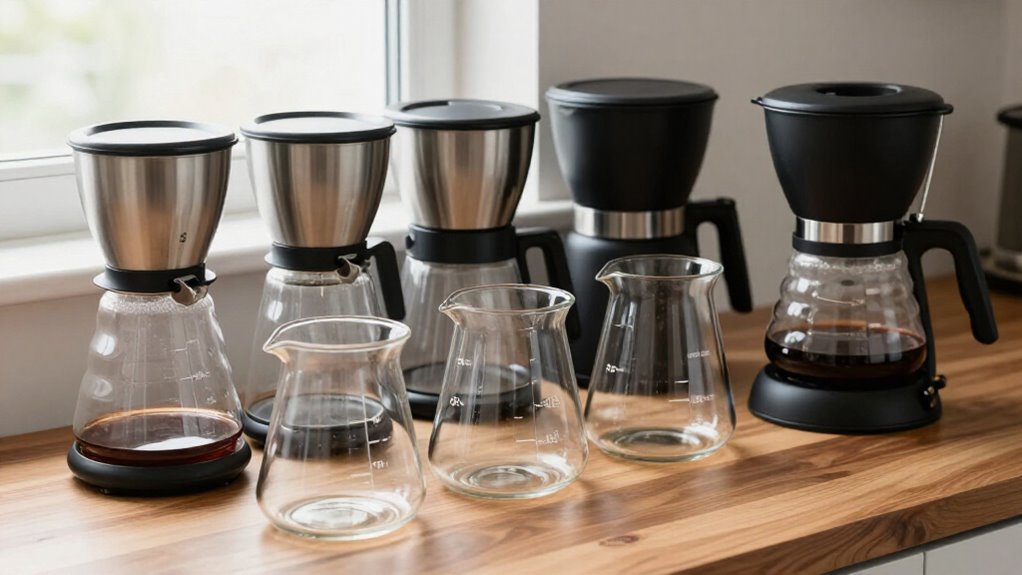
To match a replacement coffee carafe, start with your brewer’s model and OEM part number, not its 10- or 12-cup label. Compare ounce capacity, height, diameter, lid contour, spout, handle mounts, and collar notch. Confirm the lid engages the pause-and-serve valve when the carafe is fully seated, with no reservoir or handle interference.
Choose glass or thermal steel based on durability and heat retention. Inspect thrift-store glass for chips. Avoid cold-water shock.
Details follow.
Cup Counts and Dimensions
Why does a “12-cup” coffee maker hold only about 60 fluid ounces? A coffee maker’s “cup” usually measures about 5 fluid ounces, not the US standard 8-ounce cup. Many brewers use a historical 6-ounce coffee-cup convention, while some define a cup as 4 to 6 ounces.
As a result, a labeled 12-cup carafe holds 60 ounces of finished coffee, although capacity may approach 72 ounces. Read the carafe’s ounce markings; you can’t rely on its cup count alone. Check whether markings indicate maximum physical volume or recommended fill volume; the fill line prevents brewing overflow.
External dimensions also affect storage. For sizing, measure your expected serving volume and compare it with the stated fluid-ounce capacity. Manufacturing tolerances can make usable volume differ from labeled capacity.
Brand-Specific Carafe Compatibility
Although carafe capacity may look standardized, compatibility depends on each brand’s model series, carafe dimensions, lid, handle, and drip-stop interface. When you replace yours, match the brewer’s model number and OEM part code, not merely its cup rating. Cuisinart DCC lids and drip channels vary by series; Hamilton Beach and Black+Decker may share carafes within defined families. Mr. Coffee often accepts similarly shaped glass options, but you still need to verify the lid and handle mounts. Keurig single-serve brewers generally don’t use external carafes; combination models require exact OEM matching.
| Brand | Compatibility check |
|---|---|
| Cuisinart | Match DCC/TCP part number, lid, and lip geometry. |
| Hamilton Beach/Black+Decker | Confirm family cross-reference, tabs, and handle mounts. |
A third-party carafe works only when its interface matches; otherwise, choose the manufacturer’s replacement.
Pause-and-Serve Clearance
Once you’ve matched the replacement carafe to your brewer’s model and interface, verify its pause-and-serve clearance. A visually similar carafe can still fail if its lid profile doesn’t engage the brewer’s shutoff mechanism. Before ordering, check clearance around the lid and spout area, so the lid sits fully and the valve engages completely.
Insufficient space can cause leaking or excess dripping after you remove the pot.
Measure usable height from the warming plate to the shutoff or basket outlet area. Compare that measurement with the replacement’s height to prevent pause-valve misalignment. Confirm the spout and lid interface align, so coffee pours cleanly instead of striking the lid and running down the outside. Keep the original broken lid and parts for a direct geometry comparison.
Material and Lid Design
When you compare glass and thermal carafes, weigh visibility against heat resistance and durability. Match the lid’s shape and seal to your brewer’s drip-stop mechanism to prevent leaks and poor brewing.
Check that the handle and grip provide clearance, stability, and controlled pouring.
Glass Vs. Thermal
Glass carafes cost less and preserve coffee’s flavor, but they’re vulnerable to thermal shock: a carafe near 195°F after brewing can crack if you rinse it with cold water. Let it cool before washing, and check measurement markings against your brewer’s stated capacity.
Glass lets you see the fill level, but it depends on a warming plate that can overheat coffee and degrade flavor. Thermal stainless-steel carafes cost more, resist shattering, and typically retain heat far longer; guidance reports only about a 4°F drop after an hour.
You’ll use less warming-plate heat, reducing scorching and energy waste, but you won’t see the level easily. Confirm the replacement model, base fit, and allowable weight before buying. Choose glass for visibility and economy; choose thermal steel for extended holding.
Lid Shape And Seal
A replacement carafe’s lid is part of the brewer’s pour-pause system, so its height, contour, spout angle, and shutoff interface must match the original design. The lid’s profile must engage the brewer’s shutoff mechanism correctly; otherwise, coffee may continue dripping after you remove the carafe. Even when the replacement matches the original height, a different contour or spout angle can make the brew stream strike the lid, then run down the exterior in streaks.
Check the seal and its material, too. A poor seal can leak during brewing or pause-and-serve operation, while a properly seated gasket helps preserve the original flow timing.
When you compare models, match the lid height, contour, and shutoff interface where the lid presses against or mates with the valve. Confirm clearance under the brew head, because near-miss dimensions can prevent full engagement. Universal carafes may include adapters, but “fits most” doesn’t confirm exact lid compatibility.
Heat Resistance Matters
Heat resistance determines how safely and reliably a replacement carafe handles repeated brewing cycles. Choose glass only if you’ll manage thermal shock: a pot near 195°F can crack when you rinse it with cold water. Let it cool on a trivet, then hand-wash it gently. This practice reduces stress from repeated hot-to-cool cycles and limits sink-side breakage.
For longer heat retention, choose a vacuum-insulated stainless-steel thermal carafe. You’ll sacrifice brew-level visibility, but coffee may lose only about 4°F in an hour, reducing reliance on a warming plate. Evaluate the lid, too. Its heat-resistant construction and profile should seal securely and fit beneath the brewer’s head. A correctly designed lid limits heat loss and supports reliable serving. Check material ratings and cleaning instructions before you buy.
Drip Stop Compatibility
Because the drip-stop is part of the brewer’s mechanical system, the replacement carafe’s lid must match the original interface—not merely fit the machine’s opening. Material matters; geometry controls sealing.
The lid’s shutoff tab must engage the brewer’s valve or locking mechanism. A similar-looking lid can fail if its profile, spout angle, or opening position misaligns. Incorrect lid height can keep the carafe from reaching the shutoff area, leaving the pause-and-serve seal incomplete.
You may then see extra dripping or splashing when you remove it. Before buying, compare the original lid’s interface and measure usable height between the warming plate and valve area. Universal replacements may offer height options or adapters, but verify the interface.
Choose a model-specific carafe when possible; its lid should match.
Handle And Grip
Choose a replacement carafe with a handle that leaves enough clearance for your fingers and knuckles when lifting it from the brewer. Check the grip’s shape, mounting strength, and balance, especially with a full carafe.
Glass models usually weigh less, while thermal stainless-steel models weigh more and need a substantial, comfortable handle for controlled lifting and pouring.
Inspect the lid as carefully as the handle. Its profile must engage your brewer’s pause-and-serve or shutoff mechanism; incorrect geometry can cause dripping or prevent the valve from sealing. Confirm the spout or port orientation and angle to avoid side streaks and an awkward pour.
If you’re considering a universal carafe, verify its height adapter and lid geometry, not just its cup capacity. Match the model code whenever possible.
Check Handle-to-Reservoir Clearance
Before confirming a replacement carafe, measure the clearance between its handle and the coffee maker’s reservoir or side walls, focusing on the tightest point. Compare the handle’s sweep, height, and angle with the broken original carafe. A replacement may fit the base and allow the lid to close yet strike the reservoir because its handle curves inward.
Check clearance with the carafe fully seated, the lid engaged, and the pause-and-serve valve triggered. If the reservoir sits at the back, lift and rotate the carafe as you would for pouring; interference can prevent complete seating or make movement awkward. Use your original carafe’s handle geometry as the template, including distance from the neck and overall height. Verify the replacement doesn’t bind when fully seated.
Cold Water Thermal Shock
A glass carafe heated to about 195°F can crack when cold sink water contacts its surface. When you rinse it immediately after brewing, the outer glass contracts rapidly while the hotter interior changes more slowly. This uneven contraction creates tensile stress that can exceed the glass’s strength, causing a sudden crack.
Most thermal-shock failures occur during rinsing or washing, not while the carafe rests on the warming plate.
Protect your carafe by setting it on a towel or trivet and letting it cool before washing. Don’t pour cold water into it, immerse it, or hold it under a cold tap while it’s still hot. Because glass is especially vulnerable to rapid temperature changes, cooling habits reduce breakage and help preserve a carafe’s service life.
A 10-Cup Thrift-Store Find
When you spot a 10-cup carafe at a thrift store, treat its label as a capacity estimate of roughly 50–60 oz, not proof of compatibility. Check its height and geometry against the brewer: the base must sit securely, while the lid must clear the brew head and engage the pause-and-serve mechanism. Measure the warming-plate diameter and compare the lid interface, including spout shape and profile.
If a listing says “universal,” assume it fits only a model cluster, not every machine. After installation, test a full brew cycle. Confirm that coffee pours without splashing and that flow stops promptly after serving; poor alignment can cause drips and reduce heat retention. Verify the carafe remains stable when filled, and compare its model code with brewer documentation.
Inspect Chipped Glass Rims
Inspect the chipped glass rim closely and locate the damage near the lid interface, pour spout, or base seam, because each area has different fit requirements. Look for small cracks radiating inward from the chip; glass can fail through crack propagation even when the carafe still looks usable.
Pay special attention to the rim that seals with the lid or engages the pause-and-serve shutoff mechanism. A chip there can prevent proper sealing, so compare the replacement’s lid profile and height.
Before you buy, inspect these points:
- Sharp edge: A cutting edge signals altered rim geometry; don’t handle it casually.
- Lid wobble: Close the lid gently and check for rocking or incomplete seating.
- Fit risk: Replace the carafe if damage affects sealing, pouring, or base stability during brewing.
Confirm the Carafe Collar Notch
Before ordering a replacement, confirm that its collar notch, the keyed feature near the lid or lower collar, matches your brewer’s lid and pause-and-serve shutoff. This keyed feature helps the pause-and-serve valve seal and engage; a mismatch can cause extra dripping or a weak pause function. Don’t judge compatibility by capacity alone: a universal carafe may hold the same ounces yet fail at the notch.
- Compare the notch’s position with the original carafe’s bottom and overall height.
- Check the replacement’s lid profile and spout alignment against the brewer’s shutoff mechanism.
- Keep the old carafe until delivery, then compare both parts directly before brewing.
If photos or diagrams show the collar, verify notch geometry and orientation before purchasing, and choose an OEM model code whenever possible.
Conclusion
Before you buy a replacement carafe, match more than its cup count. Measure height, diameter, handle clearance, collar, lid, and pour spout against your brewer. Confirm the carafe triggers pause-and-serve correctly and seats below the basket.
Check material condition, especially chipped glass rims, and avoid thermal shock from cold water in a hot vessel. If you’re evaluating a thrift-store 10-cup model, verify every interface. The right match fits securely, pours cleanly, and brews reliably safely.