Coffee Maker Water Reservoir Capacity Guide
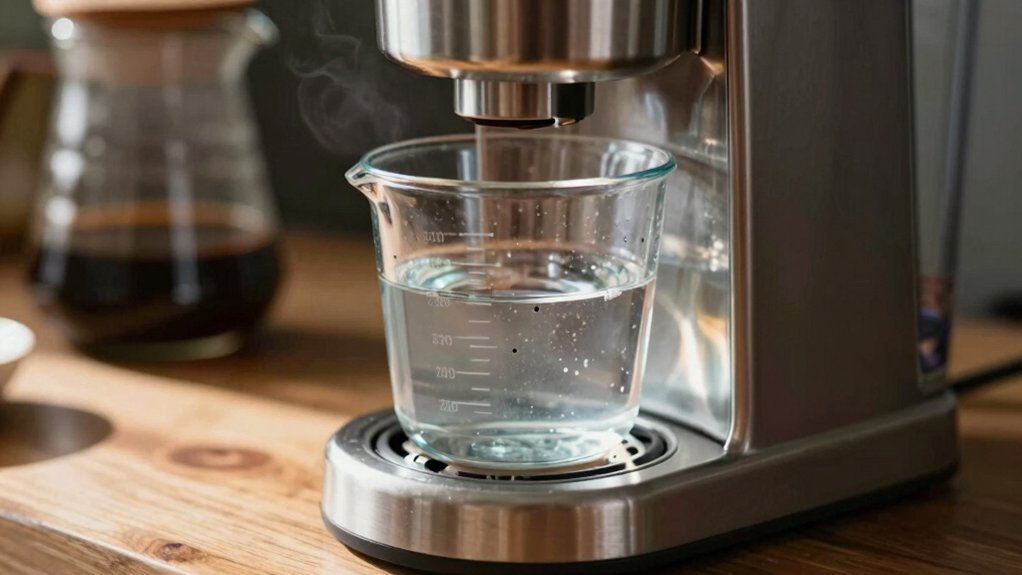
Most coffee makers list capacity by “cups,” but those cups vary. US drip cups are about 125 ml, Keurig-style cups are approximately 177 ml, and European cups are about 200 ml.
A 4-cup tank is roughly 25 oz; a 6-cup tank is near 40 oz. Additionally, 10–12 cup models often use 1.5–1.8 L (about 50–60 oz).
Use reservoir markings or a measuring cup to fill accurately. If your tank leaks, gasket seating and mounting hardware are common fixes. Keep going for step-by-step checks.
Quick Overview
- Match “cup” definitions to milliliters: US drip 125 ml, Keurig 177 ml, European 200 ml before calculating reservoir needs.
- Typical reservoir sizes: 4-cup ≈ 25 oz; 6-cup ≈ 40 oz; 10–12 cup ≈ 1.5–1.8 L (56–60 oz).
- Choose a reservoir slightly larger than daily brew volume to avoid frequent refills and allow headspace.
- Prefer removable, clearly marked reservoirs for accurate filling, easy cleaning, and simplified measurement.
- If leaking, inspect gasket/seal; verify proper seating/alignment. Replace damaged parts with OEM components.
Reservoir Volumes by Cup Count
Wondering how much water you actually need for different cup counts? You’ll use reservoir volume to plan fills and avoid mid-brew refills. A 4-cup tank often holds about 25 oz, while 6-cup tanks run near 40 oz. Larger 10–12 cup models show liters (1.5 L, 1.8 L) or ounces (56 oz). Some 12-cup units use internal tanks with unspecified removable volumes.
Single-serve compatibility varies, so check whether your model supports pods or ground coffee. Don’t get distracted by irrelevant topic tangents or stray speculation about taste; focus on the reservoir markings and keep-warm time to match your routine.
| Cups | Typical Volume | Note |
|---|---|---|
| 4 | 25 oz | Removable, marked |
| 6 | 40 oz | Visual reservoir |
| 12 | 1.8 L / 56 oz | Large, multiple servings |
Milliliters per Cup Chart
How many milliliters should you count on per “cup” when filling your coffee maker reservoir? You’ll want a simple reference so you don’t under- or overfill. Use this quick chart to match common cup labels to milliliters and avoid wasting water or diluting your brew. Ignore any irrelevant topic or unrelated discussion that doesn’t help measurement.
- Standard coffee “cup” (US drip): 125 ml
- Keurig-style “cup”: 177 ml (6 fl oz)
- European cup standard: 200 ml
- Large mug equivalent: 240–300 ml
Check your machine’s manual first. Manufacturers sometimes define “cup” differently. Keep a kitchen scale or measuring cup nearby for accuracy if you want consistent results.
Leaking Reservoir Seal Troubleshooting
If your reservoir is leaking, start by identifying exactly where the water is coming from so you can target the fix. Inspect the gasket for cracks or debris. Verify the reservoir is seated and aligned correctly, and tighten any loose mounting hardware.
If the seal is damaged, replace it to stop the leak and restore a proper fit.
Identify Leak Source
Where’s that drip coming from? First, isolate the machine and dry the area so you can watch fresh water appear. Fill the reservoir slowly and watch the base, corners, and the reservoir seal junction for beads or streams of water.
Tip the reservoir slightly while watching the underside; leaks often show only when pressure or angle changes. If you see moisture at the seal, note whether it’s continuous or only when full. That helps pinpoint a worn or misaligned reservoir seal versus an overflow or crack.
Check fittings and any quick-connects between reservoir and brewer since a loose connection can mimic a bad seal. Photograph what you find so you can compare parts or explain the leak source to support or a technician.
Inspect Reservoir Gasket
Want to know whether that damp spot comes from a worn gasket or a loose fit? Remove the reservoir and dry the area. Inspect the gasket for cracks, compression set, or mineral buildup; these signs mean it’s failing. Use a flashlight and gentle probing; don’t force the seal.
Clean with a soft cloth and vinegar solution. Then re-seat the gasket to test for improved sealing. If leakage persists, check gasket compatibility with your model before ordering replacements: size, material, and thickness matter.
Keep a simple inspection maintenance log: date checked, condition, action taken. Regular quick inspections prevent surprises and extend reservoir life. If you’re unsure about fit, consult manufacturer guidance rather than guessing.
Check Reservoir Alignment
How well does the reservoir sit in its housing? You should check alignment every time you refill or notice leaks. Remove the reservoir and reseat it firmly, watching guide rails or tabs so the seal meets the port evenly.
Misalignment can create gaps that look like gasket failure but are just off-center seating. If your machine has sensors or a display, run a simple fill-and-start to confirm the unit recognizes water level; repeated misreads might indicate calibration drift rather than a physical leak.
When you’ve reseated the tank, look for steady contact along the seal and no wobble. If problems persist after accurate alignment and sensor checks, proceed to gasket inspection or consult the manufacturer before tightening mounting hardware.
Tighten Mounting Hardware
Notice any persistent leaks after you’ve reseated the reservoir? If so, check the mounting hardware: loose screws or clips can let the reservoir shift and break the seal. Power off and remove the reservoir. Then, inspect mounting points for stripped threads, bent brackets, or missing fasteners.
Realign the reservoir so reservoir alignment matches the guide rails or locating pins. Then, gently tighten mounting screws in a crisscross pattern to distribute pressure evenly. Don’t overtighten; stop when parts feel snug and the reservoir seats without wobble.
Reinstall the reservoir, fill a small amount of water, and observe for leaks. If tightening fixes the issue, you’re done. If not, proceed to examine the seal and surrounding components.
Replace Damaged Seal
Seeing persistent leaks even after tightening mounts usually means the reservoir seal is worn or damaged and needs replacement. You’ll start by unplugging the machine, removing the reservoir, and drying the area. Inspect the seal for cracks, flattening, or residue. If it’s compromised, order a manufacturer-approved replacement; avoid generic parts that may be subtopic irrelevant or unrelated to your model.
Remove the old seal gently with a plastic tool. Clean the groove with a lint-free cloth and mild detergent. Then rinse and dry thoroughly. Seat the new seal evenly, press it into place, and reassemble. Run a test fill and brew cycle to confirm no leaks. If problems persist, contact authorized service; don’t attempt complex technical asep? repairs yourself.
Frequently Asked Questions
Can Reservoir Size Affect Coffee Taste or Extraction Consistency?
Yes, reservoir size can affect taste impact and extraction consistency. If you use a very large reservoir but brew small batches, water can sit, losing freshness and altering flavor; that reduces taste impact.
Conversely, too-small reservoirs may force frequent refills and temperature swings, harming extraction consistency. Choose a reservoir matching your typical batch size, keep water fresh, and ensure stable heating to preserve flavor and even extraction.
Can I Use Filtered or Bottled Water in the Reservoir?
Yes, you can use filtered water versus bottled water in the reservoir, and both often improve taste. Filtered water removes chlorine and off-flavors; bottled water can be consistent but varies.
Watch mineral content considerations: too-soft water tastes flat; too-mineralized causes scale. Aim for balanced mineral levels (moderate hardness) or use filtered water with occasional descaling. That keeps extraction consistent and your brewer running well.
Do Reservoirs Need Descaling Separately From the Whole Machine?
Yes, you should descale the reservoir as part of overall maintenance, but you don’t always need a separate process if your descaling method reaches it.
You’ll follow a descaling frequency based on water hardness to prevent mineral buildup. Run a descaling solution or vinegar through full cycles so the reservoir, tubing, and heating elements get treated.
Wipe the reservoir regularly and rinse thoroughly after any descaling cycle.
Are Replacement Reservoirs Widely Available for Older Models?
You’ll sometimes find replacement reservoirs for older machines, but availability varies by brand and model. Check manufacturer parts pages and third-party sellers; replacement parts can be limited for discontinued lines.
Expect compatibility concerns: measure dimensions, fill ports, and sensor locations before buying. If originals aren’t available, consider universal reservoirs or compatible donor units from similar models. Keep receipts in case the part doesn’t fit or function correctly.
Can I Safely Store Coffee Grounds in the Reservoir Temporarily?
No, you shouldn’t store coffee grounds in the reservoir. Ground storage there creates safety concerns: residual moisture promotes mold, clogs valves and pumps, and can damage seals or electronics.
If you need temporary holding, use an airtight container or the machine’s designated filter basket. Rinse and dry the reservoir promptly if grounds get in. Run a cleaning cycle before brewing to prevent off-flavors and protect your coffee maker.
Conclusion
You now know how reservoir capacity relates to cup counts, how many milliliters each cup holds, and what to check when your reservoir leaks.
When troubleshooting, identify the leak source, inspect the gasket, confirm reservoir alignment, and tighten mounting hardware before replacing a damaged seal. Use the chart to measure water accurately. Follow the stepwise checks to avoid needless parts replacement. That keeps your coffee consistent and prevents future leaks.