Ideal Water Temperature for Espresso
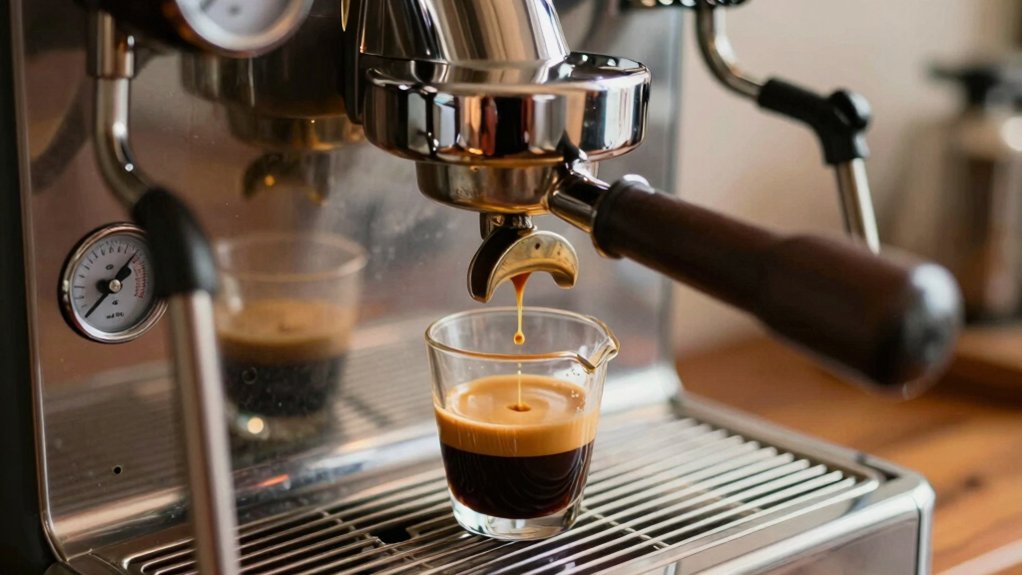
You should brew espresso with water between 90–96°C (195–205°F); centering near 94°C (201°F) for most beans. This range balances sweetness, acidity and bitterness. Small shifts of 1–2°C reveal more floral lift or more bitter, chocolate notes. Therefore, control temperature before tweaking grind or dose.
Use a stable group head, preheated portafilter and a well-calibrated PID to keep puck temperature predictable. Keep going and you’ll learn how roast, sensor placement and PID drift change the cup.
Quick Overview
- Aim for 90–96°C (195–205°F); baseline 94°C (201°F) is a reliable starting point.
- Increase temperature 1–2°C for lighter roasts to improve sugar extraction and body.
- Decrease temperature 1–2°C for darker roasts to reduce bitterness and preserve clarity.
- Use a stable group head, preheated portafilter, and a well-calibrated PID to maintain consistency.
- Calibrate sensors quarterly (heavy use) or semiannually. Log temps plus tasting notes to track drift.
Brew Temperature Range Chart
How hot should your water be for a consistent, flavorful shot? You aim for 90–96°C (195–205°F); that range balances acids, sugars, and bitters so espresso nuances sing. Equipment consistency matters: stable group head and preheated portafilter keep real brewing temps near setpoints.
Use 201°F (94°C) as a baseline; tweak ±1–2°C by roast: lighter needs slightly higher, darker slightly lower. Measure, don’t guess; single-degree shifts change taste. Preheat cups, run blank shots, and use filtered water to avoid off-flavors. The table below compresses the range into a simple emotional cue: predictability, warmth, and trust.
| Feeling | Temp (°C) | Note |
|---|---|---|
| Reassured | 93–95 | Reliable balance |
| Curious | 95–96 | Bright, floral |
| Comforted | 90–92 | Round, sweet |
Water Temp Vs Extraction
Why does a one- or two-degree shift in brew temperature change your shot so noticeably? You perceive texture, acidity, and bitterness because temperature governs solubility kinetics: hotter water extracts heavier bitters faster; cooler water preserves volatile aromatics and sweetness. That temperature nuance alters mouthfeel and the “urban flavor” edge in blends roasted for fast, intense profiles.
At +1–2°C you’ll pull more bitter alkaloids and body, darkening the cup and reducing floral clarity. At −1–2°C you’ll retain acids and delicate aromatics, increasing perceived sweetness and lift. Across roast levels, match temperature to bean development: lighter roasts need higher temps to access sugars; darker roasts demand restraint to avoid harsh extraction.
Control temperature precisely. Then tweak grind and dose for repeatable results.
Scale of PID Accuracy
When you read a PID readout, know that its accuracy often sits within a tight band (±0.5–±2°C). That range directly shapes extraction and cup temperature. Small drifts from sensor aging, wiring noise, or poor sensor placement near the group head will produce measurable flavor shifts. Therefore, check calibration and sensor location regularly.
Also consider controller resolution and calibration frequency. Coarse resolution or infrequent calibration can mask real temperature swings that affect shot consistency.
PID Accuracy Range
Curious about how precisely your machine holds brew temperature? You’ll want to quantify PID accuracy on a narrow scale: ±0.1°C, ±0.5°C, and ±1.0°C bands. Sensory tests show shots differ noticeably between ±0.1°C and ±1.0°C; sweetness and acidity shift.
Use two word discussion ideas like “stability band” and “response time” when comparing specs. Measure with a fast thermocouple at the group head for evidence. Log temperature over 60 seconds to see variance and oscillation. A PID holding ±0.1–0.2°C produces repeatable extraction; ±0.5°C is acceptable for most home setups. ±1.0°C may require compensating grind and dose adjustments.
Report raw data alongside tasting notes to link PID accuracy to flavor outcomes.
PID Drift Causes
How does a steady PID setpoint start to wander over time? You’ll notice tiny temperature swings on the display; then you’ll taste them in extraction. PID drift arises from component aging, thermal cycling, and electrical noise: aging capacitors and resistors change response curves. Repeated heating alters thermal contact, and EMI injects jitter into control loops.
Poor sensor placement amplifies perceived drift by exposing the sensor to local gradients or slow thermal coupling. This causes readings to lag true brew temperature. Mechanical wear—such as scale, gasket compression, and solder joint microfractures—shifts calibrated behavior incrementally.
You can measure drift with a high-resolution datalogger and repeatable shots; evidence shows cumulative drift of tenths to a degree over months. Regular calibration, clean thermal interfaces, and noise mitigation limit PID drift.
Sensor Placement Effects
PID drift often shows up as tiny, unpredictable swings on the readout; however, where the sensor sits determines how accurately that readout maps to the coffee puck. You’ll notice puck temperature only matches the sensor when placement samples the brew path close to the group head. Sensors tucked in the boiler or distant pipes read warmer, masking real extraction conditions.
Precision testing shows sub-1°C differences between sensor positions matter for taste: hotter readings push you to underheat the brew. So you should prefer sensors embedded near the group or thermocouples contacting the shower screen and monitor consistency over time. Track sensor placement against extraction results; plan calibration frequency as part of your maintenance to keep PID control meaningful.
Calibration Frequency Impact
When should you recalibrate to keep temperature control true to the puck? You should recalibrate whenever you detect drift beyond one degree at the group head or after any component replacement. Regular calibration frequency tied to a maintenance schedule: quarterly for heavy use, semiannually for home setups keeps PID accuracy within single-degree tolerances.
Use a calibrated thermocouple at brew-contact points and log readings. Sensory cues like sudden bitterness or muted sweetness often correlate with unnoticed drift. Evidence shows systematic checks reduce extraction variability and preserve intended flavor profiles. Keep records, perform adjustments after descaling or firmware updates, and treat calibration as preventive maintenance. That disciplined approach minimizes temperature deviation and ensures repeatable shots that reflect your chosen brew temperature.
Controller Resolution Limits
Why does a controller’s resolution matter to the taste of your espresso? You perceive tiny temperature shifts as changes in acidity, sweetness, and mouthfeel. A PID controller with coarse resolution (±1–2°C) will blur those distinctions. High-resolution controllers that adjust in 0.1°C steps let you target the 90–96°C extraction window and dial in single-degree sensitivity; evidence shows matters for roast-specific profiles.
Low resolution creates oscillation and forces compensatory changes to grind or dose. This introduces off topic concerns and masks true variables. Don’t treat controller resolution as an irrelevant topic: it’s a measurable limiter of repeatability. Choose hardware with fine resolution and stable sampling to preserve nuanced flavors and make your adjustments both predictable and reproducible.
Frequently Asked Questions
How Does Cup Temperature Affect Crema Stability?
Cup temperature directly affects crema stability. Warmer cups keep crema more fluid and volatile, causing faster collapse and aroma release. Cooler cups slow destabilization, preserving foam texture and microbubbles.
You’ll notice hotter cups thin crema, intensify bitter perception, and shorten visual lifespan. Slightly cooler cups extend crema gloss and mouthfeel. Evidence shows temperature alters surface tension and gas solubility; therefore, control cup temperature to manage crema stability precisely.
Should I Change Temperature for Decaf Espresso?
Yes, tweak temperature for decaf espresso. Decaf specific beans often need slightly warmer water to coax muted acids and body. Try 1–3°F (0.5–1.5°C) higher than your regular setting. You’ll detect clearer flavor nuances: sweeter notes, softer acidity, fuller mouthfeel.
Adjust incrementally and taste between shots. Pair temperature changes with minor grind tweaks to avoid over- or under-extraction while preserving crema and aromatic clarity.
Can Water Mineral Content Alter Optimal Brewing Temperature?
Yes, water composition and mineral effects can shift your optimal brewing temperature. Minerals buffer acidity and change extraction kinetics. Therefore, harder water often needs slightly lower temps to avoid over-extraction. Very soft water can require a touch more heat to coax sweetness and body.
Taste-test small adjustments of +/-1–2°F/0.5–1°C. Keep grind and dose constant, and use sensory cues and measurements to confirm the best setting.
Does Pre-Infusion Temperature Differ From Main Brew Temperature?
Yes, pre infusion temperature can differ slightly from main brew temperature. You’ll often start a touch cooler (or at the same temp) to gently wet the puck, preserving delicate aromatics. Then the main brew temperature rises or stabilizes to fully extract.
You’ll notice subtler sweetness and clearer clarity when the initial soak is milder. Controlled, evidence-based factories of espresso use incremental adjustments of 1–3°F to tune extraction dynamics precisely.
How Does Altitude Affect Boiling and Brew Temperature Settings?
You’ll need to raise brew temperature as altitude lowers the boil point. Altitude boil drops, so water boils at lower temps and extracts less. Increase brew temperature by a few degrees (1–4°F per 1000 ft) to compensate, tasting for balance.
You’ll notice brighter acidity and thinner body if you don’t adjust. Increasing temperature restores sweetness and body. Measure precisely, make incremental changes, and rely on sensory cues and extraction yield.
Conclusion
You’ve seen how temperature sits at the heart of espresso quality: the chart narrows the optimal brew range, extraction shifts with each degree, and PID accuracy, drift, sensor placement, calibration cadence, and controller resolution each nudge results.
Trust a well-calibrated PID. Place sensors near the group, and re-check calibration regularly to keep drift small. With precise control and repeatable readings, you’ll taste cleaner sweetness, balanced acids, and a velvety mouthfeel every shot.