Drip Coffee Brew Temperature Range
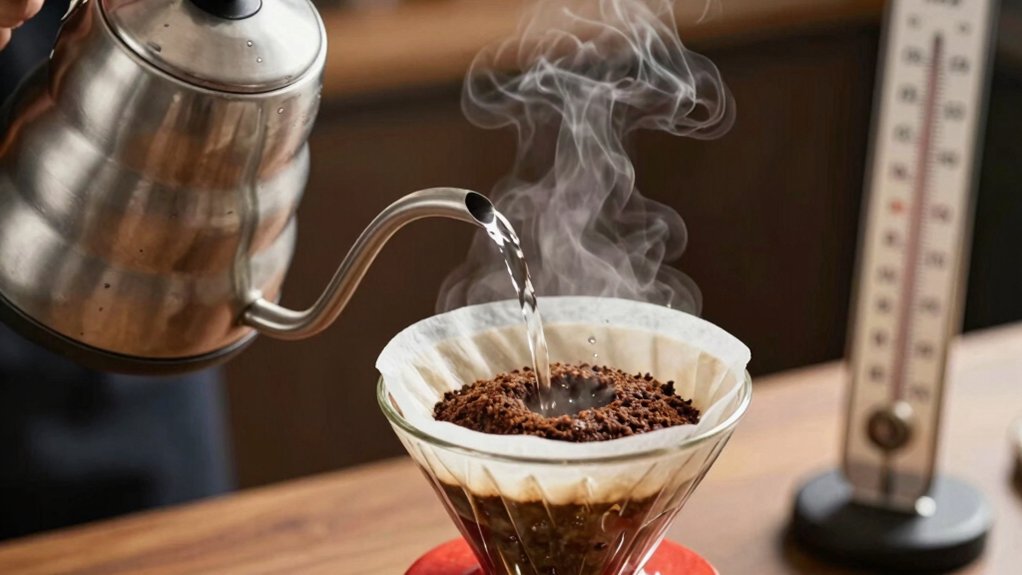
You should brew drip coffee between 195–205°F (90–96°C), with 200°F (≈93.3°C) as a practical sweet spot for balanced extraction. Aim lower for light roasts (195–200°F) and toward the top end for medium to dark roasts. Watch for bitterness above 205°F.
Maintain consistent temperature for repeatable results; small shifts under 2°F are usually imperceptible. If you want roast-specific tweaks, grind and contact time strategies will help you fine-tune further.
Quick Overview
- Aim for 195–205°F (90–96°C) as the standard drip brew temperature range for balanced extraction.
- Use 200°F (≈93.3°C / 371.48 K) as a practical baseline for repeatable results.
- Light roasts perform best near 195–200°F; medium/dark roasts toward 200–205°F.
- Temperatures above 205°F risk increased bitterness; adjust grind or ratio if you can’t lower heat.
- For cold/low-temp experiments (≈8°C), expect very slow extraction, long contact times, and delicate acidity.
Optimal Brew Temp Chart
Wondering which temperature will give you the most consistent drip coffee? You’ll aim for the SCA/NCA standard: 195–205°F, with 200°F a practical peak for balanced extraction. Match drip temperature to roast compatibility: Light roasts benefit near 195–200°F. Medium roasts are best near 200–205°F, and darker roasts should be toward the higher end; however, watch for bitterness above 205°F. If your machine lacks control, adjust grind and ratio to compensate.
| Roast Level | Suggested Temp (°F) |
|---|---|
| Light (fruity, porous) | 195–200 |
| Medium/Dark (balanced/richer) | 200–205 |
Consistency in temp keeps extraction repeatable. Small shifts under 2°F are typically imperceptible.
4–98°C Brewing Guide
How does brewing at 8°C change the way flavors develop? You’ll find extraction is extremely slow; at 8°C most soluble compounds barely dissolve. As a result, acidity, sugars, and aromatics release much later and more selectively. This low-temperature steeping highlights delicate floral notes while suppressing bitterness. It lets you probe roast nuances and extraction balance across time.
- Cold contact time: extended steeping (12–24 hours) emphasizes acids and clarity over body.
- Grind influence: finer grinds increase surface area to compensate for low solubility.
- Roast nuances: light roasts reveal bright, tea-like highlights; dark roasts yield muted sweetness.
- Extraction balance: adjust coffee dose and agitation to avoid under-extraction and thin mouthfeel.
Treat 8°C steeping as a precise experimental tool; it is not a default.
Scale Conversion Table
When you’re checking brew temperatures, a clear Celsius–Fahrenheit conversion makes it easy to match the 195–205°F target to 90–96°C. I’ll include quick conversion formulas, Kelvin notes for scientific precision, and a compact reference chart so you can convert on the fly.
Use the chart to pick the right temp for light, medium, or dark roasts without guesswork.
Celsius To Fahrenheit
Curious about how the drip-brewing temperature range translates for your recipe or thermometer? Use a simple Celsius conversion to match the National Coffee Association’s 195–205°F guideline. Multiply Celsius by 9/5 and add 32 to get the Fahrenheit scale reading you need.
Practically, 90–96°C maps to the 195–205°F optimal range; target ~93°C (200°F) for a reliable middle ground. For light roasts, aim slightly lower in that Celsius band; for dark roasts, slightly higher, following roast-specific guidance.
If your machine displays only Celsius, this conversion helps you set grind and ratio compensations when you can’t change temperature. Keep a note of consistent conversions so you reproduce extraction results precisely across brews.
Fahrenheit To Celsius
Wondering what Fahrenheit readings mean for your kettle or thermometer? You’ll convert by subtracting 32, then multiplying by 5/9 to get Celsius. For example, 200°F becomes 93.3°C. That scale lets you compare recommended drip ranges (195–205°F) precisely: 195°F ≈ 90.6°C, 200°F ≈ 93.3°C, 205°F ≈ 96.1°C.
Use these values to match roast-specific targets and avoid over- or under-extraction. Account for temperature drift during transfer; measure near the brewer, not after long exposure. Also, consider carafe thermal stability: stainless or insulated carafes preserve the conversion’s practical meaning by limiting cooling, while glass carafes permit faster decline.
Record readings consistently (same location and device) to keep brewing reproducible and evidence-based.
Kelvin Conversion Notes
How do you translate the drip-brewing temperature range into Kelvin so your instruments or scientific notes stay consistent? Convert Fahrenheit to Celsius, then add 273.15 to get kelvin. That gives 368.15 K to 373.15 K for the standard 195–205°F range. For a 200°F target, record 372.04 K.
Maintain kelvin accuracy by keeping three significant figures when documenting typical brewing targets (e.g., 368 K, 372 K, 373 K) unless your sensors justify greater precision. Include a brief scale interpretation note: Kelvin is absolute, so offsets remain linear with Celsius conversions. This simplifies comparisons across studies and instruments. Use consistent rounding rules in your log to avoid cumulative errors in replication or cross-instrument calibration.
Brewing Temp Reference
You already have the Kelvin equivalents for the standard 195–205°F range and a 200°F target. Now let’s lay out a compact conversion table you can use in the field or in lab notes.
Convert common brew setpoints: 195°F = 368.15 K, 200°F = 371.48 K, 205°F = 374.81 K. Add roast-level guidance alongside each value: light roast → 195–200°F (368.15–371.48 K), medium roast → 200–205°F (371.48–374.81 K), dark roast → 203–207°F (375.15–376.48 K) when you need slightly hotter extraction.
Use 200°F/371.48 K as a baseline for balance. Record both Fahrenheit and Kelvin in your notes to ensure reproducibility across equipment. This precision helps you match brewing temperature to roast level and expected extraction outcomes.
Quick Conversion Chart
Because brewing temperature is critical to extraction, a compact conversion chart lets you switch quickly between Fahrenheit and Kelvin while matching roast-specific setpoints. Use 195°F (368.15 K) for lighter roasts, 200°F (371.48 K) as your balanced baseline, and 205°F (374.81 K) for medium roasts. The range of 203–207°F (375.15–376.48 K) is reserved for darker profiles that need slightly hotter water.
Keep a small table at hand: 195, 200, 205, 210°F converted to Kelvin for lab-like precision. You’ll apply these setpoints to account for candied origins that extract sweeter solubles at lower heat and for robust beans needing hotter water. Note water chemistry: hardness and pH change perceived extraction; so adjust grind or ratio if your machine lacks temperature control.
Frequently Asked Questions
Should I Preheat My Carafe Before Brewing?
Yes, you should preheat your carafe. Preheating the carafe warms the vessel so carafe temperature influence is minimized. This prevents immediate heat loss from brewed coffee that can under-extract or cool the cup too fast.
Rinse the carafe with hot water or run a blank brew cycle; this simple step stabilizes brew temperature. It preserves flavor balance and gives you more consistent extraction and a hotter, more enjoyable cup.
Can I Use Filtered vs. Tap Water for Temperature Reasons?
Yes, you can use either; however, filtered water usually gives more consistent temperatures and flavor. Using filtered water vs tap water matters because water mineral content affects extraction and heat transfer. Very hard water can speed extraction and taste metallic. On the other hand, very soft or demineralized water under-extracts and tastes flat.
Choose filtered water with balanced minerals, or add minerals, to keep brewing temperature behavior and flavor stable.
How Does Elevation Affect Brewing Temperature?
Elevation impact: As you go higher, the boiling point drops; so brewing temperature falls too. You’ll extract less at the same settings. Compensate brewing temperature by using hotter water (if possible), a finer grind, or slightly longer contact time to reach proper extraction.
At high altitudes, aim a few degrees higher than usual or adjust grind and ratio to avoid under-extraction. Monitor taste and tweak until you restore balance.
Does Bloom Time Change With Water Temperature?
Yes, bloom time does change with water temperature. You’ll see hotter water speed CO2 release and visible bloom; this will shorten bloom time slightly. Cooler water slows degassing; therefore, you’ll prolong it to ensure even wetting.
Adjust bloom time based on temperature and roast: use a shorter bloom for hotter pours and a longer one for cooler pours to promote consistent pre-infusion and more uniform extraction.
How to Store Brewed Coffee to Preserve Temperature-Related Flavors?
Store brewed coffee in an insulated thermos or vacuum carafe to preserve temperature and flavor. Don’t leave it on a hot plate; this degrades taste. Chill quickly for cold storage. Then keep sealed in the fridge and consume within 24–48 hours for best flavor preservation.
Reheat gently if needed; avoid prolonged high heat. Practice proper coffee storage and airtight sealing to minimize oxidation and preserve nuanced temperature-derived aromas.
Conclusion
You’ve learned the optimal drip coffee brewing temperatures and how to convert between Celsius, Fahrenheit, and Kelvin quickly. Use 90–96°C (195–205°F) for most roasts; adjust slightly for roast level. Consult the quick conversion chart when you’re switching units.
Measure with a reliable thermometer, and tweak within the range based on taste. By applying these evidence-backed guidelines and simple conversions, you’ll brew more consistent, better-tasting coffee every time.