How to Clean a Siphon Coffee Maker Without Damaging the Glass
Let your siphon maker cool completely to room temperature before disassembling or rinsing. Inspect the glass under bright, angled light, especially seams, the base, and handle points; don’t reuse it if you find a crack or chip.
Rinse with lukewarm water, then gently brush residue using a soft nylon or silicone brush and mild, pH-neutral soap. Avoid abrasives and sudden temperature changes.
Descale monthly in hard-water areas, rinse, and air-dry each component. More guidance follows.
Protect the Siphon Glass
Before cleaning, let the siphon glass cool completely to room temperature to prevent thermal shock. Handle it only by the upper rim or designated handles; never twist or press on the bulb, because concentrated force can create hairline cracks. Inspect every surface under good light before and after cleaning.
If you find a chip, crack, or unusual cloudiness, stop using the component and replace it; heat can turn minor damage into sudden failure.
While cleaning, keep the glass supported on a soft towel in a stable position. Don’t set it directly on a hard, dry counter, where a bump can chip the rim. Let it remain secure during drying, and handle it gently when relocating it. Avoid sudden temperature changes throughout the cleaning process.
Use a Nonabrasive Brush
Once the glass has cooled and passed inspection, use a soft nylon or silicone brush to remove coffee oils, fines, and mineral residue without scratching the surface. Rinse the chamber with warm, not boiling, water first to dislodge loose grit and reduce thermal stress. Choose a brush long enough to reach the globe and upper chamber, with a slightly smaller head and flexible shaft for curved glass.
- Add mild pH-neutral dish soap to warm water.
- Insert the brush straight; scrub gently with circular and vertical strokes, never levering against rims or joints.
- Rinse the bristles between passes, because trapped grit can scratch glass.
Rinse every surface until no soap film remains. For scale, use a 1:1 vinegar-water soak, then brush lightly and rinse thoroughly.
After Every 10 Brews
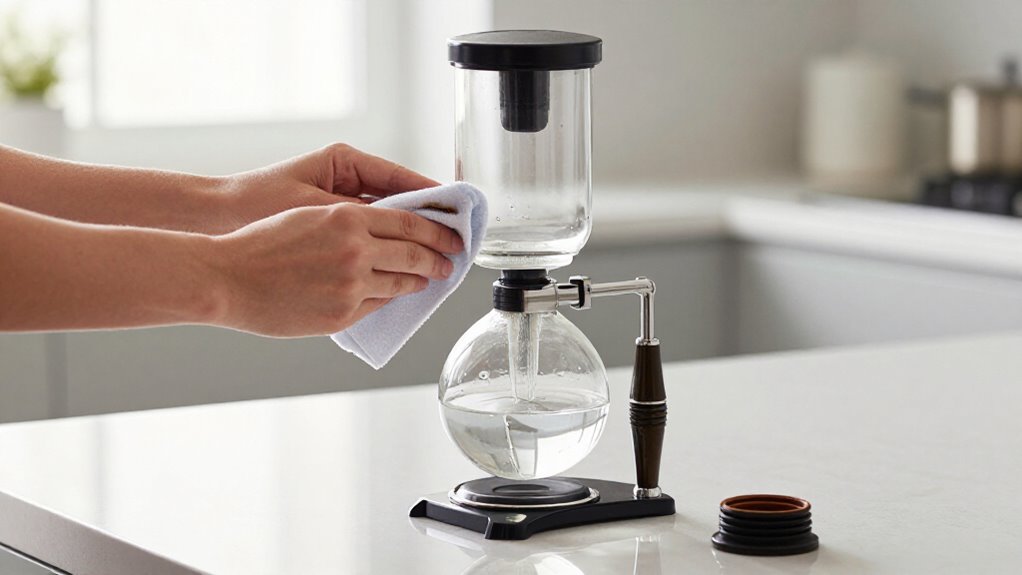
After every 10 brews, switch off the siphon maker and let the glass cool completely before you touch or move it. Then, wipe the glass siphon with a soft, damp cloth; don’t use harsh scrubbers, which can scratch or weaken glass over time. Remove filter parts and soak only those removable components in warm, soapy water. Keep glass cleaning gentle and controlled.
| Task | Component | Control |
|---|---|---|
| Cool | Glass | Wait completely |
| Wipe | Glass | Soft cloth |
| Soak | Filter parts | Warm soapy water |
| Flush | System | Plain-water cycle |
Run a plain-water brew cycle to flush tubes and connections, then discard the rinse water. If residue remains, run one additional quick rinse. Finally, let every glass component air-dry fully before reassembly or storage; this limits film, odors, and residual moisture.
Rinse With Lukewarm Water
After disassembling the siphon, rinse its glass vessel with lukewarm water to loosen coffee residue without causing thermal shock. Use a gentle stream, tilt the vessel to flush outlet areas, and avoid very hot or cold water that could crack the glass.
Let it drain, then air-dry it thoroughly before reassembly.
Use Lukewarm Water
Use lukewarm water, not hot, to rinse the siphon after cleaning or descaling, since a gradual temperature change helps prevent thermal shock and glass damage. Run water gently through chambers, tubes, and base so cleaner and dissolved minerals are carried away. Keep the stream moderate rather than forceful, and use water that feels warm, never hot. Discard the rinse water after each cycle; don’t let it remain in the siphon, where residue can redeposit or affect flavor.
Repeat with fresh lukewarm water until the effluent runs completely clear and contains no odor from soap or descaler.
Then set the glass aside and let it cool to room temperature before you handle or wipe it. Air-dry every component fully in a clean, ventilated location before reassembly.
Avoid Thermal Shock
Once you’ve turned off and unplugged the siphon, let its glass components cool to near room temperature before rinsing. If you’ve just brewed, don’t remove the chambers while they’re hot to the touch; handling them too soon can cause burns and expose warm glass to abrupt temperature changes.
Borosilicate glass tolerates heat better than ordinary glass, but it can still crack under thermal stress.
Run lukewarm water, not cold or boiling, over the components to reduce temperature differences gradually. Avoid high-pressure flow, which can cool or heat glass abruptly and create concentrated stress. Keep the difference below about 40°C when possible.
For descaling, follow the manufacturer’s timing and temperature limits, using lukewarm water between stages. Replace damaged glass before you resume cleaning or brewing.
Rinse Glass Gently
With the glass cooled and disassembled, rinse both chambers under a gentle stream of lukewarm water to remove loose coffee residue without stressing the glass. Hold each chamber securely by its base or frame, keeping your fingers clear of edges and fittings. Avoid hot, boiling, or ice-cold water; thermal shock can create cracks in thin borosilicate components, even after normal use.
If residue clings, lightly swish lukewarm water inside the chamber rather than applying force. Let the water sit briefly, then rinse again until it runs clear. Don’t strike the glass against the faucet or sink, and support it continuously during handling.
Place each chamber on a clean, soft towel and let it air-dry fully. This prevents water spots and trapped moisture.
Remove Coffee Residue
After the siphon has cooled completely, remove its glass components and rinse each one under a gentle stream of lukewarm water. Confirm the glass feels cool before handling, and place each component on a padded surface to limit impact. Keep the stream gentle; lukewarm water, rather than hot water, minimizes thermal shock and reduces the risk of cracking.
Gently swirl water inside each vessel, directing it across the bottom and walls. Pour it out completely. Repeat until the water runs clear and no oily film remains.
If residue persists, use a soft-bristled brush or non-abrasive sponge with a amount of neutral dish soap. Work without force, especially around rims, filter grooves, and spouts. Rinse repeatedly with fresh lukewarm water to remove soap and loosened residue.
Air Dry Thoroughly
Rinse each glass component with lukewarm water, not hot water, to remove remaining soap and limit thermal shock that could weaken or crack the glass. Keep the temperature change gradual, even with borosilicate glass, and handle every piece over a towel or silicone mat. Shake off excess water, then place each component upside down on a clean, dry rack in a well-ventilated area.
Position narrow chambers and filter housings so water can drain rather than collect.
Let the siphon air-dry completely, typically overnight. Before reassembly or storage, inspect seams, joints, and recesses for remaining droplets. Dry surfaces thoroughly to prevent odors, mold, bacterial growth, or mineral film that could affect your next brew.
Don’t reassemble until every piece feels completely dry to the touch.
For Hard Water Areas
In hard-water areas, use a coffee-maker anti-scale cleaner or a properly diluted vinegar solution to remove mineral buildup without stressing the glass.
Descale about monthly with daily use, following the product’s dosage and filling limits. Rinse each component through multiple fresh-water cycles, discarding the water, then air-dry everything completely.
Use Gentle Descaling Solutions
If hard water leaves mineral scale in your siphon coffee maker, use a gentle descaler such as white distilled vinegar diluted 1:1 with water or a coffee-maker product like Affresh. Follow the label’s specified dilution and contact or brewing time; correct dosing dissolves scale while limiting exposure of the glass and seals. Keep the solution lukewarm, never hot, and let the siphon cool fully before cleaning or reassembly.
This reduces thermal-shock risk.
Run only the descaling solution through the siphon’s brewing path, then discard it. Perform cycles with plain water, rinsing every component until no acidic taste or odor remains. Don’t add bleach or abrasive powders; they can damage glass surfaces, degrade seals, and leave difficult-to-remove residues. Inspect the cooled glass and follow instructions.
Prevent Mineral Buildup
Hard-water users should descale a daily-use siphon coffee maker about once a month, or every three months with occasional use, and sooner when scale appears on the glass or metal fittings.
Use a purpose-made descaler such as Affresh, or dilute white vinegar, according to label directions. Before treatment, remove filters and applicable tubing; soak them separately in warm soapy water.
This prevents trapped minerals from redepositing and limits concentrated cleaner contact with the glass. Keep deposits from returning by wiping the exterior promptly after each wash and drying water droplets before they harden into spots. Use only intact glass, inspect for chips or hairline cracks, and follow your manufacturer’s temperature and chemical limits. After descaling, run the manufacturer-recommended fresh-water rinse cycle before brewing again.
Rinse Glass Thoroughly
After descaling, rinse the siphon’s glass chambers with warm, freshly filled water until no cloudy residue remains. In hard-water areas, repeat this process. Discard each batch; reused water can redeposit minerals on surfaces.
If you see white spots or a film, add freshly filled water and gently swirl it through the interior. For stubborn scale, soak the glass in a 50:50 solution of distilled white vinegar and water, then perform fresh-water rinses.
Don’t use boiling water in a cold chamber; sudden temperature changes can stress or crack the glass. Handle it over a towel or silicone mat, and inspect for chips or hairline cracks before use. After the final rinse, place chambers inverted on a ventilated rack to air-dry completely, preventing marks and moisture.
No Coffee Film Remains
Rinse the siphon thoroughly after each brew by running multiple clean-water cycles until the glass walls remain clear and free of coffee film. Use a soft microfiber cloth or bottle brush with soft bristles to wipe interior surfaces gently. Avoid scouring pads, which can scratch glass and create places where residue accumulates.
If film persists, soak only removable glass parts in diluted vinegar, or use a glass-compatible descaler according to its instructions. Rinse repeatedly until the water runs clear. After descaling, run a fresh-water brew cycle and discard the rinse water. Run another cycle if you still see tinting or streaks.
Air-dry the siphon with glass exposed so micro-residue won’t dry into film. Wipe with a cloth only if needed to prevent streaks.
Check for Hairline Cracks
Before cleaning or brewing, inspect the glass under bright, angled light, using a phone flashlight to reveal hairline cracks near seams, the base, and handle attachment points. Rotate the vessel slowly without tapping, squeezing, or flexing it. Examine every surface for thin radial lines, slight cloudiness, or uneven reflections; these stress signs can indicate microscopic damage that ordinary room lighting may conceal.
If you find any crack, however faint, don’t clean for reuse or brew again. Pressure and hot water can widen the flaw, causing sudden glass failure. Don’t attempt to patch, seal, or sand damaged glass, because heat and cleaning solvents can weaken the area further. Replace the affected siphon component with a compatible part, and discontinue use until you’ve installed it securely.
Avoid Sudden Temperature Changes
Once the glass passes inspection, let every component cool to room temperature before rinsing or wiping it. Thermal shock occurs when the glass surfaces change temperature too quickly, creating uneven expansion and dangerous stress. Use lukewarm, not hot tap water, and never place a warm globe in a cold sink.
- Match soak water to the glass’s current temperature.
- Add cooler water gradually as the glass acclimates.
- Dry it naturally at room temperature, away from drafts.
Don’t use a refrigerator, freezer, or strong cold airflow to accelerate drying. Before reassembly, ensure the entire assembly has reached one consistent temperature; don’t fill warm glass with cold water. If you must handle residual warmth, use a towel or heat-resistant gloves, and proceed slowly to prevent accidental drops.
Inspect the Rubber Gasket
Inspect the rubber gasket around the glass and frame for cracks, tears, flattening, discoloration, hardening, or sticky residue, since these defects can cause leaks and pressure instability. Before cleaning, make sure it’s cool and stable. Lift the gasket gently with your fingertips; don’t use sharp tools.
Check that it sits evenly in its groove without gaps, bulges, or misalignment. Replace it when hardened, discolored, or damaged; a worn seal can stick to glass during cleaning and increase chipping risk.
Clean only the gasket area with a soft, damp cloth and mild dish soap. Rinse it, then dry it completely before reassembly to prevent mineral buildup from stressing the glass seal. Confirm uniform compression when components connect; uneven compression clearly indicates improper seating or damage.
Conclusion
Clean your siphon coffee maker gently to protect its glass and seal. Use a nonabrasive brush, rinse with lukewarm water after every 10 brews, and address hard-water deposits without scratching surfaces.
Confirm that no coffee film remains, then inspect the glass for hairline cracks and the rubber gasket for wear. Don’t expose hot glass to sudden temperature changes. If you find damage, stop using the brewer and replace the affected component before you brew again.