How to Clean a Coffee Maker With Grinder Combo the Right Way
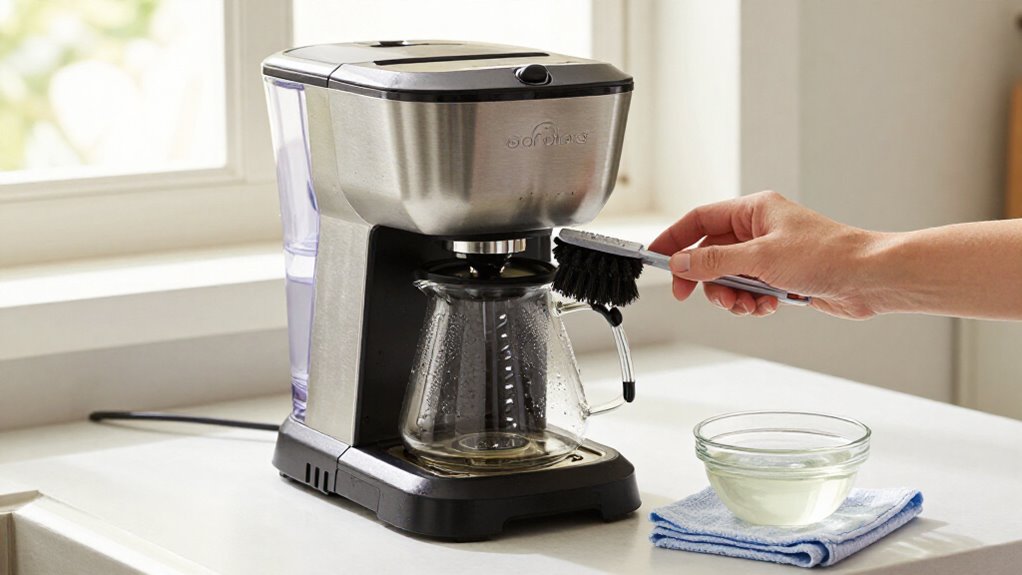
To clean a coffee maker with grinder combo, unplug it, empty the beans and grounds bin, and let it cool.
Brush the burrs and chute without touching moving parts or adding water.
Run the grinder’s cleaning program, then water-only brew cycles.
Descale with the manufacturer’s solution or a 1:1 vinegar-water mix when appropriate, then rinse with fresh water until no odor remains.
For dependable upkeep, follow the detailed safety steps that come next right here.
For Bean-to-Cup Machines
For a bean-to-cup machine, start by emptying the bean hopper, then run the normal brew cycle until no more coffee dispenses; this clears stale beans and grounds from the grinder and brewing path. Next, activate the machine’s cleaning mode for the brew unit or grinder chute, if available. Follow the program’s instructions, then run several water-only cycles to flush loosened oils and residue.
Descale through the dedicated cycle using the manufacturer’s solution or a 1:1 vinegar-and-water mixture when appropriate. Run multiple fresh-water cycles afterward, stopping only when no vinegar odor remains. Wipe the exterior, carafe, drip tray, and removable brew-unit parts. Wash compatible components, then let everything air-dry completely before reassembly. This routine helps prevent clogs, biofilm buildup, bitterness, and slower brewing while preserving reliability.
Inspect the Burr Grinder
After cleaning the bean-to-cup machine’s brew path, inspect the burr grinder for trapped grounds, oil buildup, foreign objects, misalignment, and signs of wear. Unplug the machine, remove beans, and follow your manual before opening the hopper or cover. Never touch moving burrs or use water near internal parts. Use a flashlight to examine burr edges, mounting points, and the chute. Brush loose grounds with a soft, dry brush, then wipe accessible surfaces with a lint-free cloth.
Look for:
- chipped burr edges or unusual dullness;
- oily, sticky residue or compacted fines;
- foreign material, looseness, or uneven spacing.
If you find damage, wobble, or inconsistent spacing, stop and contact the manufacturer or a qualified technician. Don’t grind rice; use food-safe tablets when your manual recommends them.
Burr-Brushing Frequency Guide
Brush the burrs whenever you notice old grounds, a stale-coffee smell, or dark, oily residue. These signs mean oils and fines may distort your next cup. Unplug the combo, follow its manual, and use a stiff, dry brush; don’t wet burrs unless the manufacturer permits it.
| Use pattern | Brushing schedule |
|---|---|
| Dark roasts or daily brewing | Weekly |
| Light roasts, moderate use | Every 2–4 weeks |
After switching from very oily beans to lighter beans, brush immediately to prevent flavor carryover. If you use grinder-cleaning tablets, brush right after the cycle to remove loosened buildup and preserve grind consistency.
Treat this schedule as a baseline, then shorten it when residue returns sooner. Consistent brushing protects clean flavor, steadier extraction, and the comforting ritual of a fresh, reliable brew.
Empty Grounds Bin First
Locate the grounds bin, remove it before cleaning, and empty it completely into the trash.
Brush away trapped residue around the bin opening and chute, then wipe the area clean. Reinsert the empty, dry bin before starting the cleaning cycle.
Locate the Grounds Bin
Turn the machine off and let it cool completely, then empty the carafe and remove the filter holder so loose grounds don’t fall back into the brew path. Next, locate the grinder’s grounds bin, often labeled “used grounds container.” Check the compartment for its handle or release point; consult your manual if needed.
Pull it out carefully, supporting the base so compacted coffee won’t spill. Empty it completely; leftover clumps can clog the grinder or slow its flow. Wipe the rim and buildup inside the compartment. If a charcoal filter or removable insert is nearby, set it aside; don’t soak it unless the instructions allow immersion. Replace the bin, wipe around it, and press until it clicks fully into place. Confirm it sits flush.
Remove Before Cleaning
Before cleaning, switch the machine off, unplug it, and let it cool completely to prevent accidental starts. Remove the portafilter or carafe according to your model and set it aside. Locate the used-grounds bin or brew basket and pull it out carefully to avoid scattering residue. Empty its contents into the trash before you begin rinsing, descaling, or running a cleaning cycle.
Rinse the bin and any removable catcher or tray with warm water so old coffee oils won’t contaminate your cleaning solution. Don’t place grounds in the reservoir; instead, fill it only with the manufacturer-approved cleaning liquid when you use a clean or descale mode. Inspect the bin opening and surrounding ledges for stuck particles. Wipe them away with a damp microfiber cloth.
Empty Grounds Completely
After switching off and unplugging the machine, remove the carafe or filter and pull out the grounds bin. Discard all grounds; don’t leave even a thin layer, because packed residue can clog chutes and affect brew flow. If your combo uses a separate filter basket, remove it, shake out remaining grounds, and rinse it briefly.
Rinse the empty grounds bin and removable cover with warm water, then dry both pieces completely. Moisture can cause odors and retain residue. Reinstall the bin and basket securely before testing, according to the manufacturer’s alignment instructions.
Finally, run a short brew or grind cycle with plain water only, without coffee. Confirm that no grounds remain in the grinder-to-brewer pathway, then empty and dry the components again if needed.
Brush Away Residue
Start with an empty grounds bin: discard all used coffee and rinse the removable bin with warm water and mild dish soap, if the manufacturer permits it. Set it aside to dry fully, preventing buildup and odors while you clean the grinder area.
If grounds have sat inside, make a dry-brush pass before using liquid. Unplug the machine, remove beans, and use a soft, manufacturer-approved grinder brush to sweep compacted grounds from the burr area and chute.
Lift debris outward rather than pushing it deeper into the mechanism. Use a dry cotton swab or toothpick for narrow crevices, and avoid water on burrs unless the manual explicitly allows it. Inspect the chute opening afterward, confirming no visible grounds remain before continuing with deeper cleaning.
Reinsert the Empty Bin
With the machine turned off and unplugged, remove the grounds bin, discard its contents, and rinse it with warm water if the manufacturer permits. Dry it fully to prevent clogs and old-coffee odors.
Before you continue, return the empty bin to its compartment. Align it with the guides, then push it inward until it seats securely. Don’t leave it loose or partially engaged; the machine may display a fault or refuse to brew or grind.
If your model includes a clean or maintenance mode, reinstall the bin before starting that cycle. It must collect purge water and expelled grounds correctly. Only after the bin is secured should you run a grinder purge or add cleaning pellets. This prevents cleaner from mixing with leftover grounds.
Hard-Water Descaling Schedule
Test your water hardness, then set a descaling schedule of every one to three months, using filtered water to slow mineral buildup. If you use the machine heavily or have hard water, descale more often: up to monthly.
Track brewing time, white film, odors, and output volume so you’ll catch scale before it affects performance.
Identify Water Hardness
How hard is your tap water? Start by checking your utility’s water-quality report, which may list hardness as grains per gallon or milligrams per liter. If the report doesn’t provide it, use a water-hardness test strip or contact the utility for a measurement. Classify the result as directed and record it with your coffee maker’s maintenance notes.
Hard water contains more dissolved minerals, especially calcium and magnesium, so it can leave scale inside the heater and water lines. Look for evidence, including a white film on the reservoir or fittings, slower-than-usual brewing, and a bitter taste. These signs suggest mineral buildup, even if you haven’t tested recently. Check the exact water source you use, since filtered or bottled water may differ from tap water.
Set Descaling Frequency
Set a descaling schedule based on your water hardness and usage: every one to three months for most machines, but monthly if you have hard water or notice slower brewing or a bitter taste. Choose the shorter interval when you brew frequently, because heavier use moves mineral scale through the heating system faster.
If you use filtered water, schedule descaling near the three-month mark unless your machine’s instructions require otherwise. For a straightforward hard-water routine, descale on the first day of every month. Don’t wait for the calendar if you see white scale on internal parts or brewing takes longer than it did when the machine was new. Follow the manufacturer’s interval whenever it differs, and set a recurring reminder for the selected date.
Track Mineral Buildup
Watch for slower brew times, increased pump noise, or a white-gray film on the carafe, shower head, and brew path: these signs indicate mineral buildup from hard water. Record each symptom and the date in a maintenance log, then compare brewing time with your machine’s normal cycle. If flow slows, noise rises, or scale appears, descale immediately rather than waiting for the calendar.
Even a grinder combo needs this step: fresh beans don’t prevent scale in the brewer, and restricted flow can foul brew-contact parts faster and damage flavor.
Descale every one to three months according to hardness and use; choose monthly for hard tap water or frequent buildup. If uncertain, descale after 100 filters. Rinse twice with fresh water until no vinegar smell remains.
No Vinegar Smell Remains
Once descaling is complete, discard the solution and run two or three full brew cycles with fresh water until no vinegar smell remains. Use the machine’s Clean or descale setting, then run a separate rinse-only cycle with water. Let the unit cool slightly between cycles, and use hot water for each rinse so residual vinegar flushes more effectively.
If your reservoir detaches, remove and rinse it thoroughly. Wash removable filter baskets and the carafe as directed, then reinstall them after rinsing. You’ll check the reservoir and brew path by smell before making coffee; repeat a full water cycle if any odor remains.
If the reservoir is removable, consider baking soda instead of vinegar; afterward, run two additional clean-water cycles to eliminate every taste and odor before your next brew cycle.
Stop If Water Leaks
If you notice water leaking from the grinder area, base, or sides, stop the cleaning or descaling cycle immediately and unplug the machine. Check that the water reservoir sits correctly, then confirm that the carafe or cartridge and grounds chute fit tightly. Loose parts can cause overflow during brewing.
Correct the fit and dry the machine thoroughly, including removable parts around the grinder and brew chamber. Moisture can prolong the leak or create an electrical hazard. Next, run a short fresh-water test cycle: never vinegar, to verify that the leak has stopped before restarting a full cleaning program. If water still escapes, inspect for clogged grounds or a misaligned brew or bypass outlet. A blockage can back up water and force it through the seals. If you can’t resolve the problem, stop using the machine and seek service.
Avoid Wetting Grinder Burrs
To protect the burrs, unplug the coffee maker and stop any descaling or rinse cycle before water can back up into the grinder housing. Remove and empty the hopper, then brush out dry grounds first; moisture can turn them into a sticky slurry around the burrs. Never pour water into the grinder throat or hopper, because damp burrs may rust and residue may clump. Route cleaning solution through the brew path only, using your model’s specified vinegar ratio.
- Brush first: Use a dry, stiff brush to loosen fines without creating paste.
- Keep openings dry: Don’t rinse the throat, even when residue looks stubborn.
- Air-dry completely: Leave the compartment open until no dampness remains before adding beans.
This prevents damp buildup and protects consistent grinding.
Check the Water Filter
Check the water filter before cleaning: remove any charcoal filter from the reservoir before adding vinegar or descaling solution, since these products can saturate the filter and reduce its effectiveness. Check its age, and replace it according to the manufacturer’s schedule. A fresh charcoal filter helps reduce mineral buildup, which can cause scale and slower brewing.
Use fresh, filtered water afterward; depending on your water hardness, you may need to descale every one to three months.
Run the vinegar or descaling cycle with only the reservoir in place, never with the filter installed. Then complete multiple fresh-water brew cycles to remove residue, taste, and odor. When rinsing ends, reinstall the filter. If your machine indicates the cycle’s complete, afterward brew another fresh-water cycle to verify the path is fully clean and clear.
Conclusion
Cleaning a coffee maker with a grinder combo takes a careful sequence, but you can keep it simple. Empty the grounds bin, brush the burrs on schedule, and descale according to your water’s hardness.
Check the filter, avoid wetting the grinder, and confirm that no vinegar smell remains. If water leaks, stop and investigate before brewing again. Follow these steps consistently, and you’ll protect the machine, improve flavor, and enjoy safer, better coffee every day.