How to Use an Espresso Tamper for an Even, Balanced Shot
To use an espresso tamper, clean and dry the portafilter, basket, rim, and tamper face.
Dose consistently, break up clumps with WDT, and level the grounds without compressing them.
Choose a flat tamper matching your 54- or 58-millimeter basket.
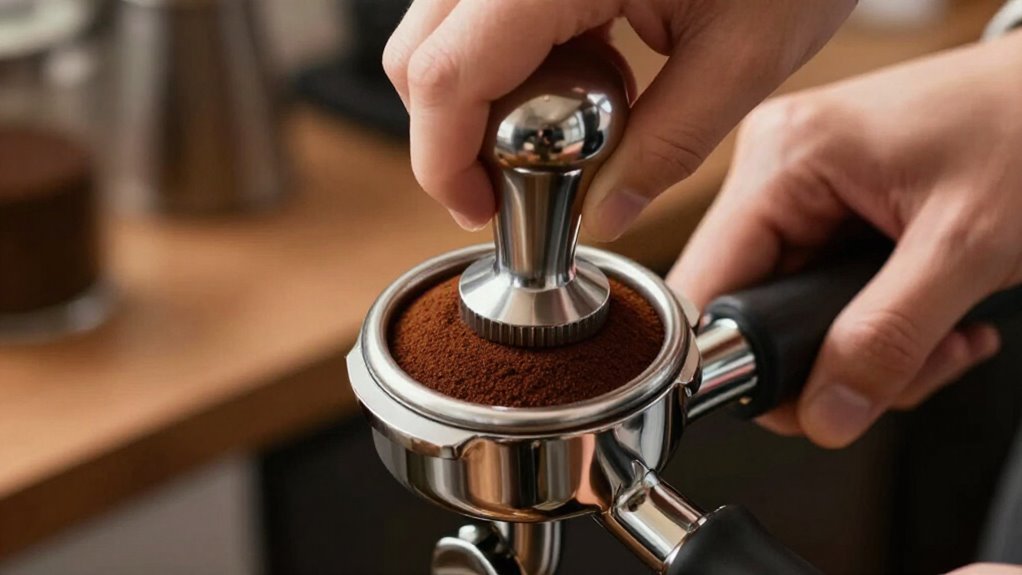
Hold it parallel, press straight down once at about 30 pounds, pause, then lift vertically; don’t twist during descent.
Polish after releasing pressure.
Wipe the rim clean, lock in, and monitor shot flow.
More technique follows.
Target 30-Pound Tamping Pressure
How much pressure should you apply? Begin with approximately 20, 30 pounds, using 30 pounds as a reference. This force forms a firm puck without unnecessarily disturbing the coffee bed. Apply the load vertically through the tamper’s center, keeping the handle and base level. Uniform compression matters more than reaching an exact numerical value.
Use a repeatable second push: press downward, hold briefly, then release while keeping the tamper stable. Don’t twist during descent. After releasing pressure, gently twist or polish the tamper to smooth the puck’s surface and maintain even packing. If you can’t measure force, practice pressing on a bathroom or force scale until 30 pounds feels familiar.
Then repeat that pressure consistently from shot to shot, and change it deliberately during testing.
Clean the Portafilter First
A clean portafilter helps the group-head gasket seal correctly, preventing leaks and uneven pressure during extraction. You’ll keep the basket rim, undercut, gasket area, and holes free of grounds, oils, and residue before you tamp. Blocked holes alter flow, while debris can cause bypass, leaks, and stale flavors.
- After each shot, knock out the puck, brush the basket, and wipe the rim with a lint-free cloth.
- Daily, backflush with water using a blind filter; run five-to-ten-second pump cycles, then rinse the group head.
- Weekly, use measured detergent only if your machine manual permits it; flush thoroughly and soak removable parts for ten-to-fifteen minutes as directed.
Inspect the gasket monthly and replace it if it shows damage or compression loss. Clean spouts and crevices, too.
Step 1: Level Grounds in Portafilter
Once you’ve dosed the basket—typically 18–22 g for a double—keep the portafilter level on your tamping mat and gently settle the grounds with a light knock.
Break up clumps before leveling. Use a WDT tool or stir the coffee to remove pockets and fill gaps. Keep the basket stable and horizontal throughout.
Next, run one finger lightly across the surface to remove excess coffee and create an even plane. Don’t press down or compact the bed; your goal is uniform particle placement, not compression. Check the rim and clear stray grounds so the portafilter seats correctly.
A level puck gives water consistent resistance across the basket. If high or low spots remain, water can follow a path of least resistance, causing channeling and less balanced flavor.
Step 2: Select a Matching Tamper
Choose a tamper that matches your basket’s diameter—commonly 54 or 58 mm—so its base fits flush and compresses the puck evenly to the edges. Select a flat-bottom model for the most consistent, uniform puck surface, especially while you’re dialing in your technique.
A calibrated tamper, often set around 20–30 lbs, can improve pressure repeatability from shot to shot. It’s useful when you’re building consistent muscle memory, but consistency matters more than an exact force target.
If you want compression concentrated toward the puck’s outer edges, choose a convex base: provided its profile suits your basket. Don’t assume it’s interchangeable with a flat model. Match the tool to your workflow: a dual-head tamper lets you switch sizes or base styles without changing your setup mid-routine.
Step 3: Press Straight Down Once
With the tamper flat on the grounds, align it perpendicular to the basket and press straight down once using controlled, even force. Keep your elbow at 90 degrees and your wrist straight so the tamping axis remains vertical. Apply approximately 20,30 pounds (9,14 kilograms) of pressure, or enough to create a firm, level puck without excessive resistance. Use your body weight consistently rather than forcing the handle with your wrist.
Hold the tamper steady at compression, allowing the grounds to settle into a dense, uniform bed. Then lift it vertically and inspect the puck surface and edge. A level puck promotes uniform resistance, limits gaps that encourage channeling, and supports predictable flow.
Keep your dose, grind, and distribution consistent, because tamping can’t correct uneven preparation.
Step 4: Avoid Twisting While Pressing
Keep the tamper level and press straight down without twisting, using consistent force of about 20–30 pounds (9–14 kilograms). When you twist during the downward stroke, you’ll shift particles, create uneven density, and leave pathways that promote channeling.
Stabilize your wrist, align the tamper with the basket, and move only along the vertical axis. Apply one press, then hold pressure for two seconds before releasing. This pause lets the puck compact uniformly instead of shifting as you rotate. If the surface shows cracks, pinholes, or mottling, correct it with another straight, non-twisting press. Only after you complete that press should you lift the tamper and make a polishing twist. Use this rotation to smooth the surface and reduce sticking, not to redistribute the coffee.
Step 5: Check Basket Headspace
After dosing and leveling, inspect the gap between the coffee bed and the portafilter rim. You’re checking basket headspace: excessive clearance can let the puck shift or seat unevenly, changing resistance and flow. Use a consistent dose, typically 18–22 grams for a double basket, so this gap remains repeatable.
Before tamping, settle and distribute the grounds until the surface is level. Then position the tamper flat and perpendicular to the coffee. An angled press creates a thicker edge and changes effective headspace across the puck. Aim for a smooth, uniformly compacted surface. Loose spots indicate uneven density, so correct distribution before applying pressure.
Record your dose and preparation method, and compare headspace visually from shot to shot. Stable headspace supports predictable extraction and balanced flavor.
Step 6: Wipe Basket Rim Clean
Wipe the basket rim clean with a dry cloth or fingertip, removing loose grounds from the lip and surrounding edge. After dosing and distributing, inspect the basket’s top perimeter before you lock in the portafilter. Use a dry, lint-free cloth, clean fingertip, or folded towel to lift coffee dust and stray particles from the lip. Sweep around the circumference, including the area beneath the basket’s outer edge, without disturbing the prepared coffee bed.
If grounds spill during leveling or tamping, you’ll remove them immediately rather than allowing them to dry on the metal.
Keep the rim completely dry. Residual coffee can prevent the portafilter from seating against the gasket, compromise the seal, and create leaks or irregular water flow. This supports consistent daily workflow.
Confirm No Channeling Marks
Before locking in the portafilter, inspect the tamped puck for cracks, pinholes, loose spots, or channeling tracks. These defects indicate uneven density and can create paths of least resistance during extraction. Confirm that the surface is smooth, compact, and uniformly level, especially around the basket edge, where gaps commonly develop.
Hold the tamper straight and apply about 20–30 pounds of downward pressure; don’t tilt it or press off-center. If coffee sticks to the tamper, wipe the base clean, then re-tamp to remove torn or smeared areas that could leave micro-gaps. After polishing, check the rim and basket edges again. Remove every stray ground so it can’t alter local density or produce a visible channeling mark during the shot, before securing the portafilter for brewing.
Fix Slow, Dripping Shots
If the shot only drips, the puck may be creating excessive resistance from an uneven or overly forceful tamp. Recheck distribution before changing grind. Break clumps with WDT or a finger sweep, then settle grounds evenly. Keep your tamper parallel to the basket and use a straight wrist and forearm.
Apply consistent, moderate pressure—about 20–30 pounds—not extra force.
| Check | Correction | Expected result |
|---|---|---|
| Uneven bed | Distribute and level | Uniform resistance |
| Heavy tamp | Reduce force consistently | Faster flow |
| Puck defects | Inspect cracks and pinholes | Fewer restrictions |
Tamp pressure first, then twist gently only as you release; don’t twist while pressing. Inspect the puck for cracks or pinholes, and clear grounds from the basket edge. If dripping persists, adjust grind only after tamping and distribution remain consistent.
Rinse and Dry Tamper
A clean, dry tamper prevents old coffee oils and moisture from disturbing the puck surface. Before dosing, rinse your tamper with warm water to remove residual oils and coffee particles. These contaminants can transfer to the basket and leave an uneven tamp. Dry the tool completely with a clean, lint-free towel; moisture film can make grounds smear beneath the base.
Inspect the tamper face before each shot. It should be clean, level, and free of clinging grounds. If it has rested in a wet area, wipe and re-dry it before use. Between shots, make drying a repeatable step. A dry, residue-free base compresses the coffee bed uniformly, preserving density and reducing gaps that promote channeling. Don’t rely on rinsing alone: moisture must be removed.
Conclusion
An even espresso shot starts with controlled preparation, not force alone. Clean the portafilter, distribute the grounds, and use a tamper that matches the basket. Apply about 30 pounds of pressure in one straight, level press, then clear the rim.
Inspect the puck and flow for channeling, and adjust grind or dose if extraction runs too slowly. After brewing, rinse and dry the tamper. Consistent technique gives you repeatable resistance, flow, and flavor each time.