How to Use a Coffee Cup Warmer Without Scorching Your Drink
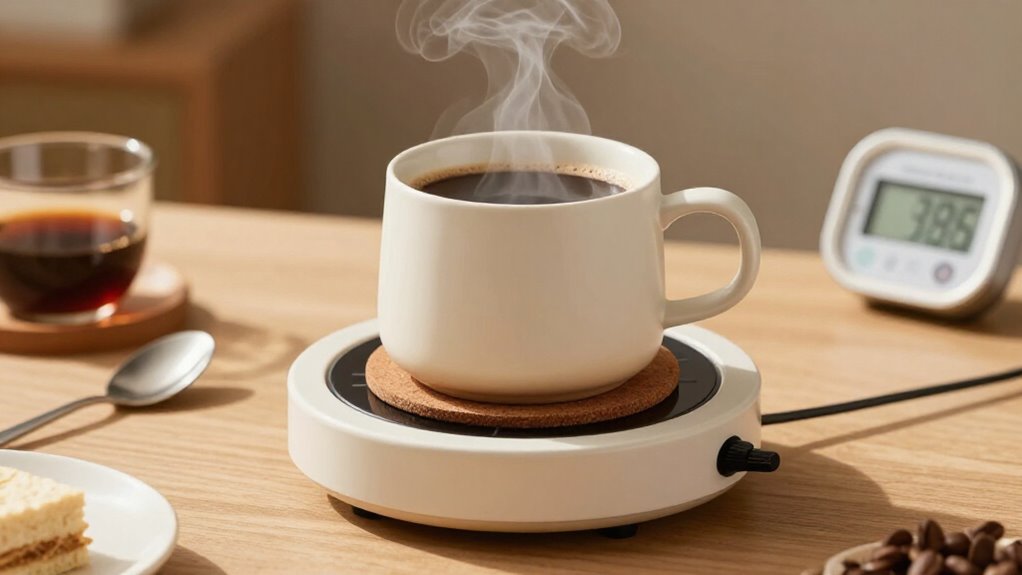
To prevent scorching, use a compatible, thick-walled ceramic mug with a smooth, clean, dry base.
Center it on the warmer, choose the lowest setting, and set a 10-minute timer.
Check the coffee with an instant-read thermometer, stirring first; stop at about 120–140°F, or remove the mug.
Wipe spills promptly, and never leave coffee heating indefinitely.
If the cord grows hot, unplug the unit and stop using it.
More setup and safety details follow below, too.
Choose Low Heat
Start with the lowest heat setting your warmer offers, since many plate warmers operate near 130°F (54°C), a safer range for maintaining coffee without rapidly overheating it. If your warmer provides several choices, select its “warm” option, such as 105°F or 130°F, rather than a high preset. Avoid settings around 180°F; testing found that hotter warming damaged coffee’s flavor across devices.
Monitor timing rather than leaving it on heat indefinitely. When coffee reaches your preferred drinking range, lower the setting or remove the cup. You’ll limit flavor loss from prolonged heating while keeping the beverage warm.
Don’t assume a self-heating smart mug prevents scorching: some operate between 120°F and 145°F, or hold a fixed 130°F. Use the lowest setting and don’t leave it unattended.
Check Mug Material First
Before you switch on the warmer, confirm that your mug’s material is compatible with it. Assess thermal behavior:
- Ceramic: Choose thick-walled ceramic, porcelain, or stoneware; they retain heat and warm gradually. Reject crazed mugs because cracks can concentrate heat.
- Glass: Prefer tempered or borosilicate glass. Don’t place cold glass on a hot plate; rapid change can cause thermal shock and breakage.
- Metal, plastic, or enamel: Use insulated stainless steel with compatible induction or magnetic models. Uninsulated metal transfers heat rapidly and can scorch coffee. Don’t use plastic unless its manufacturer rates it for direct plate contact. Replace chipped enamel, which can expose metal and create hot spots.
Check the manual for approved materials, diameter, weight, and sensor requirements. Your well-insulated thermal mug may need no external warming during normal use.
Step 1: Wipe the Mug’s Base
A clean, dry mug base is essential for even heating. Before you place your cup on the warmer, inspect its underside. Wipe away coffee grounds, milk residue, oils, and moisture with a lint-free cloth. These contaminants can create gaps or heat-transfer points, producing hotspots that may scorch the beverage or stain the warmer.
Check that the base is smooth, intact, and flat. Set the mug down so its bottom contacts the warming surface; rocking, ridges, or debris can restrict heat spreading. Use only a heat-safe container that fits the platform, such as compatible ceramic or tempered glass.
Don’t use a cracked, warped, or poorly supported mug. Recheck the base after spills, because even a thin wet film can affect contact and heating consistency.
Step 2: Plug in the Warmer
Once the mug base is clean, plug the warmer into a stable outlet and select its lowest setting; many plate warmers begin near 105°F, which limits rapid overheating. Position the mug so its bottom sits fully and evenly on the warming plate. Complete contact distributes heat and reduces localized hot spots that can scorch coffee. Check that the cord remains dry and clear.
If the warmer offers temperature presets, choose a conservative coffee setting near 130°F rather than higher options. Don’t leave coffee unattended while using settings; depending on the model, temperatures around 130°F or above can damage flavor. Keep the lid off unless your warmer directs you to fit it. A trapped lid can increase heat at the surface and raise scorching risk.
Step 3: Set a Ten-Minute Timer
Set a ten-minute timer when you start warming the coffee, then check its temperature at the alert. Most plate-style warmers heat toward one target, often about 130°F, so don’t assume the coffee needs continuous heating. Use a food-safe instant-read thermometer, and stop warming once the drink reaches a comfortable temperature, generally 120–140°F.
If the coffee still isn’t hot enough, restart a ten-minute interval rather than leaving it on high. Select the lowest temperature first; some plate warmers offer 105°F, 130°F, and 180°F settings. For self-warming mugs, reduce the setting: presets around 130°F, 140°F, and 150°F can overshoot during prolonged heating.
Keep checking at ten-minute intervals until the coffee is drinkably hot. This limits flavor damage from extended high heat and helps prevent burnt, bitter notes.
Step 4: Center Mug on Plate
Center the mug on the warmer’s hot plate so its base contacts the hottest area evenly, reducing localized hot spots that can scorch the coffee. Choose a mug with a flat, heat-safe bottom made from compatible ceramic, metal, or tempered glass. Its base should fit fully within the plate’s heating zone; an overhanging or uneven bottom can transfer heat inconsistently and destabilize the cup.
If your ceramic mug has a center foot or indentation, place a small heat-conductive item, such as a quarter, in the middle to improve contact and transfer warmth. Use this method only if the warmer’s instructions permit it, and keep the mug stable. Start low, about 130°F; increase only if the drink cools. This positioning warms coffee without excess heat.
Step 5: Check for Hot Spots
After positioning the mug, check for uneven heating by carefully touching its exterior near the base and center after 1–2 minutes; don’t touch the hot plate itself. Lightly touch the outer wall; never touch the plate.
After another minute, compare the base, center, and upper body. If one area feels markedly hotter, heating is uneven. Re-center the mug for better contact. If the patch persists, stop and inspect the mug for a warped bottom.
On adjustable models, start at the lowest setting, such as 105°F, then increase only if coffee remains near room temperature. For self-warming mugs, verify the preset and choose about 130°F, not “piping.” Stir after heating to redistribute temperature before evaluating it. If rim or base feels dramatically hotter, change position immediately.
Step 6: Remove Coffee Rings Promptly
Wipe up coffee rings as soon as they appear; residue can char on a warmer holding near 130°F, even if the spill looks harmless.
Use a damp cloth or paper towel to lift the ring immediately, and don’t leave the mug on a hot plate or self-warming platform after a splash. Remove coffee from the mug’s base as well.
A clean, dry base restores even contact with the warming surface, limiting residue buildup, staining, and localized scorching. If you use a self-heating mug, check its care instructions: heating models typically aren’t dishwasher-safe. Hand-wash the mug promptly, keeping water away from its electrical components, heater, and sensors.
Dry the base completely before returning it to the warmer. Treat small drips the same way as larger spills; dried sugars and coffee oils become harder to remove and can carbonize during warming. Regular wiping protects the vessel and warmer’s surface.
Measure With Instant-Read Thermometer
How hot is your coffee really? Don’t judge by steam or taste; use a food-safe instant-read thermometer. Stir the beverage gently, then place the probe in the center, away from the mug’s walls and bottom. Wait for the reading to stabilize, and record the temperature before warming.
Aim for about 130°F for warm coffee or 140–150°F for hot, depending on your warmer’s setting and preference. Check again after 10–20 minutes to measure drift. If the temperature approaches 150°F, lower the setting or shorten warming time to limit flavor damage.
For a warmer with a 120–145°F range, start near the low end. Test coffee, tea, and hot chocolate separately: the same setting won’t produce identical results. Clean and dry the probe carefully after each measurement.
Troubleshooting: Cord Feels Hot
A thermometer can confirm your coffee’s temperature, but a hot power cord signals an electrical or heat-management problem. Unplug the warmer. Inspect the cord for pinching, fraying, contact with plate, moisture, or steam. Don’t use it until you correct hazards.
| Symptom | Likely issue | Action |
|---|---|---|
| Cord warms steadily | Electrical resistance | Stop use; verify voltage and outlet rating |
| Heat near plate | Poor contact or routing | Center a heat-safe mug; reroute cord |
Match the warmer’s voltage and plug rating to your region; an incorrect adapter or underpowered outlet can heat conductors. Keep the cord loose, dry, and away from the hot surface: never coil it during operation. If it remains hot or grows hotter while the mug warms, stop using it. Have it inspected or replace it.
Clean Plate With Vinegar
Before cleaning, unplug the mug warmer and remove loose coffee or tea residue. Dampen a cloth or paper towel with vinegar, then wipe the plate to dissolve dried film. Use vinegar only on the plate surface; keep it away from the appliance’s interior and electrical contacts. Let the vinegar sit briefly, allowing it to loosen buildup that can create hot spots and uneven warming.
Wipe again with a water-dampened cloth to remove vinegar and loosened residue. Dry the plate completely before plugging the warmer back in; lingering moisture can disrupt predictable heating and worsen localized scorching.
When you’re done, center the mug where the plate provides strongest contact. A clean surface distributes its fixed low setting, often about 130°F, more evenly.
Conclusion
Use your cup warmer as a temperature-maintenance tool, not a reheating device. Choose its lowest effective setting, match the mug to the plate, and keep the base clean and dry. Set a timer so you check the drink before it overheats.
Verify temperature with an instant-read thermometer when consistency matters. If the cord feels hot, unplug the warmer and replace it. Wipe spills promptly, then clean the cooled plate with vinegar and inspect it.