How to Use a Pour-Over Coffee Maker: An Easy Step-by-Step Guide
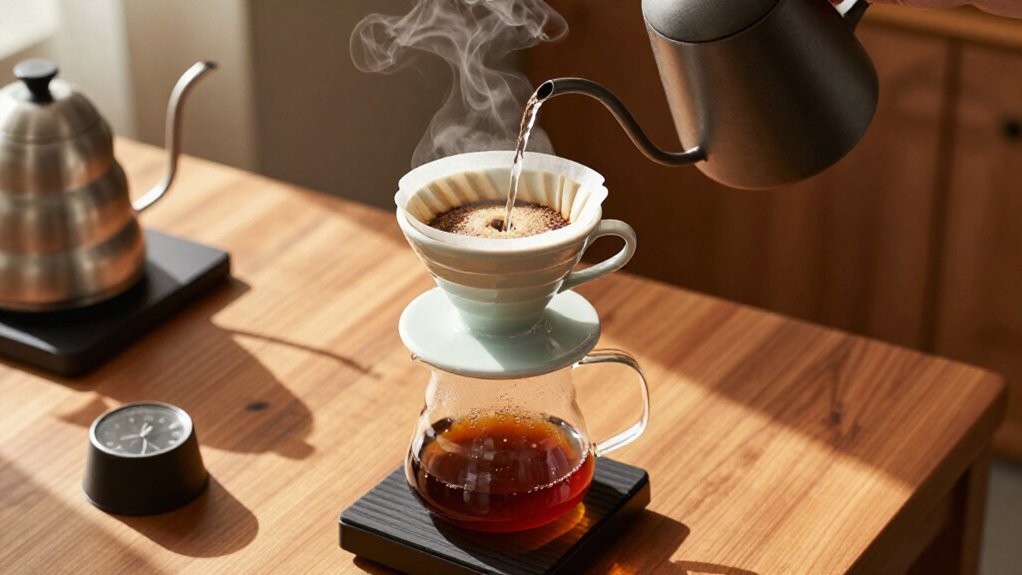
To brew pour-over coffee, place a rinsed filter in the centered dripper over a stable mug.
Add 20g medium-fine grounds and bloom with 60g of 195 to 205°F water for 30 to 45 seconds.
Pour the rest in three or four slow, concentric pulses.
Let drawdown finish, aiming for 2 to 3 minutes, then discard grounds and rinse.
Taste: if it’s sour or thin, grind finer; if bitter or slow, grind coarser.
More helpful guidance follows for confident home brewing.
Ideal Brew: 2–3 Minutes
Aim for a total brew time of about 2–3 minutes, which generally produces balanced extraction without a flat, underdeveloped taste or harsh over-extraction. Use a timer to track brewing from the first pour through the final drip.
If brewing ends near 2:00, grind finer next time to slow flow and deepen extraction. If it approaches 5:00, grind coarser to speed flow and limit over-extraction. Treat 2–3 minutes as your main target rather than a rigid rule; drippers and recipes can affect timing.
Keep water at 195–205°F (90–96°C) for steady extraction and consistency. When timing misses, change grind size first, then taste the cup. A balanced brew tastes clear and developed, without sour thinness or harsh bitterness. Record adjustments; you’ll soon find your ideal setting.
Gather a Gooseneck Kettle
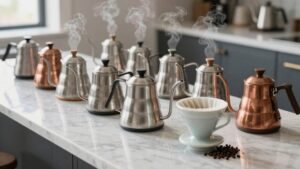
A gooseneck kettle gives you the control needed to pour slowly and evenly, helping you maintain consistent extraction as you refine brew time. Choose a kettle that feels balanced in your hand. Electric models let you hold 195–205°F, while stovetop models require a 30–60-second rest after boiling.
- Check the spout: A long, narrow gooseneck supports a slow, steady 2–10 g-per-second stream.
- Match capacity: A 0.6–1.2-liter kettle suits one- to six-cup brews.
- Test the handle: An insulated, comfortable grip helps you direct precise center-to-edge spirals.
- Inspect safety features: Keep the kettle below its maximum line, use a heat-resistant surface, and keep steam away from your hands and face.
Keep the spout clear of mineral buildup, which can disrupt flow and cause splashes.
Step 1: Place Mug Beneath Dripper
Before you begin brewing, place the dripper securely over your mug and center it so every drip lands inside. Check that the dripper’s base rests evenly on the mug’s rim and that the mug sits on a stable, level surface. If the dripper wobbles, reposition it before you continue; a secure setup prevents spills and keeps the brew pathway aligned.
Choose a mug with enough capacity for your planned coffee and water, leaving room to prevent overflow. Set it on a stable, level surface, and ensure the dripper’s outlet doesn’t touch the mug’s bottom, which could restrict flow. Keep the vessel directly beneath the outlet, not offset to one side.
Once the setup feels secure and centered, you’re ready to continue confidently with ease.
Step 2: Rinse Filter, Add Grounds
With the dripper secured over your mug, insert the paper filter and rinse it thoroughly with hot water to remove papery flavors and warm the brewer. Discard the rinse water completely before you continue.
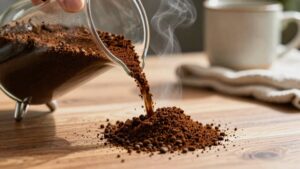
Weigh about 20 grams of freshly ground coffee for a typical single serving, using a burr grinder for a consistent medium-fine to medium texture. Add the grounds to the rinsed filter, then gently shake or swirl the dripper to settle them into an even, level bed. This preparation supports uniform extraction and steady flow later. Keep your brewing water around 195–205°F (90.5–96°C). Check your scale and timer now, and have everything ready before adding water. You’ll start the next brewing step with a clean, warm brewer and evenly distributed grounds.
Step 3: Pulse-Pour in Concentric Circles
Once the bloom has finished, pour the remaining water in three or four roughly equal pulses, using slow, concentric circles centered over the coffee bed. For a 20-gram dose at a 1:16 ratio, bloom with 60 grams, then add the remaining 260 grams across those pulses. Keep your kettle’s stream thin and controlled, and avoid pouring directly onto the paper or filter edges. Maintain the dripper between half and two-thirds full so water moves evenly through the grounds without overwhelming the bed.
Use your scale and timer; you’ll reach 320 grams by about 2:30 to 3:00. If water flows too quickly and the cup tastes thin, weak, or sour, grind finer next time. If it flows slowly and tastes bitter or harsh, grind coarser next time accordingly.
Step 4: Wait Until Drawdown Finishes
After your final pulse, keep the dripper level and let gravity carry the remaining water through the coffee bed until it stops dripping. Watch the stream as it narrows, but don’t lift or tilt the brewer. A level dripper keeps the bed evenly drained and makes your timing reliable.
Wait until drawdown finishes completely before you remove the brewer. Aim for roughly 2:45–3:30 minutes from the start of brewing through the final drip. If water clears around two minutes, your grind may be too coarse; dial finer next time. If it takes nearly five minutes, grind coarser to speed the flow.
Once dripping ends, remove the dripper and serve immediately. If you brewed directly into a mug, give the coffee a gentle stir first.
Step 5: Taste for Bitterness
Taste the coffee while it’s fresh and check for bitterness or harshness. If bitterness dominates, your brew is likely over-extracted. Start by checking drawdown: a very long finish, beyond roughly 2:30-3:30, often points to a grind that’s too fine.
Set your grinder coarser so water moves through the coffee bed faster. Keep your water between 195-205°F (90.5-96°C). Hotter water extracts more and may intensify bitterness, especially with fine grounds.
Also, limit the bloom to about three times your coffee dose: use 60 g water for 20 g coffee, then avoid extending the wait. Change one variable at a time, starting with grind size. Taste again and record the result to determine whether grind, timing, or temperature causes bitterness in your next cup of coffee.
Step 6: Discard Grounds, Rinse Dripper
When brewing is complete, discard the spent grounds rather than reusing them, then rinse the dripper thoroughly with hot water. If you’ve used a paper filter, lift it gently from one edge and work around the rim until it comes free. Place the grounds and filter in your compost or waste container without letting residue dry.
Keep rinsing the dripper until water runs clear through it, no coffee oils remain, and no lingering smell persists. Hot water helps loosen residue and keeps cleanup efficient, but handle heated equipment carefully. After rinsing, set the dripper where air can circulate, and let it dry fully before storing it safely.
This finish prevents buildup and leaves your brewer clean, fresh, and ready for the next precise pour.
Check Clarity and Aroma
As soon as brewing ends, inspect the cup’s clarity and smell its aroma while the coffee is still hot. Look for a uniform, light-to-medium body and a clean, bright appearance. If the brew looks very hazy or muddy, note it as a sign that extraction may not have aligned. Don’t judge only by color; swirl and watch how the coffee moves in the cup.
Next, inhale immediately, when pour-over aromatics shine most clearly. Identify fruit, floral, chocolate, or spice notes before cooling dulls them. A sharp, green, or sour scent can signal an uneven result, while a burnt or harsh smell may overwhelm aromas. Record what you notice alongside the brew time, aiming for roughly 2:45:3:30. This quick check guides your next future brew.
Finer Grind for Sourness
If your pour-over tastes thin or sour, grind the coffee finer to increase extraction and slow the water’s flow through the bed. Keep your usual 1:16 ratio, such as 20 grams coffee to 320 grams water, so you’ll isolate grind size as the variable.
Bloom with about 60 grams for 30–45 seconds, then continue your normal pours.
| Grind cue | What you notice | Your next move |
|---|---|---|
| Too coarse | Fast drawdown, sour cup | Grind finer |
| Balanced | Sweet, clear flavor | Keep setting |
| Too fine | Slow, bitter cup | Grind coarser |
| Target | About 2:45–3:30 | Adjust gradually |
If brewing finishes much faster than 2:45–3:30, go finer again. Keep water around 195–205°F (90.5–96°C); hotter water can also reduce sourness.
Change one variable at a time and taste the difference before serving.
Descale Kettle Monthly
Descale your pour-over kettle at least once a month to remove limescale that can reduce heating efficiency and make water temperature less consistent. Mineral buildup can make your kettle boil slowly and struggle to hold the 195–205°F (90.5–96°C) range. If you boil frequently, inspect performance and descale sooner when heating slows.
Choose a kettle-safe descaling solution or your manufacturer’s method. Follow its stated contact time to loosen scale effectively. Empty and rinse the kettle thoroughly, then flush it with clean water. Don’t brew until no chemical taste or odor remains.
Regular descaling helps your kettle heat predictably, supports consistent extraction, and keeps every cup clean. Add a monthly reminder for better brewing, and you’ll protect temperature control and make each pour-over more reliable.
Conclusion
With a few simple steps, you can brew a bright, balanced pour-over in just 2–3 minutes. Use a gooseneck kettle, pour steadily in concentric circles, and watch the coffee bloom. Then discard the grounds, rinse your dripper, and enjoy the clarity and aroma you created.
If your cup tastes sour, grind finer; keep your kettle clean by descaling it monthly. Practice each brew, and you’ll quickly turn this method into a rewarding daily ritual today.