Espresso Station Workflow Setup
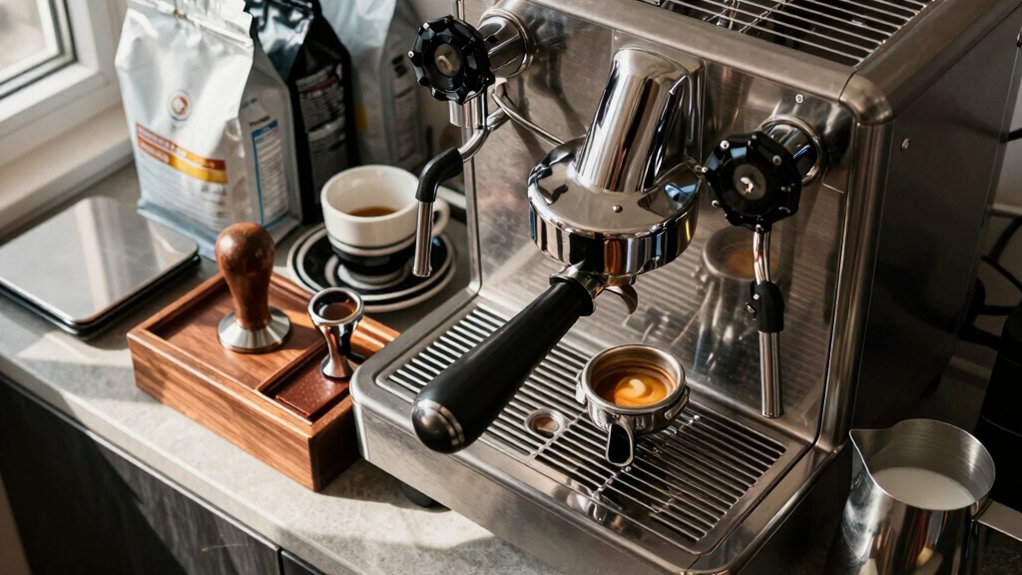
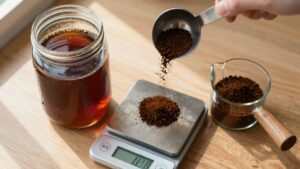
Set a repeatable workflow: purge the grinder, dose by scale (8 g for predictability), level and timed tamp, and target yield/time while watching portafilter pressure.
Start pre-infusion at 2–4 bar, ramp to about 9 bar in 8–20 seconds, then hold. Lower pressure for very light roasts.
Use dose as primary control; tweak grind one click at a time, log adjustments and burr wear, and schedule calibrations. Follow this and you’ll get consistent shots and learn practical troubleshooting next.
Quick Overview
- Standardize a pressure profile: 2–4 bar pre-infusion, ramp 8–20s to 9 bar; maintain full extraction pressure.
- Use a dose-first routine: weigh dose (prefer 8 g for predictability), purge grinder, center-dose, distribute, timed tamp.
- Treat grind as the fine tuner: adjust one click at a time after stabilizing dose. Log grind step and extraction time.
- Monitor and log indicators: flow rate, color, timing, and puck resistance. Record OPV and roast-dependent pressure adjustments.
- Schedule calibration and burr maintenance: morning/mid-shift checks; log drift, and replace/recalibrate burrs based on usage.
Portafilter Pressure Chart
Start by setting your machine’s pressure profile to match the roast and dose you’re using: Pre-infusion at 2–4 bars for 0–8 seconds, ramping to about 9 bars through the next 8–20 seconds; then holding 9 bars for full extraction. You’ll monitor portafilter pressure against roast type: Lower 6–7 bars for lighter roasts, standard 9 bars for most, and adjust if you see overextraction.
Maintain tamping consistency—15–20 kg vertical force—so pressure transmits evenly and channeling’s reduced. Change grind or temperature before big pressure shifts. Verify OPV in small increments and record shot indicators: flow, color, timing.
| Parameter | Recommendation |
|---|---|
| Pre-infusion | 2–4 bars |
| Ramp | 8–20 s to 9 bars |
| Full extraction | 9 bars maintained |
5–18g Dose Checklist
After you’ve set pressure profiles and confirmed consistent tamping, calibrate your workflow for an 8 g dose so shot variables stay predictable. You’ll lock down portafilter prep, dosing rhythm, and timing to preserve workflow consistency. Use a scale, timed tamp, and repeatable distribution pattern. Record target yield and extraction time for every shot. Train teammates to follow the sequence.
- Pride when each pull matches the chart
- Relief as variance disappears
- Confidence in steady customer flow
- Satisfaction from precise, repeatable results
- Calm during rushes because systems hold
Check basket fit, purge grinder, and dose into the center every prep. Label your checklist near the tamping station. Review numbers weekly and adjust only when you see consistent deviation; do not adjust for single anomalies.
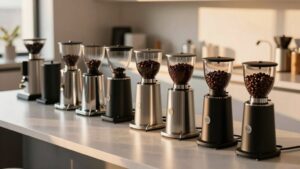
Grind Size Adjustment Limits
Check the grinder’s usable grind size range and note any mechanical limits on how coarse or fine you can set it. Remember that dose changes interact with grind adjustments. Burr wear shifts particle distribution over time; those factors together define practical adjustment limits.
Track consistency by logging settings and shot results so you can spot when burr wear or mechanism drift forces recalibration.
Grind Size Range
A well-defined grind size range sets the limits for consistent shot extraction. You’ll want to establish clear upper and lower bounds for each coffee and group head so baristas can adjust quickly without guessing. Define the acceptable coarse and fine endpoints based on grind material and dose to prevent channeling or over-extraction. Document numeric settings on each grinder and use color coding on hoppers or adjustment rings so shifts match recipes instantly.
Train staff to test extraction time and puck appearance. If extraction is inconsistent, answer with a one-step grind change, not a string of tweaks. Record results on a simple log so trends show when beans age or humidity shifts. Keep ranges narrow enough to limit variability but wide enough to accommodate daily bean changes.
Adjustment Mechanism Limits
How far should you let grinders wander from their documented settings? You should limit grind size adjustment to a narrow band around documented settings, so you keep consistency and avoid chasing variables. Set clear mechanical stops or mark detents that represent +/- one to three clicks from the baseline. Treat larger moves as recipe changes requiring log updates and taste verification.
Train staff to check portafilter pressure and extraction times after any adjustment, and to record adjustments immediately. If grinders lack physical limits, use visible tape marks on adjustment rings and a written chart at the station. Regularly verify calibration during shifts and lock settings outside service. These controls reduce shot variability and keep workflow predictable without impeding necessary fine tuning.
Dose Versus Grind
When you change dose, you’ll often need only small grind adjustments rather than large swings; treat dose as the first control and grind as the fine tuner. You’ll aim for dose consistency first: set and stabilize weight so extraction variables are minimized.
Once dose is consistent, tweak grind to correct flow rate and shot time in tiny steps; many grinders make meaningful changes with one or two clicks. Watch puck resistance and crema to judge effects. Improve grind distribution to avoid channeling: level and tap baskets before tamping, and inspect for uneven tamp marks.
Log dose, grind step, and resulting times so you can repeat successful settings. Limit adjustment scope: favor dose changes for yield shifts and fine-grind tweaks for balance.
Burr Wear Effects
Why does burr wear matter for your grind settings? You rely on consistent particle size to hit target extraction; burr wear gradually shifts that size range, forcing you to compensate. Inspect burrs routinely for rounded edges, uneven grooves, and metal discoloration: these are signs of burr wear. Small adjustments to grind size will cover early wear; however, once you exceed manufacturer adjustment limits, you’ll see extraction variance and clogged or under-extracted shots.
Log adjustment steps and extraction outcomes so you can spot when effects escalate beyond tuning. Schedule burr replacement based on hours, kilograms processed, or sensory thresholds rather than fixed calendars. When replacing burrs, recalibrate dose and grind settings immediately to restore original performance and maintain workflow efficiency.
Consistency Over Time
Wondering how far you can push grind adjustments before performance degrades? You’ll set firm limits: small, incremental changes (one to two clicks or steps) reduce extraction swings and keep shot times predictable.
Track adjustments in a log so you can reverse a change if tamping or dose interactions produce consistency pitfalls. Establish a time-based calibration routine: morning, mid-shift, and post-busy to spot drift from temperature or burr wear. When dial changes exceed your limit, inspect burrs, dosing, and distribution rather than continuing to compensate.
Train staff to follow the adjustment protocol and record outcomes. Consistent paperwork and scheduled recalibration preserve shot quality and prevent cascading workflow issues that stress the machine and your service cadence.
Frequently Asked Questions
How Do I Arrange Equipment for Left-Handed Baristas?
Place equipment to create a left handed workflow by mirroring standard layouts. Move grinders, tamping station, and milk fridge to the left of the machine so baristas reach naturally. Mirror the golden triangle and linear flow; keep everything within three steps.
Position cup dispensers, syrup pumps, and POS left-oriented. Ensure steam wand and knock box remain opposite grinders to avoid grounds in milk. Test and tweak for comfort and efficiency.
Where Should Mobile POS Be Placed for Peak-Hour Flow?
Place mobile POS placement at the pass or service edge, within three steps of the barista and visible to queues to support peak hour flow. You’ll keep it out of the golden triangle and away from grinders to avoid grounds near transactions.
Mount or dock it on a low-profile stand to prevent crowding, route cables safely, and ensure staff can grab it single-handedly to speed payments and reduce congestion during busy service.
What Flooring Material Minimizes Slip Risk and Noise?
Choose slip resistant rubber or vinyl acoustic flooring; they’re anti slip and provide sound dampening material benefits. You’ll want textured, commercial-grade sheets or tiles with a certified slip-resistant rating, good drainage, and a cushioned underlayer to reduce impact noise.
Install seams tightly and add anti-fatigue mats near the espresso machine. Maintain cleanliness to preserve traction, and replace worn sections promptly to keep slip risk and noise minimized.
How Often Should Steam Wands Be Descaled Professionally?
You should descale steam wands professionally every 6–12 months, depending on local water hardness and usage. That’s your recommended descale frequency and professional intervals. If you run hard water or high volume, schedule service at the 6-month mark. With soft water or lighter use, annual professional descaling is fine.
Between visits, you should purge and wipe wands after each use. Additionally, perform weekly mild descaling checks to prevent buildup.
Where to Position Fire Extinguisher for Quick Access?
Place the fire extinguisher within sight and reach near the espresso station exit or pass area for quick access. It should be mounted 3–5 feet off the floor and unobstructed. For left handed workflow adjustments, mount it slightly toward the left-side pathway so left-handed staff can grab it naturally.
Keep signage visible and ensure clearance around it. Train staff on location and use. Check mounting and service tags regularly.
Conclusion
You’ve learned how to read portafilter pressure, follow a 5–18 g dosing checklist, and respect grind-size and adjustment limits. Keep dose and grind balanced. Monitor burr wear and track consistency over time.
Regularly record pressure and extraction variables; replace or recalibrate burrs when performance drifts. Make only small, deliberate adjustments. By staying methodical and proactive, you’ll maintain repeatable shots and a reliable espresso station workflow.