Milk Steaming Temperature Chart
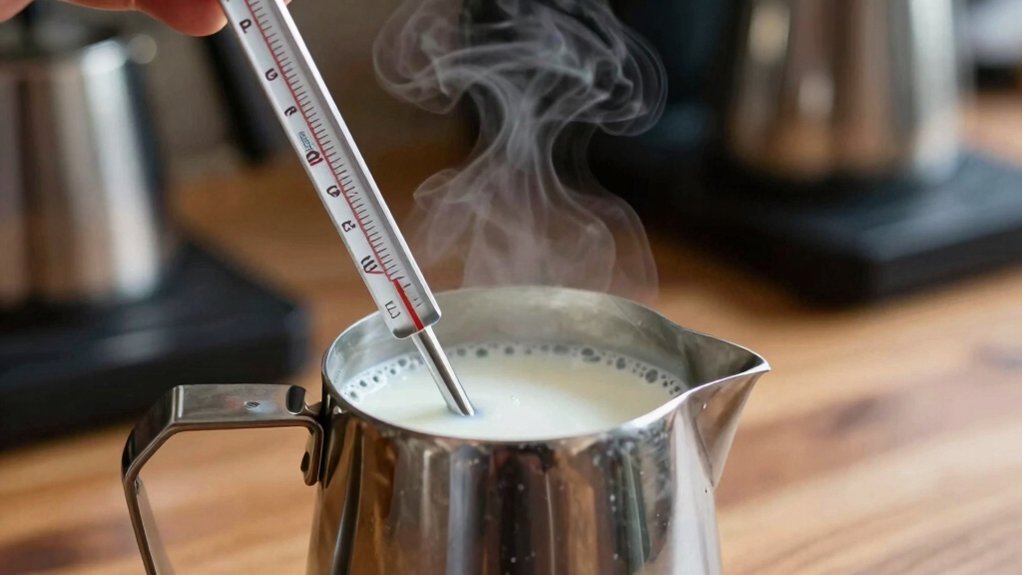
You should steam dairy milk to 60–65°C and most plant milks (oat, almond, soy) to 55–60°C. Stop a few degrees early to allow carryover. Avoid 82°C scalding; this irreversibly breaks proteins and ruins sweetness and texture. Use gentle steam for delicate plant milks and medium for dairy. Monitor with a thermometer or hand feel.
Look for smooth hissing, glossy microfoam, and tiny surface bubbles. Keep a few preventive tips in mind if you want more practical guidance.
Quick Overview
- Dairy milk: Steam to 60–65°C, stopping a few degrees early for carryover.
- Oat and most plant milks: Target 55–60°C to preserve texture and sweetness.
- Avoid scalding (~82°C); stop steaming ~5°C below target and watch for thin skin or tiny bubbles.
- Use low steam pressure for delicate plant milks, medium for dairy, and short high bursts only for rapid heating.
- Monitor with a thermometer or hand feel. Maintain wand circulation. Purge and sanitize after use.
Milk Temperature Ranges Chart
Why does temperature matter so much when you steam milk? You must hit precise targets to develop sweetness, microfoam, and texture stability without scalding. Aim for 60–65°C for whole milk. Stop at 65°C because proteins break down above that.
For non-dairy alternatives, use lower setpoints: oat and other plant milks perform best around 55–60°C to avoid curdling and poor foam stability. Monitor temperature continuously with a thermometer or by hand feel. Stop steaming a few degrees early to allow heat carry-over.
| Milk Category | Target °C |
|---|---|
| Whole Dairy | 60–65 |
| Oat Milk | 55–60 |
| Other Plant Milks | 55–60 |
Steam Wand Pressure Guideline
How hard should you push the steam wand? You’ll control steam pressure to shape texture: aim for steady, consistent steam pressure that lets you inject air without hammering the milk. Too high and you tear bubbles; too low and you won’t stretch.
Low (gentle) preserves foam stability during initial stretching. Use for delicate plant-based milks.
Medium (steady) is ideal for dairy milk; it balances air intake and whirlpool circulation for microfoam.
High (short bursts) is reserved for rapid heating only; it risks unstable, coarse foam.
Watch sound and pitcher feel: a smooth hissing and slight warmth change signal correct pressure. Adjust valves incrementally. Monitor foam stability, and stop steaming a few degrees before target to finish by carryover.
Scalding Point Warning (82°C)
When milk reaches the scalding point around 82°C, you’ll have irreversible protein breakdown that ruins texture and flavor. Watch for a thin, flat mouthfeel, a slightly burnt or cooked taste, and loss of glossy microfoam as clear signs of scalded milk.
Prevent this by monitoring temperature closely. Stop steaming 5°C below your target and keep the wand positioned to maintain stable circulation within the safe range: 60–65°C for dairy; lower for plant milks.
What Scalding Means
Curious what “scalding” actually means for milk? Scalding definition: when milk reaches temperatures high enough to irreversibly alter its proteins and fats, typically well above your ideal steaming range.
You should treat scalding as a structural failure. This is heat-driven dairy damage that removes gloss, thins texture, and produces a cooked or slightly burnt flavor.
To prevent it, monitor temperature continuously and stop steaming before reaching critical thresholds. Use a thermometer or the hand method to sense heat rise; shut off steam a few degrees shy of the max.
If you hit scalding, you can’t reverse the protein breakdown. Discard the batch and start fresh. Precise timing and steady technique keep microfoam intact and flavor clean.
Signs Of Scalded Milk
What should you watch for as milk approaches scalding temperatures? You’ll notice tiny surface bubbles that stop expanding and a thin skin forming along the pitcher rim; these are early physical cues to halt heating.
Pay attention to an abrupt change in steam sound: from steady hiss to harsher, louder bursts, and to a rapid rise on your thermometer toward 82°C. Smell carefully: a developing scalding flavor will be faint before it’s obvious, so act quickly.
Taste tests aren’t recommended for dairy safety once overheating is suspected. If you detect any of these signs, cut steam immediately, cool or discard the batch, and sanitize equipment.
Train by monitoring thermometer trends so you prevent irreversible protein damage and ruined texture.
Effects On Flavor
How will scalding at or near 82°C change your milk’s flavor and usability? You’ll notice an immediate shift: sweetness collapses, savory bitter notes emerge, and the mouthfeel thins. At that scalding point, proteins denature irreversibly; so you can’t recover the original texture or microfoam stability.
Use this two word discussion ideas prompt — “burnt taste” and “flat texture” — when evaluating a batch. For practical flavor dynamics assessment, taste a small sample and test foam integration; both will fail compared with properly steamed milk. Scalded milk won’t hold latte art; it will produce uneven extraction in espresso drinks. Discard scalded batches; reheating or aggressive aeration won’t restore sweetness, creaminess, or structural integrity.
Preventing Scalding Tips
Why risk ruining a batch when simple checks can keep you well below the 82°C scald point? Use a thermometer and the hand method together: watch the thermometer, and when the pitcher becomes uncomfortably warm for a few seconds, cut steam.
Perform a sensory inspection: smell and glance for slight film or scorch signs to catch early overheating. Maintain consistent steam wand depth and whirlpool action to distribute heat evenly; avoid burying the tip.
Calibrate thermometers regularly and log readings as part of routine equipment maintenance so tools stay reliable. Drain and purge the wand after each use to prevent hot buildup.
If you detect off-odors or visible denaturation, discard that milk and start fresh; scalding can’t be reversed.
Safe Temperature Range
When should you stop heating milk to avoid irreversible damage? Stop well before the scalding point: while scalding happens around 82°C, you should target and maintain temperature stability within the optimal steaming window for your milk type. For whole dairy, aim for 60–65°C. For oat and delicate plant milks, aim lower as specified.
Monitor with a thermometer and the hand method; cut steam when the reading is ~5°C below your target to account for carryover. Exceeding 65°C for dairy or species-specific thresholds for alternatives causes protein breakdown, thin texture, and ruined foam quality. Above 82°C, damage is irreversible and the batch must be discarded. Consistent monitoring and precise wand technique prevent overshoot.
Frequently Asked Questions
Can I Reuse Scalded Milk for Baking or Cooking?
Yes, you can reuse scalded milk for some cooking and baking, but not for delicate dishes. Can you reuse scalded milk? Use it in custards, breads, pancakes, sauces, or soups where flavor and protein change won’t be noticed.
Avoid it in recipes needing fresh milk’s sweetness or microfoam-dependent drinks. Taste first; if it’s noticeably burnt, discard. Cool, strain if lumpy, and adjust sugar or fat to balance altered flavor.
How Does Milk Fat Percentage Affect Steaming Time?
Higher milk fat shortens steaming time slightly because fat raises heat capacity and stabilizes foam. You’ll reach target temperature a bit faster with whole milk than skim.
Monitor milk fat: whole (3.5%+) needs marginally less steaming time than low-fat or skim, which heat a touch slower and form weaker microfoam. Use a thermometer and stop 5°F (≈3°C) before target to prevent overshoot and preserve texture and sweetness.
Can Flavored Syrups Change Optimal Steaming Temperatures?
Yes, flavored syrups can alter flavor impact and demand attention to temperature stability. You should steam milk to the usual range; however, add syrups after steaming to preserve sweetness and avoid diluting foam. If you must combine before steaming, reduce target temperature by a few degrees and monitor stability closely. Added sugars lower surface tension and can thin microfoam.
Always use a thermometer and adjust technique for consistent texture.
What’s the Best Pitcher Material and Size for Steaming?
You should choose stainless steel pitchers in 12–20 oz for single drinks and 20–32 oz for doubles or milk-heavy drinks. Pitcher materials like stainless steel transfer heat quickly, resist denting, and let you feel temperature. Double-walled options slow heat but reduce tactile feedback.
Pitcher sizes affect whirlpool creation and foam control; use smaller sizes for precise microfoam and larger for volume. Match size to drink and steaming technique for consistent texture.
How Long Should Steamed Milk Be Used Before Reheating?
You should use steamed milk within 30–60 minutes for best texture and safety. Steamed milk loses microfoam and sweetness as it cools. Within 30 minutes, it stays glossy and integrated. Up to 60 minutes, it’s still usable for reheating but may separate.
If you must hold it longer, chill promptly and refrigerate. Then gently reheat only once to avoid protein breakdown. Never reheat repeatedly; discard after one reheating cycle.
Conclusion
You’ll want to keep milk steaming within the safe temperature window to preserve sweetness and texture: aim for 55–65°C for cappuccinos and 60–70°C for lattes. Never exceed the scalding point at 82°C.
Watch for rapid rising temperature, a thin skin, sour smell or burnt taste; those are scalding signs. Reduce steam pressure, keep the wand tip just below the surface, and move the pitcher to control heat. This way, you consistently get silky microfoam without flavor damage.