How to Use a French Press Coffee Maker for Rich, Smooth Coffee
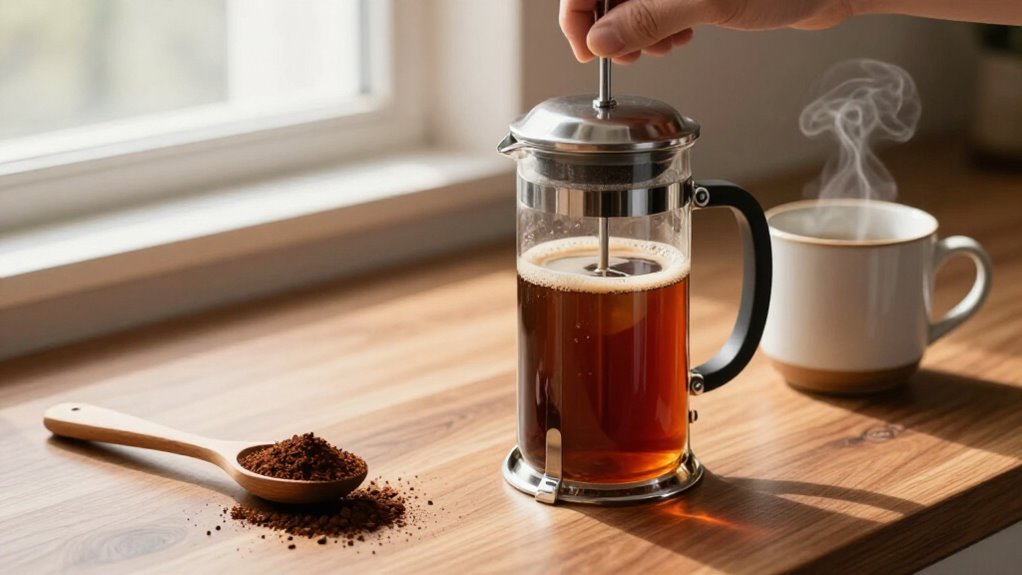
For rich, smooth French press coffee, weigh 30 grams of ground coffee and 500 grams of water. Use a burr grinder set coarse, then preheat the carafe. Add grounds, pour 93–96°C water, and start the timer.
Stir gently after five minutes, replace the lid, and steep five more minutes. Let coffee settle, skim foam, then plunge slowly for 20–30 seconds. Pour gently.
If it tastes muddy, coarsen the grind and clean its mesh. The finer points follow.
Coffee-to-Water Ratio
Start with about 60–70 grams of coffee per 1 liter of water, a range that produces a balanced French press with good body. For a practical baseline, use 30 grams of coffee with 500 grams of water, approximately a 1:16.7 ratio.
You can scale this proportion directly: weigh both ingredients in grams, then preserve the same relationship for any batch size.
Choose a stronger, fuller cup by moving toward 1:16 or 1:14, using more coffee relative to water. For a lighter cup, use less coffee; 10 grams per 180 milliliters produces roughly a 1:18 ratio. If you lack a scale, 30 grams equals about four tablespoons, but volume measurements vary because ground coffee density differs. Weighing your dose gives you repeatable strength and extraction.
Gather Grinder, Scale, Kettle
Before you measure your coffee and water, gather a burr grinder, digital scale, temperature-controlled kettle, and timer. Choose tools that support repeatable brewing:
- A burr grinder creates uniform coarse particles, similar to sea salt, so extraction stays balanced.
- Set your digital scale to grams, confirm its tare function, and choose at least 0.1-gram resolution for small doses.
- Use a temperature-controlled kettle to target 93–96°C (195–205°F); if yours lacks temperature control, keep a thermometer nearby.
- Start a timer you can read easily, whether it’s separate or built into your scale.
Keep fresh whole beans airtight, and grind them immediately before brewing.
Adjust gradually: go coarser for bitterness or silt. Brush burrs regularly, and unplug the grinder before cleaning.
Step 1: Preheat the Glass Carafe
A quick preheat keeps the glass carafe from pulling heat from the brew during blooming. First, rinse the French press, especially its glass carafe, with hot water. Swirl the water to warm the walls, then discard it completely.
This step removes the glass’s chill and helps keep brewing temperatures near the target range of 195–205°F. It also reduces the early temperature drop that can occur as you wet the coffee, supporting more consistent extraction from one batch to the next.
Use enough hot water to warm the entire interior, but don’t leave it standing longer than necessary. If the carafe is already warm from recent use, a brief rinse is sufficient. Still, don’t begin with cold glass when you want rich, smooth results.
Step 2: Add Grounds to Carafe
With the warmed carafe ready, add coarsely ground coffee directly to its bottom, about 60–70 g per liter of water, or roughly 10 g per 180 ml (6 fl oz).
Choose a uniform coarse grind, with particles resembling coarse salt to steel-cut oats. This texture helps limit overextraction, bitterness, and silty sludge while promoting even brewing. Weigh your dose on a digital scale rather than relying on volume, especially when adjusting the recipe.
Keep the grounds loose and level in the carafe; don’t tamp or compress them. Don’t stir before adding water, because agitation belongs after the initial pour, using a wooden or plastic utensil to saturate the bed gently at about 30–45 seconds. Start timing when water enters the carafe; begin the brew immediately.
Step 3: Pour 500G Boiling Water
Pour 500 g of water over the grounds, using water at 195 to 205°F (90 to 96°C) when it reaches the coffee. Bring the water to a boil, then let it stand for about 30 seconds if you prefer a slightly sweeter cup, particularly with an insulated or double-walled press.
Pour steadily and completely, ensuring the grounds become saturated without splashing or disturbing the coffee unnecessarily. Use your measured 500 g immediately so brewing begins consistently when the water contacts the grounds. This amount generally suits a coffee-to-water ratio between 1:16 and 1:14; adjust your coffee dose to control strength. For dark roasts or decaf, choose water 10 to 15°F cooler than boiling to reduce harshness. Keep your pour controlled and note the starting time for consistent total brew timing.
Step 4: Stir After Five Minutes
After the coffee has steeped for about five minutes, gently stir the crust with a wooden or plastic utensil using a few slow motions. Make sure your strokes reach the depth of the brew without scraping the glass or striking the filter. This agitation redistributes water around settled grounds, reducing uneven extraction and helping prevent a silty, sludgy texture that can develop when the coffee rests undisturbed.
Replace the lid, but don’t press the plunger yet. Let the coffee steep for five more minutes. This second rest allows extraction to continue evenly and produces a smoother, fuller cup. If you’re following Hoffmann’s method, this two-stage schedule uses two five-minute waits: stir after the first, then complete the plunge when the screen rests on the liquid.
Step 5: Skim Foam and Grounds
Let the brewed coffee rest for 30–60 seconds so the grounds can settle, then skim away the surface foam and floating particles. Use a clean spoon and work gently across the surface; don’t stir the settled grounds back into suspension. This removes excess foam and fines that can create a dusty texture or uneven mouthfeel.
If heavier mud gathers near the bottom, leave it undisturbed rather than mixing it upward. Keep that layer separate from the coffee you plan to drink. Remove the spent grounds immediately after serving and rinse the plunger and mesh thoroughly.
Lingering particles encourage sludge and stale foam in your next brew. A clean mesh preserves clarity and keeps each extraction more consistent. This simple cleanup also protects the filter.
Step 6: Plunge Screen, Pour Carefully
When the brew reaches your target time, press the plunger slowly and steadily over 20–30 seconds until the mesh screen rests on the coffee’s surface. Keep your pressure controlled and firm, without bouncing or forcing the mechanism. A gradual plunge limits the amount of fine sediment pushed through the screen; a fast plunge can create a gritty, heavy cup.
As soon as you finish, pour the coffee gently into your pre-warmed mug or clean serving carafe. Tilt the press carefully, keeping the screen down so settled grounds remain undisturbed. Don’t leave the coffee in the press, because residual grounds will continue extracting and can produce bitterness. Keep the lid on during brewing and handle the warmed press cautiously to maintain temperature and prevent spills.
Taste for Balanced Flavor
How does the cup taste once you’ve poured it? Look for balance: sweetness, clear coffee character, moderate body, and no harsh bitterness or watery weakness. Keep your coffee-to-water ratio stable at 60–70 grams per liter, roughly 1:16 to 1:14 by mass. Brew for about six to eight minutes, and use the same timing each time so you can judge changes accurately.
Taste the result before adjusting multiple variables. If the coffee tastes weak or watery, grind slightly finer next time. If it tastes dish-raggy, bitter, or overextracted, grind slightly coarser. At 30–45 seconds, stir gently but thoroughly so every ground becomes evenly wet. End extraction when the screen reaches the top of the liquid; that stopping point strongly influences smoothness and flavor balance directly.
Muddy Coffee: Clean Mesh
A balanced cup can still turn muddy if fines pass through the mesh or old grounds remain on the filter. Rinse the screen immediately after plunging, removing every visible particle before residue dries. Use water and inspect the mesh against light; blocked openings restrict flow and encourage sludge.
If buildup persists, wash the screen with a soft brush, avoiding metal tools that can deform it. Also correct the grind: choose coarse to medium-coarse particles, between coarse salt and steel-cut oats. Let the coffee settle for 6–8 minutes, then press slowly and steadily; a rapid plunge drives silt through the filter.
| Symptom | Likely cause | Action |
|---|---|---|
| Cloudy cup | Fines | Coarsen grind |
| Slow press | Clogged mesh | Rinse thoroughly |
You’ll reduce sediment by pouring gently, keeping grounds settled below.
Disassemble Plunger Before Storage
After brewing, remove the plunger assembly before storing the press so trapped grounds don’t dry inside it. Pull off the mesh screen, then remove the cap and rod as your model permits. Separate every accessible piece so you can reach residue hidden around the filter and fittings.
Rinse each component thoroughly with hot water, shaking off remaining fines. Sediment left behind can affect your next brew’s flavor and clog the mesh, restricting smooth plunging. Set the screen flat, and keep the rod and cap apart while everything air-dries completely. Moisture trapped inside metal or plastic parts encourages odors and buildup. Once dry, store the components together, or place them in a separate pouch or section. You’ll reassemble the plunger and press smoothly next time.
Conclusion
With the right ratio, an even grind, and controlled pouring, you’ll make French press coffee that tastes rich, smooth, and balanced. Preheat the carafe, steep consistently, and plunge slowly to keep sediment under control.
Taste each brew and adjust the grind, water temperature, or steeping time methodically. After serving, clean the mesh thoroughly and disassemble the plunger before storage. These repeatable steps will help you produce better coffee every morning with greater consistency and confidence.